Hybrid
ohyay provides a lot of flexibility for setting up custom configurations of audio and video streams, so it lends itself well to supporting hybrid events (mixed in-persons and virtual attendee events). In this doc, we'll cover how to set up a basic kiosk for allowing in-person and virtual attendee conversation:
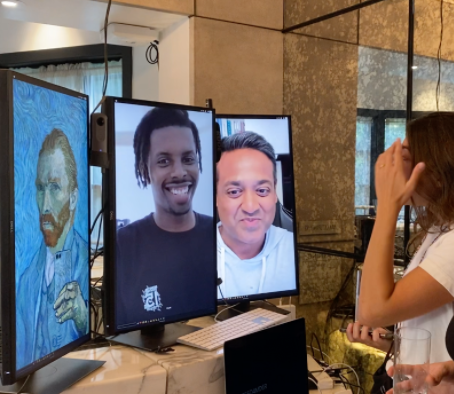
What you'll need:
- A computer/laptop to power the kiosk
- One or more screens to display the remote attendees in the physical space
- Speakers to send audio from virtual attendees to the physical space
- A webcam to send a video of the physical space to virtual attendees
- A microphone to send audio from the physical space to virtual attendees
- A friend to test it out as a virtual attendee
Configuring the ohyay workspace
In this example, we'll use 2 screens in the physical space, so you'll need to create three different rooms - one room for virtual guests and then a room for each screen in the physical space. Let's call these Bar (for virtual guests), Bar Screen A (for the first screen) and Bar Screen B (for the second screen):
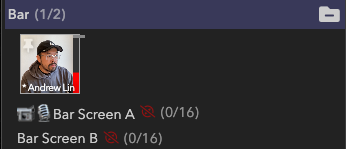
To help keep organized, we've added camera📹 and microphone🎙 emoji to the Bar Screen A room Title to help us remember that this "hot" room that uses the attached camera and microphone to send audio/video to the virtual guests.
Setting up the rooms
Bar Screen A will be shown on one of the screens in the physical space and should show a virtual guest if one is present. Typically, you'll set the aspect ratio of this room to match that of your screen (eg. 720x1280 if the screens are in portrait mode). It will also be used to play all audio from the virtual guests. To do this, we need 3 elements:
- A User Slot Live Feed to contain the live feed from the camera (to be mirrored into Bar), set offscreen in the margin of the room
- A User Slot Bar Guest to show a virtual guest, sized to the entire size of the room.
- A User Audio Mixer to pull all audio of the virtual guests from Bar
Bar Screen B will be similar, but a little simpler, because it only needs to display a virtual guest on the screen so it only needs one element:
- A User Slot Bar Guest to show a virtual guest
Finally, Bar will be the room that virtual guests see. It needs:
- A User Slot Live Feed to display the live feed from the physical space
- An Image element of the screens in the physical space to frame the virtual gusts
- A User Slot Bar A to contain the virtual guest to be shown in Bar Screen A (deformed to fit the screen in the Image element)
- A User Slot Bar B to contain the virtual guest to be shown in Bar Screen B (deformed to fit the screen in the Image element)
- A User Audio Mixer to pull in the sound from Bar Screen A (which runs the mic in the physical space)
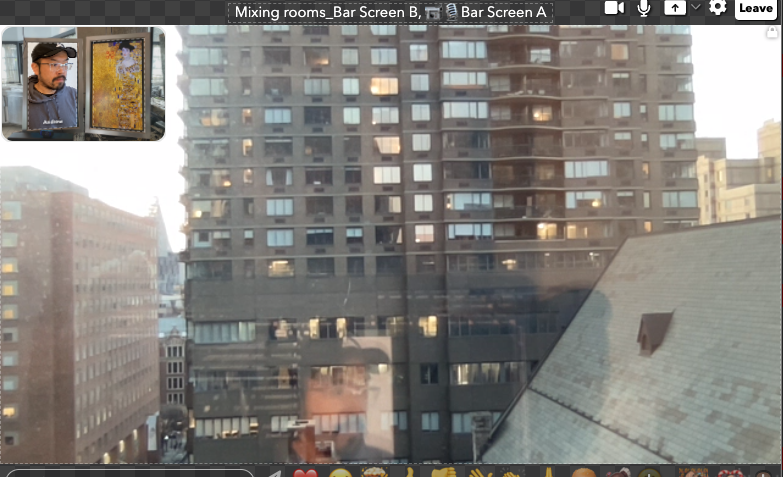
For context, in the screenshot above, the Live Feed is showing a city building. The image being used in the preview in the top-left is below.
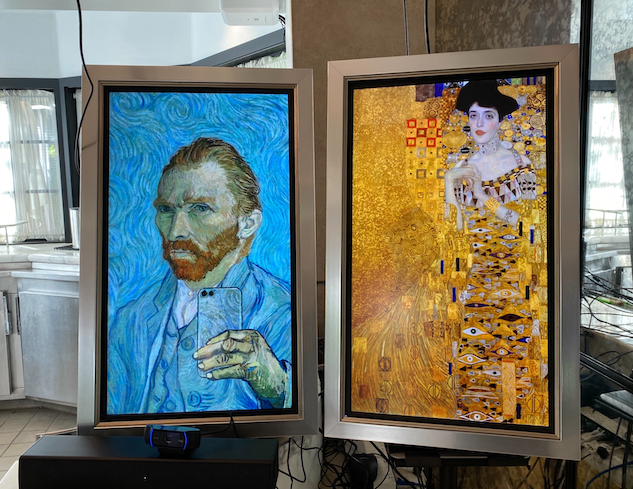
The user slots are deformed to fit the bounds on the screens:
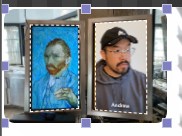
Now that we have all the elements in place, we can start wiring everything together.
In Bar A, first configure the Live Feed to mirror the video from the corresponding Live Feed element in Bar Screen A:

Next, configure the User Mixer to mix Bar Screen A:

In Bar Screen A, first configure the Live Feed element to set Video Quality Override to 1280x720 (or higher if you want):

Then set the Mirror User Element of the Bar Guest element to Bar A in the Bar room:

Finally, set the User Audio Mixer to mix in the Bar room:

Go into Bar Screen B, and you just need to set the Video Quality Override to your desired resolution and the Mirror Participant Element of the Bar Guest to Bar B in the Bar room:

Using the workspace
Now your ohyay workspace is fully configured to run this hybrid kiosk! All we need to do it bring in all the right ohyay browser windows to make it work.
Make sure your mic, camera, and speakers are all attached (or built-in) to your computer and properly selected in ohyay.
To properly display your virtual guests, you'll need to run a separate browser instance with a separate ohyay account for each screen that you want to power in the physical space. In Chrome, you can create multiple profiles by following a guide similar to: https://pureinfotech.com/add-new-user-profiles-google-chrome/.
Once you have a window for each profile, you can create an ohyay account per profile as well (you can use email login accounts [email protected], [email protected] to have them all associated with the same email address).
In the first browser window, go into the workspace and enter room Bar Screen A. Make sure this user gets assigned into the offscreen Live Feed element (so it will be mirrored properly into Bar). You'll want to go into your settings, launch Profile & Other Settings, and increase the capture resolution of this camera. Look for:

In the second browser window, go into the workspace and enter room Bar Screen B. You'll want to mute your mic, mute your browser tab, and turn off your camera since they won't be used.
Now drag the browser windows to their corresponding screens and full screen them. To occupy the full screen, you may need to turn off the Always Show Bookmarks and Always Show Toolbar in Fullscreen options in the View menu of chrome:

For a cleaner look on screen, you may want to put kiosk_mode=1 into the query string of your address bars to hide the ohyay icons and reaction bars from the screen:

Your kiosk should now be ready to use! Get someone remote to go into the Bar room of the space and start chatting! To make this experience more interesting for your remote attendees, you'll usually set up several of these kiosks within your physical space. This will allow the remote attendees to "move" around the room and see different perspectives/people/etc.
Using a 360 degree camera
If you have access to a 360 degree camera, you can give remote attendees a really great perspective on your physical event using ohyay. We've found that hanging a 360 degree camera (eg. Ricoh Theta Z1) from the ceiling at a physical event provides a unique vantage point and high engagement for remote participants.
To get this set up, you'll want to connect the 360 camera to a dedicated computer/laptop in the physical space and select it as the camera device. You'll also want to make sure the Capture Resolution in that user's Settings is configured for 3840x1920. Then assign this user to User Slot in a room where the Join Mode is Manual (so nobody else can take this slot). Now, turn on the Enable Participant 360 View under the Advanced category:

And also set the Video Quality Override to 3840x1920:

Now other users will be able to use their mouse/trackpad to drag and pan the viewport around the room.
Updated almost 4 years ago
