Beginner Guide: Creating and Customizing a Workspace
Welcome to ohyay! In this beginner guide, we’ll introduce you to the basic concepts of ohyay and familiarize you with our platform for creating virtual workspaces.
You’ll learn how to:
- Import a workspace
- Navigate your workspace as a viewer
- Navigate ohyay's interface in Edit Mode
- Create a room
- Add a background
- Add a user slot
- Add a multi-user slot
- Add music
- Customize reactions
- Add elements such as an image, chat, and a question board
- Test with bots
- Style your elements
- Add others as admins
- Host others in your workspace
- Secure your workspace
- Share your workspace
Let’s jump right in!
ohyay in a nutshell
The goal of ohyay is to make creating online virtual experiences as easy as editing a document or presentation slides. Getting started with ohyay boils down to understanding three simple ideas:
A workspace is a virtual meeting space.
- A workspace provides the venue for users to interact, whether that be a group of friends hosting a private video chat, co-workers residing in a virtual office, or hundreds of guests participating in a large virtual conference.
- Unlike a video conferencing call that starts and ends when the host comes and leaves, an ohyay workspace is a 24-7 space that allows users to visit at any time.
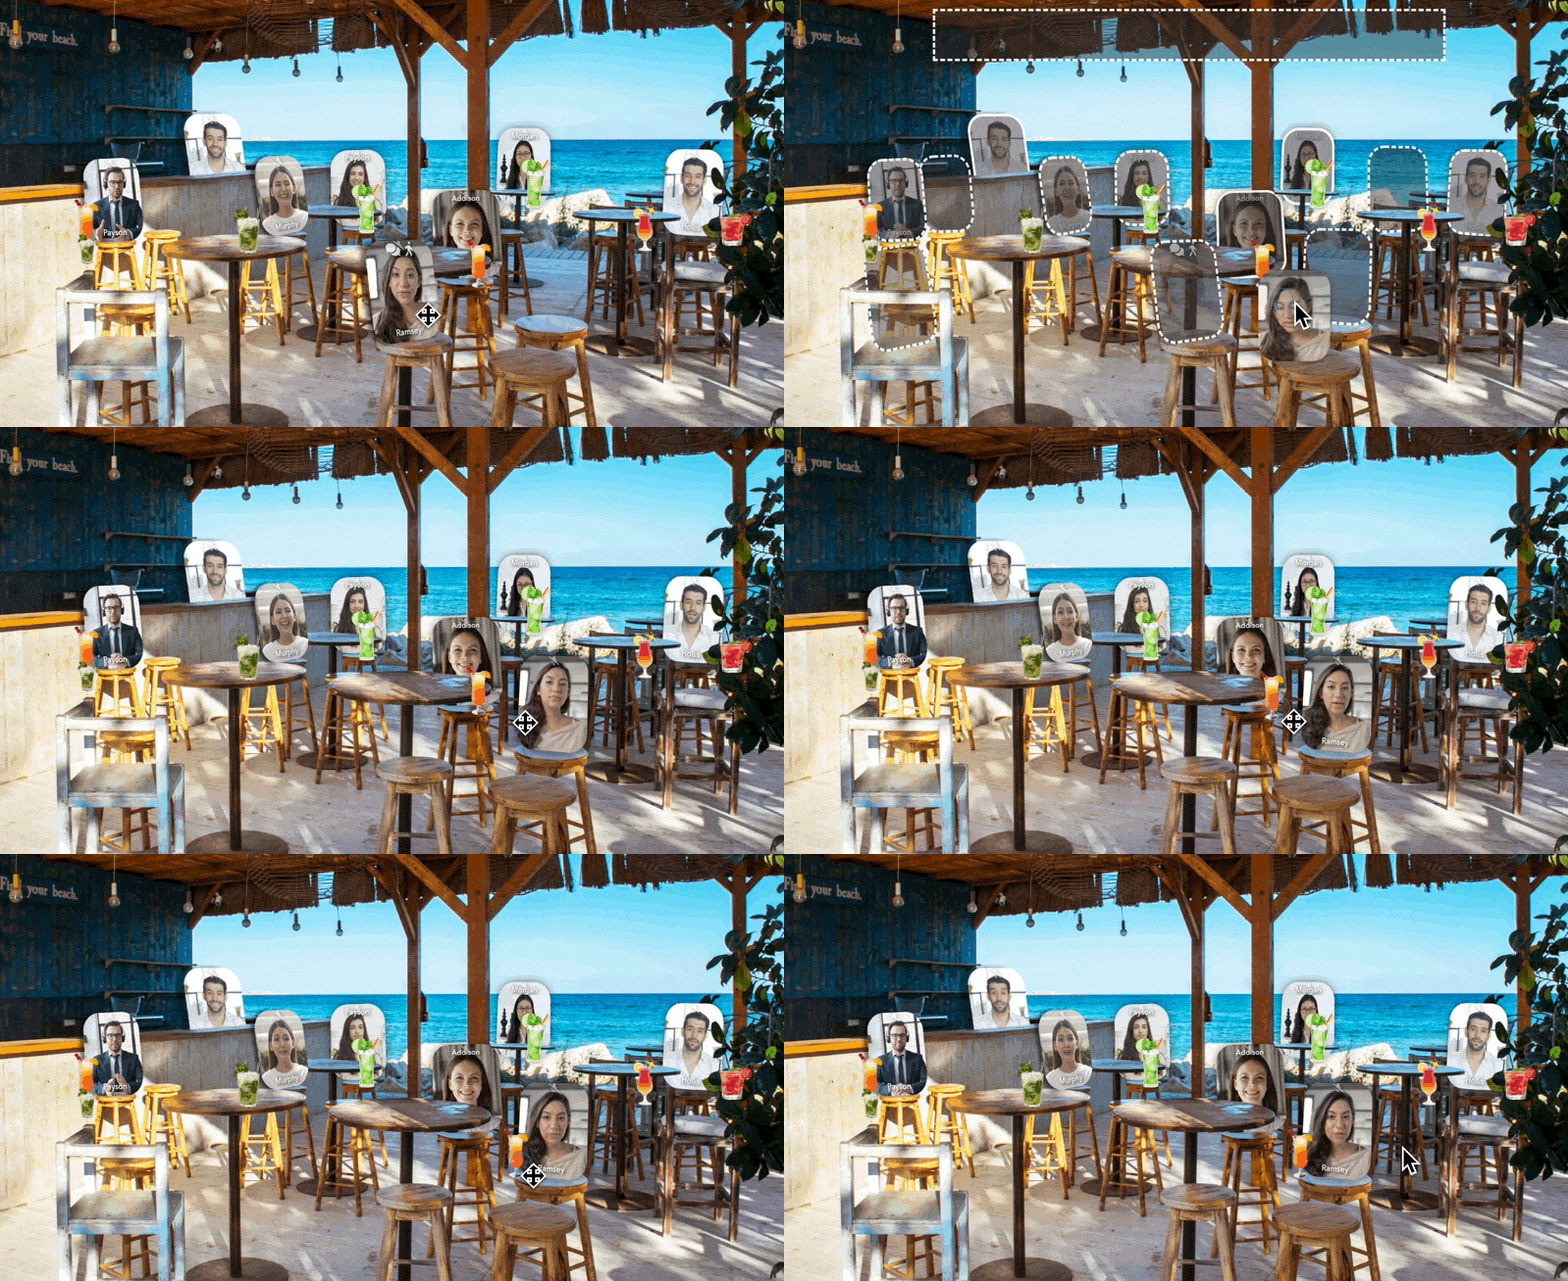
Workspaces are organized into rooms.
- A workspace is divided into rooms, and each room hosts activities for groups of users.
- Users can move themselves from room to room to join different video chat discussions and participate in activities with others.
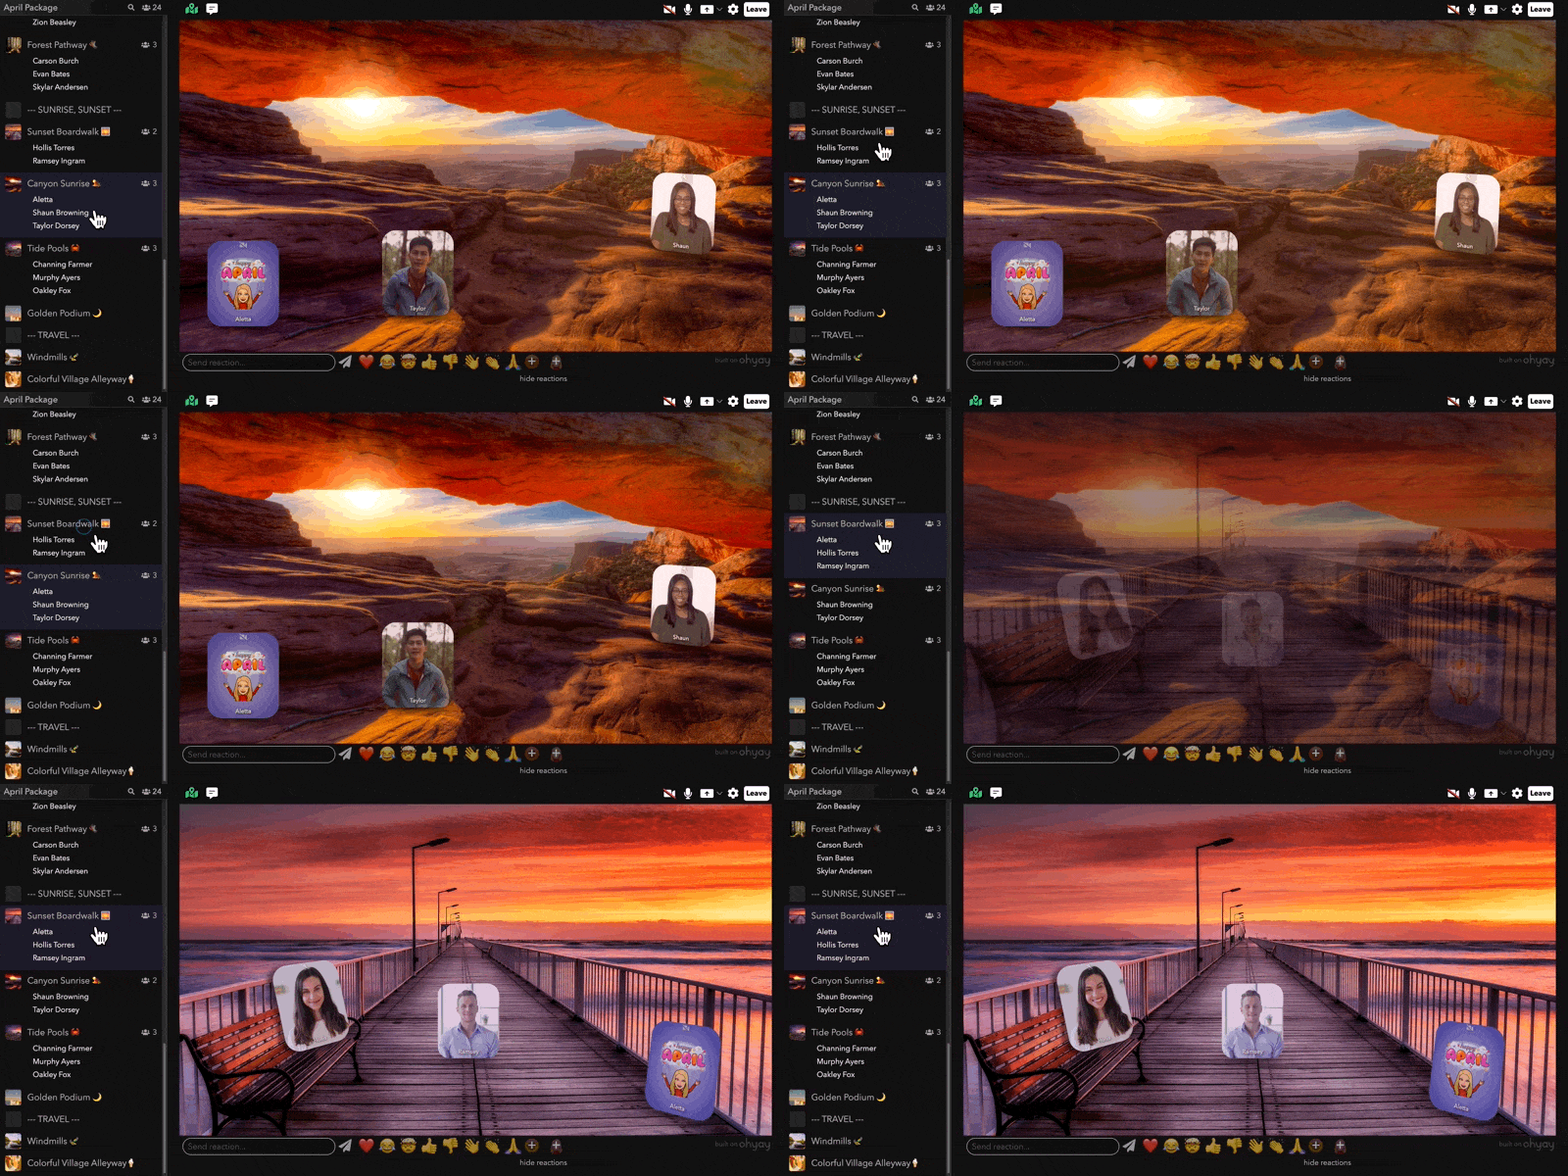
Rooms are fully customizable.
- ohyay allows you to customize how a room looks, where users appear, and what users can do.
- By filling your room with users, images, music, and other interactive elements, you can create rooms that enable many kinds of video chat activities.
Importing a workspace
Today, we’re going to start out by navigating to our website and importing a workspace called “ohyay starter pack."
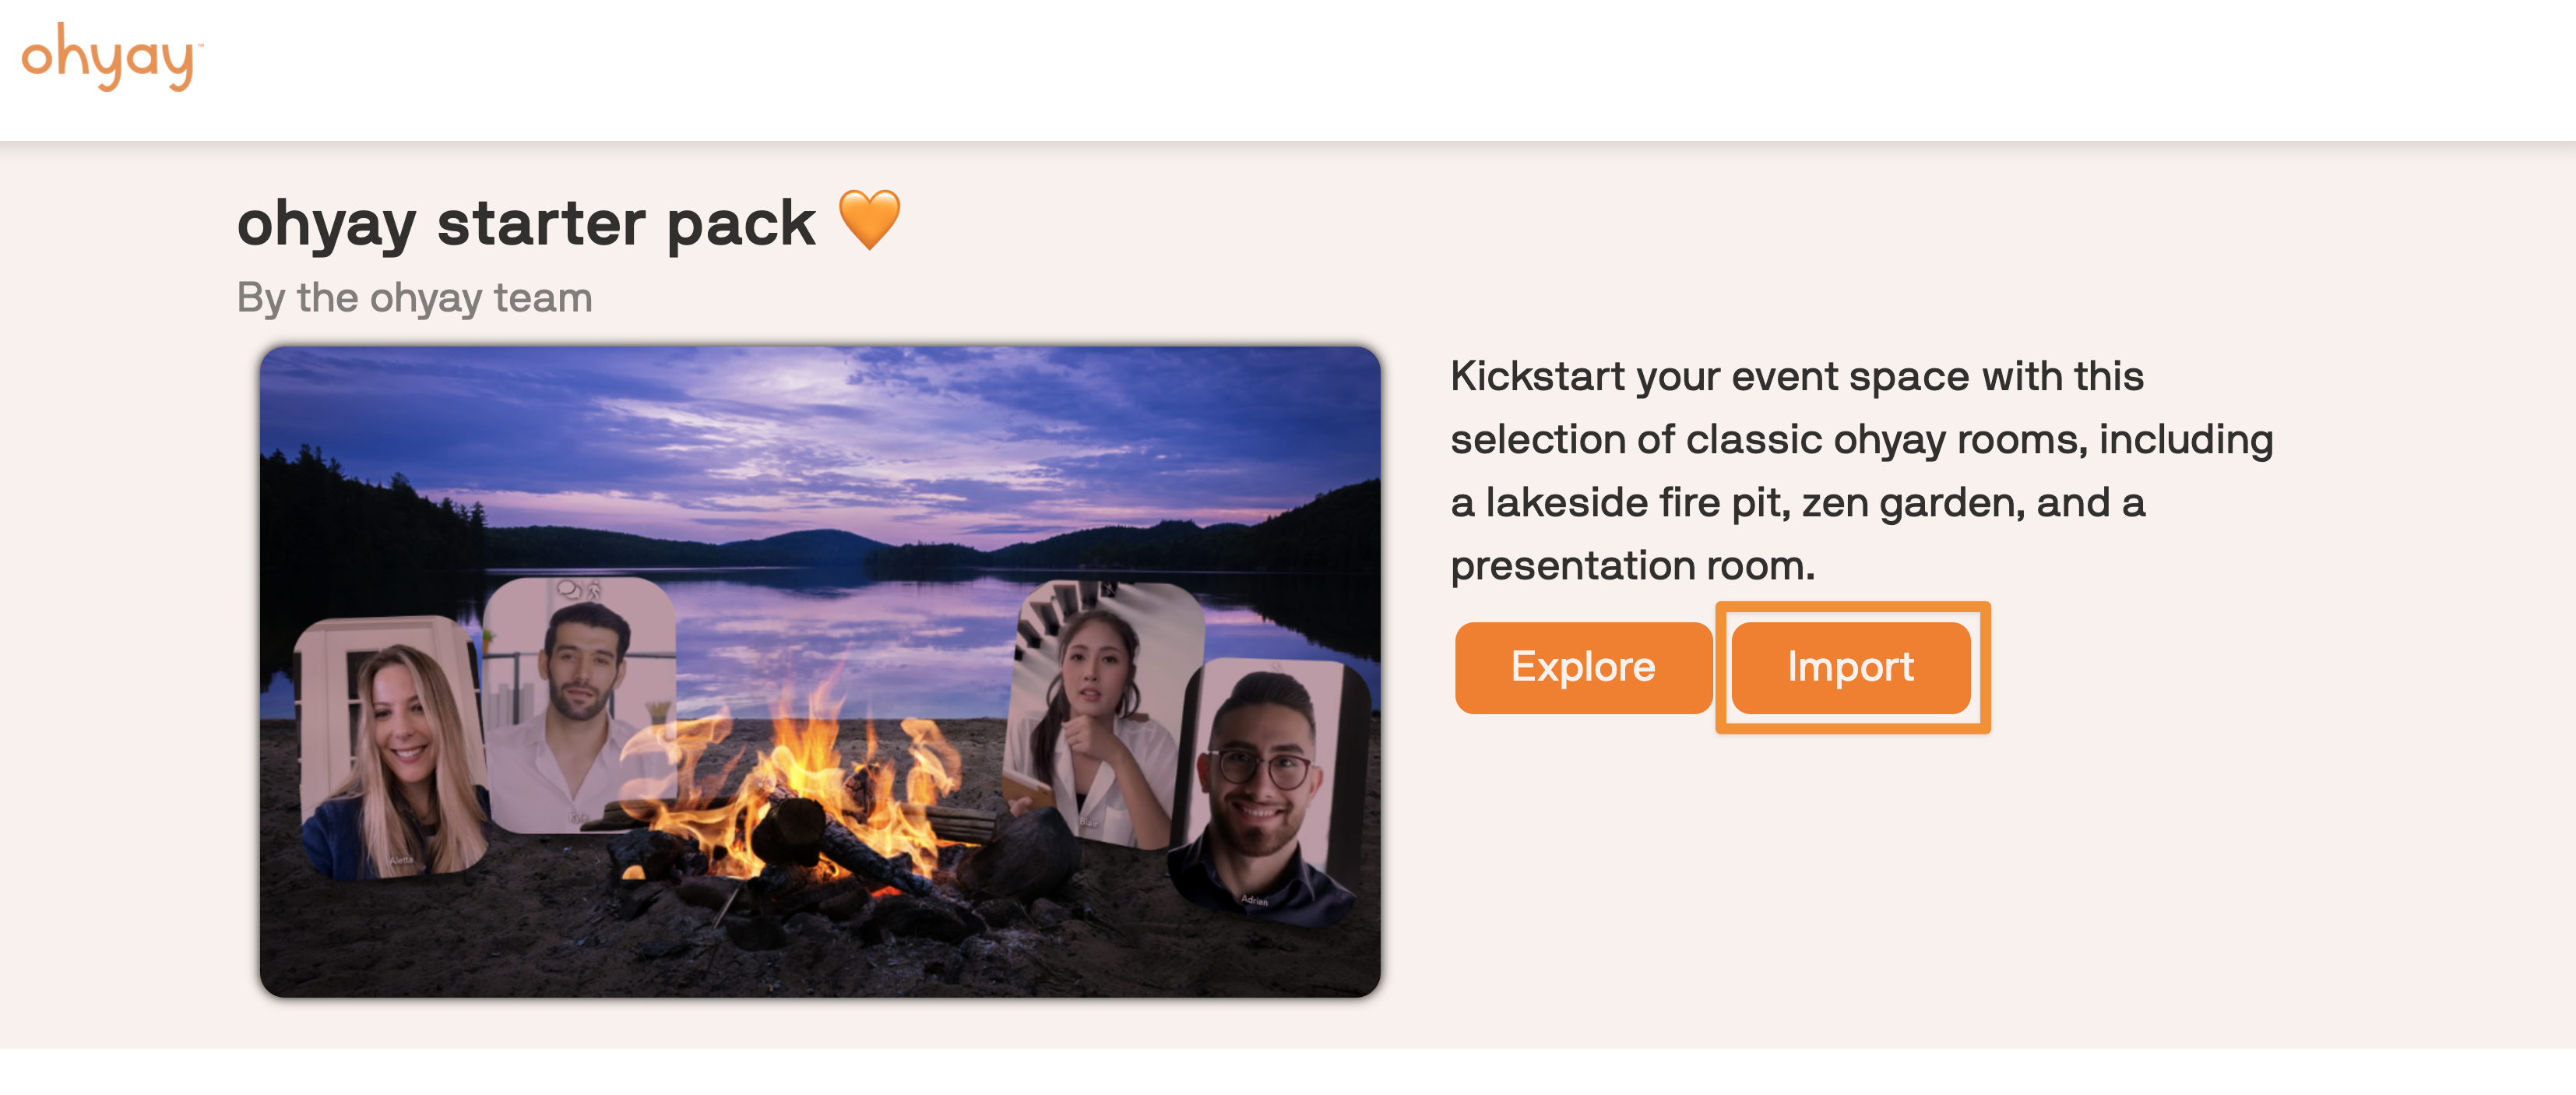
To import the “ohyay starter pack” workspace, click on the ohyay starter pack thumbnail under the “workspace gallery” header or navigate to this link.
Next, click on Import to copy the workspace for yourself and make it your own.
Blank Workspaces
You can create your own workspace from scratch by clicking on the
button next to My Workspaces. By default, your workspace will be empty and be called “Untitled.”
Navigating your workspace as a viewer
Once you’ve imported the workspace, you should see your video feed appear in the Lakeside Fire Pit room (the first room in the workspace).
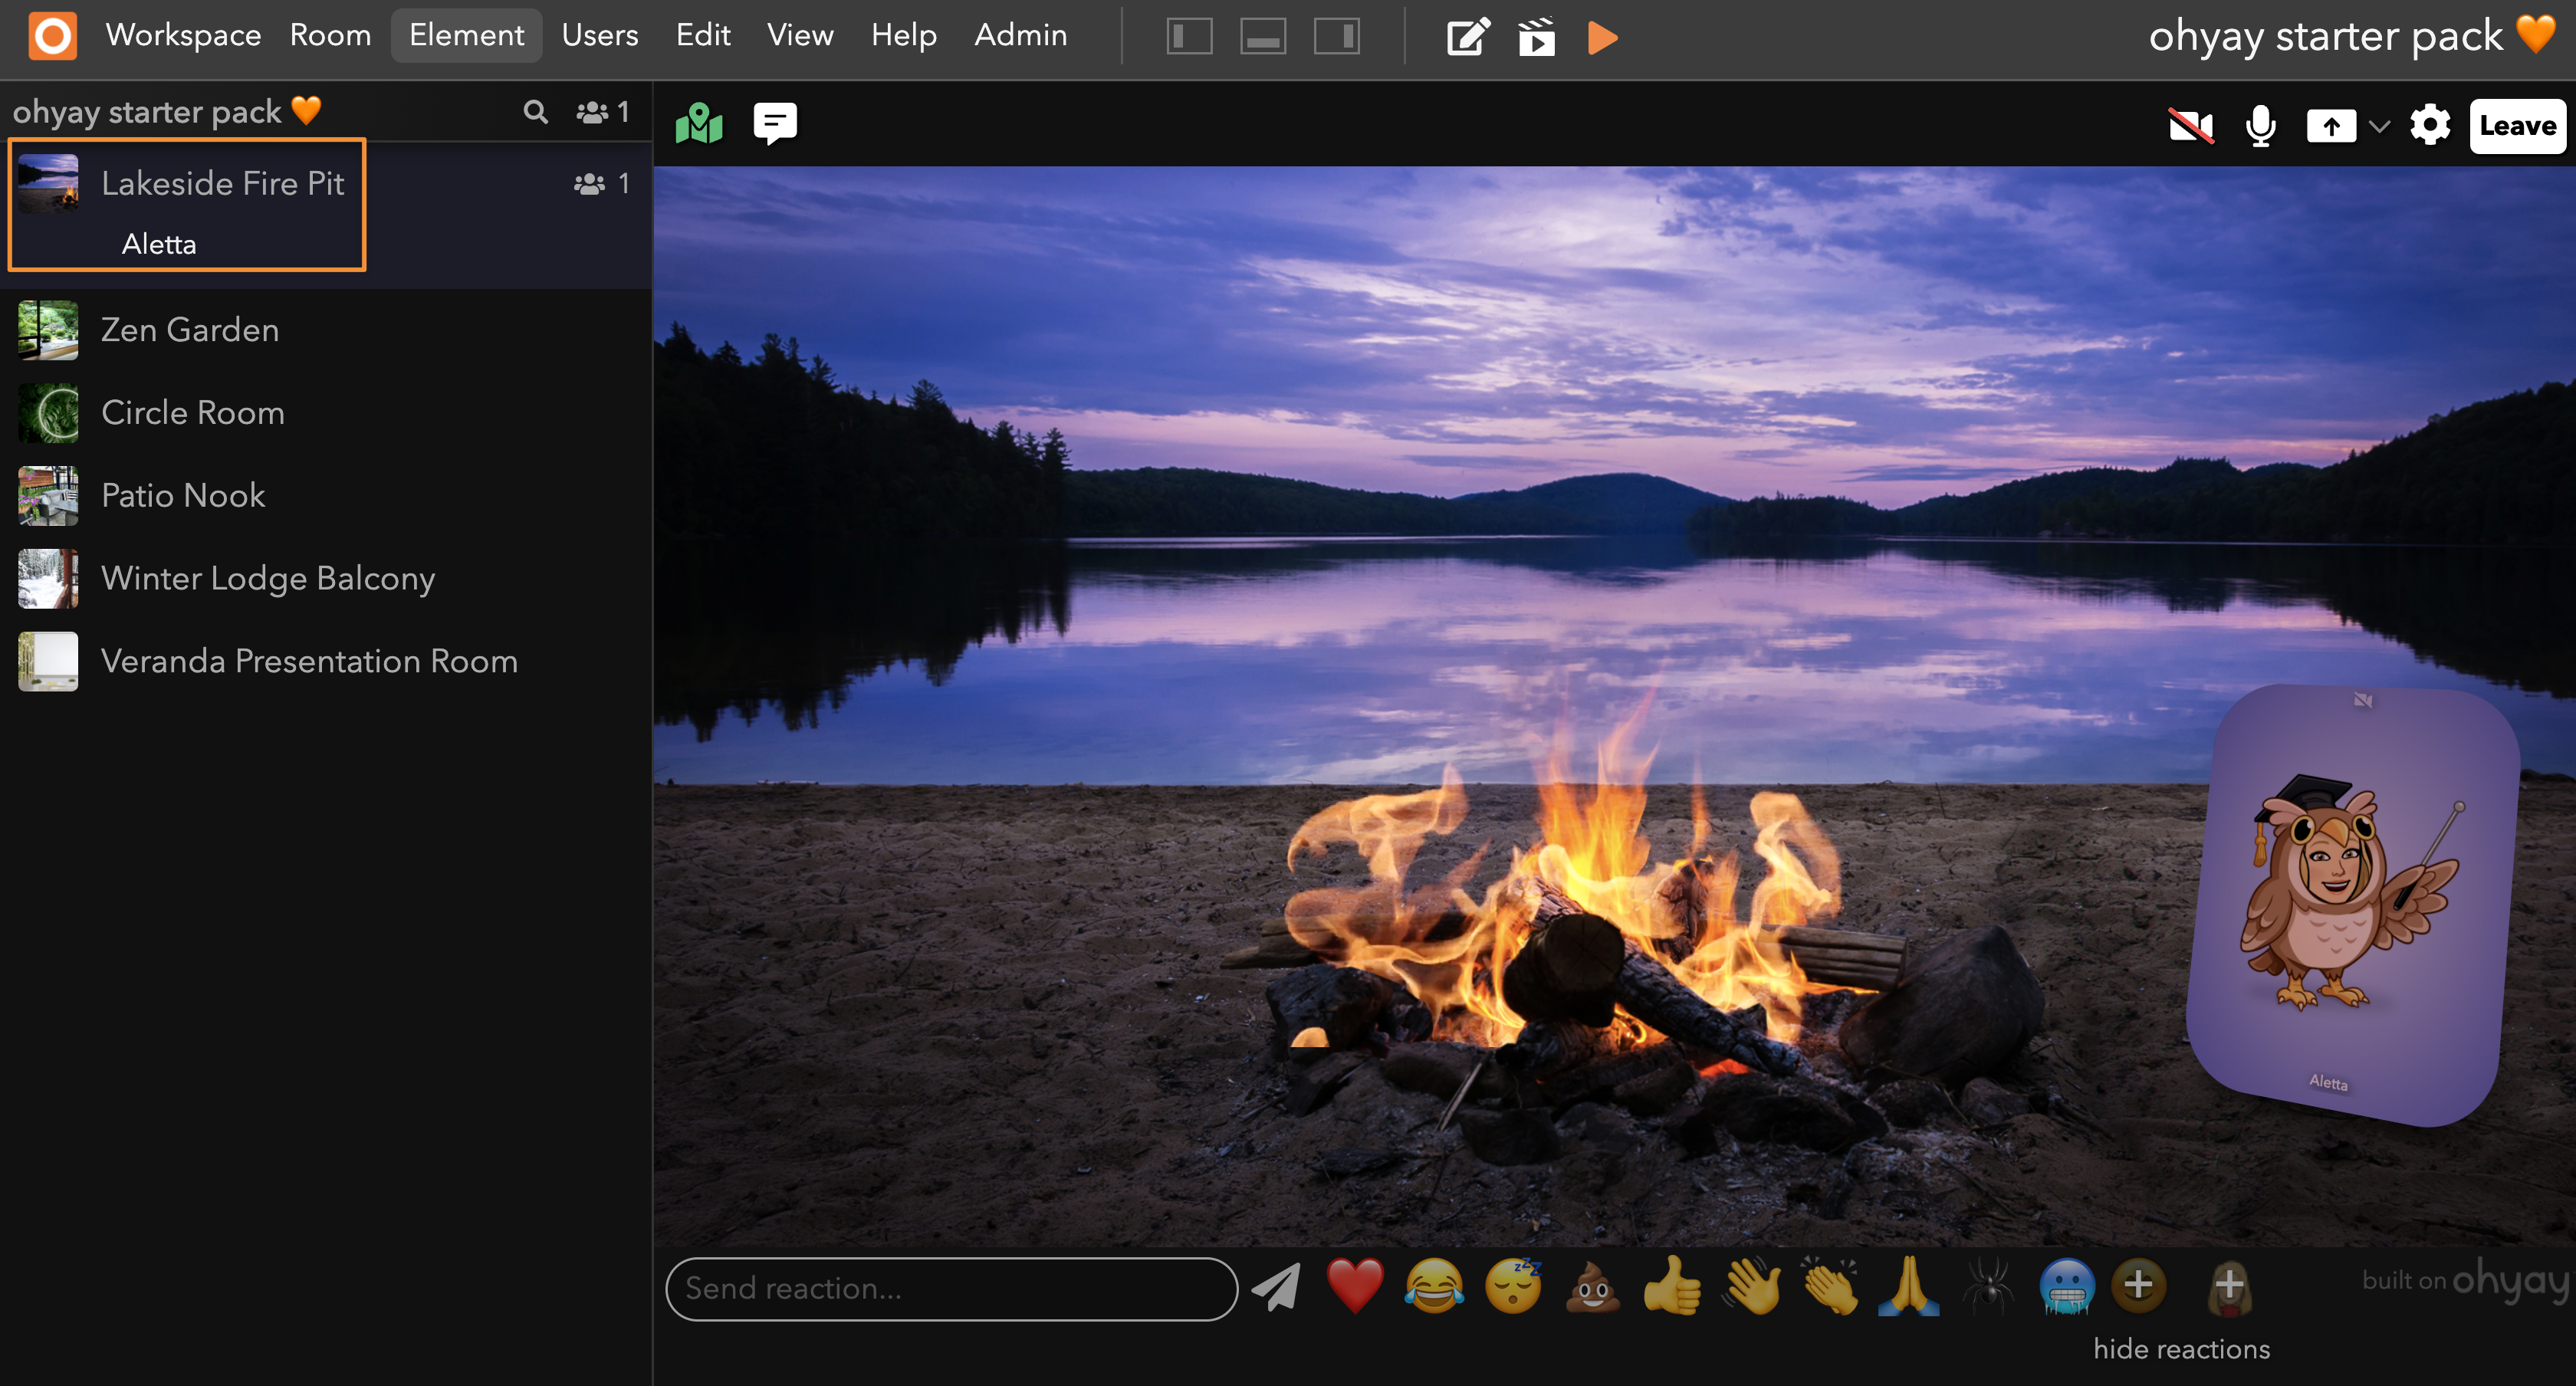
You are in Viewer Mode, meaning that you’re seeing what your guests would see during your event. One giveaway that you're in Viewer Mode is the highlighted icon in your toolbar:

Now, try the following:
- Move yourself into another slot by clicking on your video feed, dragging it over another slot, and releasing

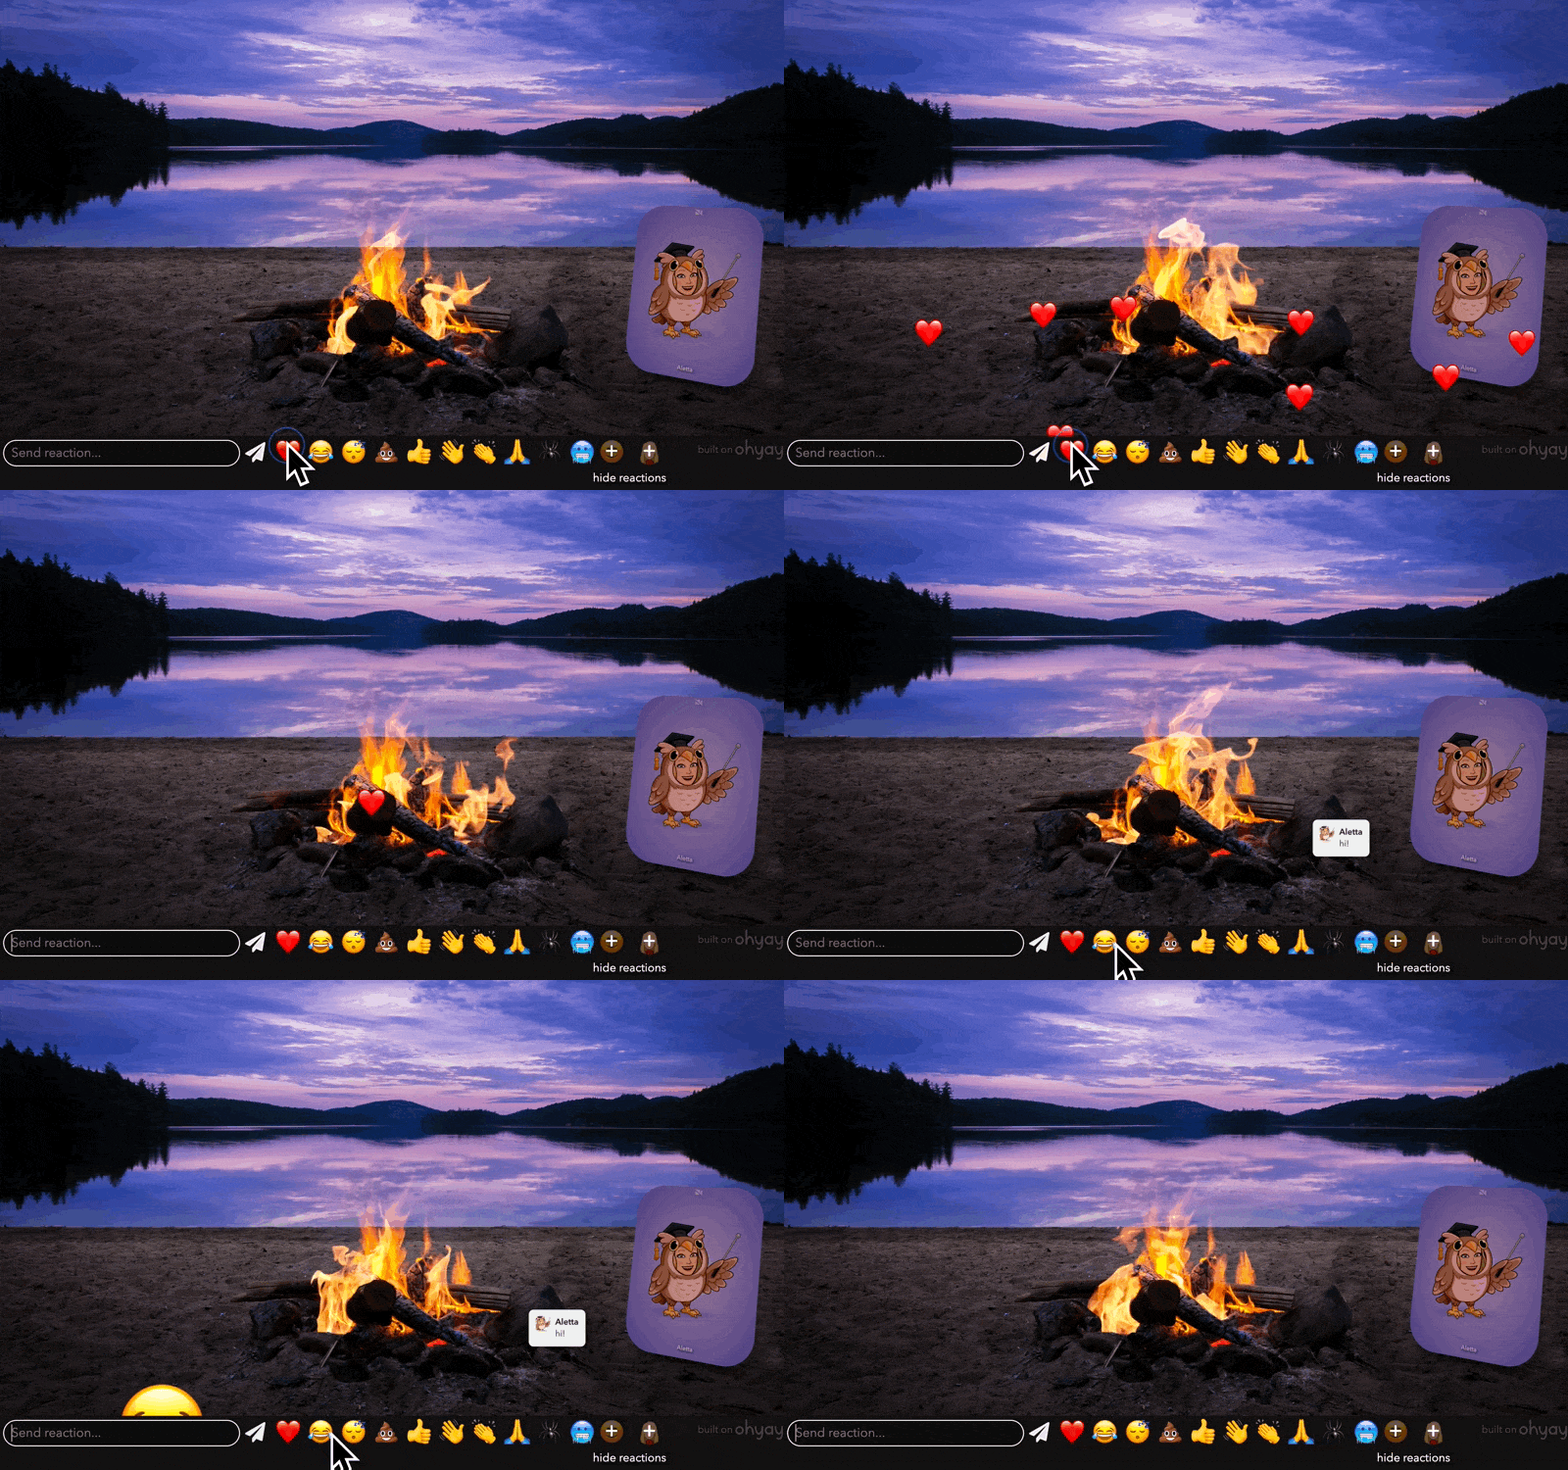
- Click on the emojis at the bottom of the screen and type messages into the “Send reaction” box. Click and hold on an emoji to make it bigger.
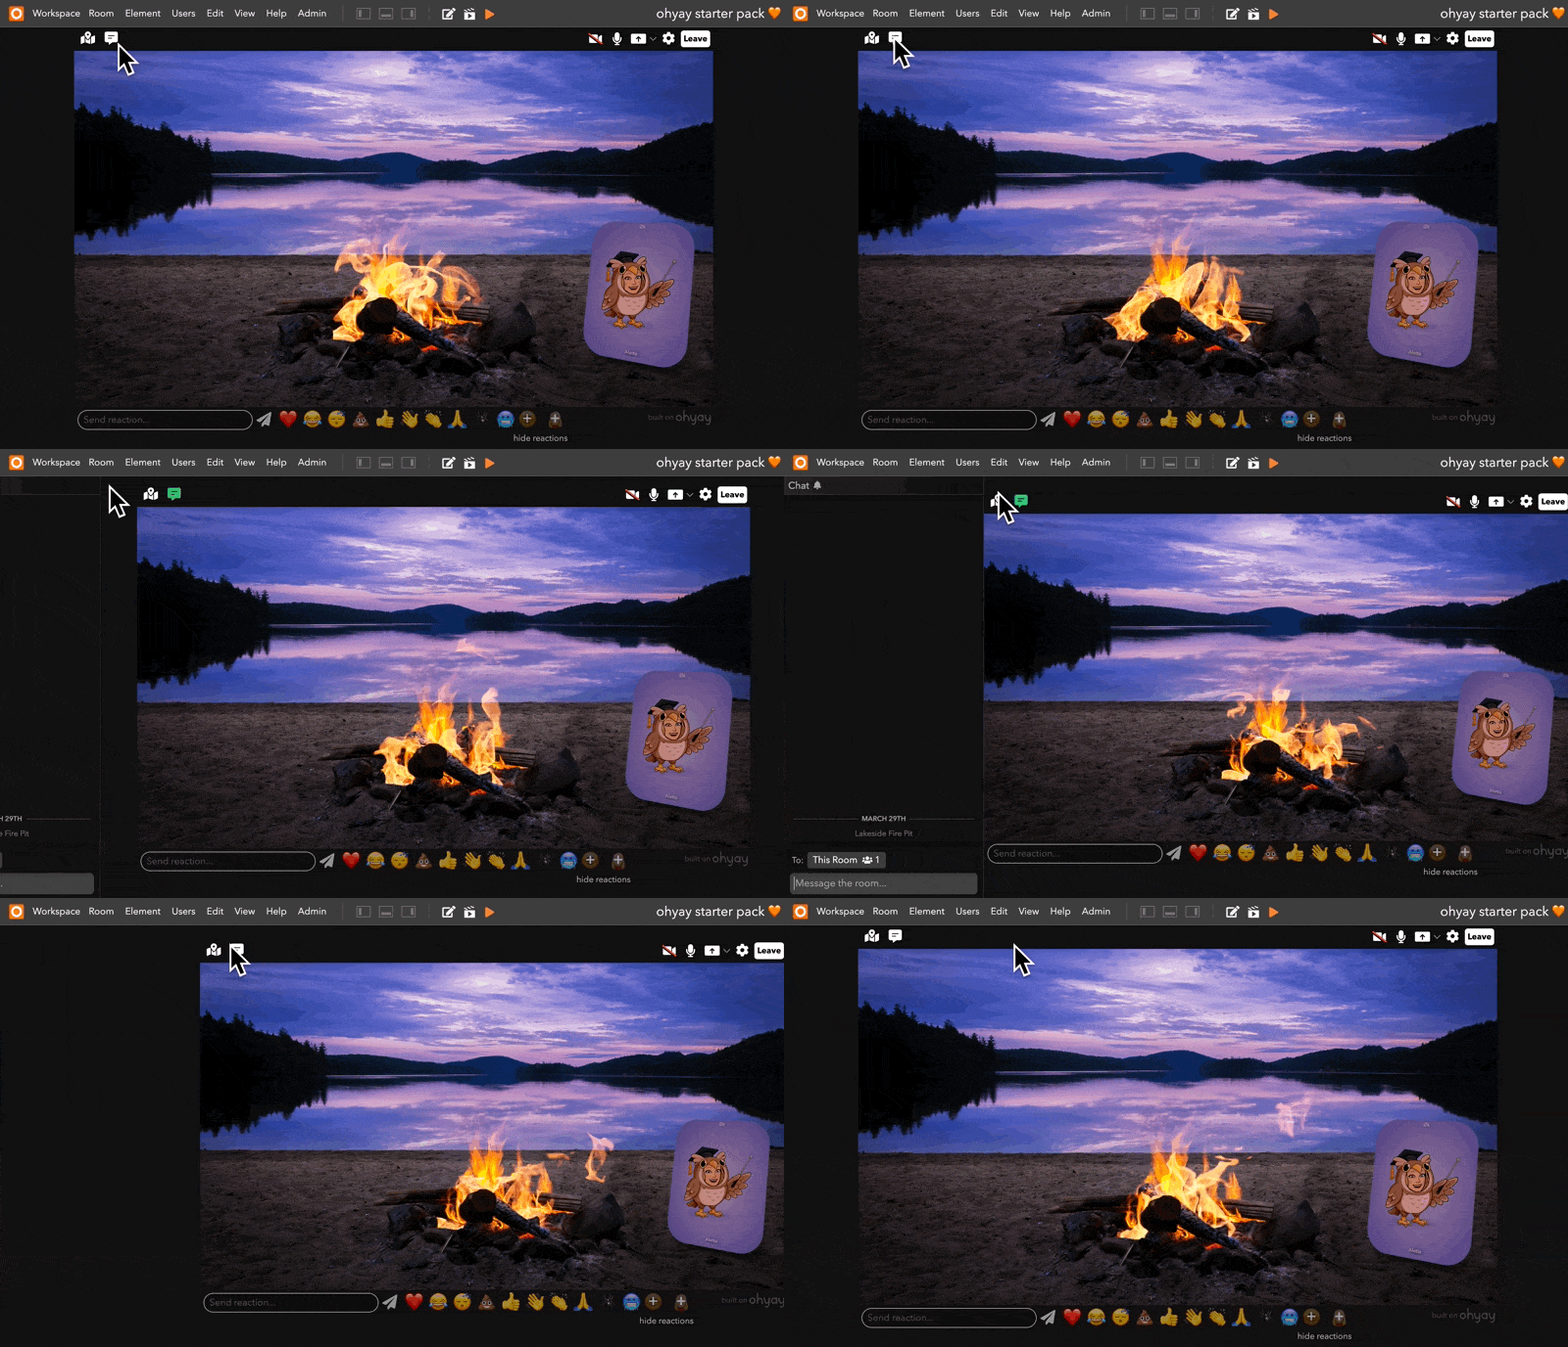
- Toggle the chat bar by clicking on the chat icon on the top left of your screen
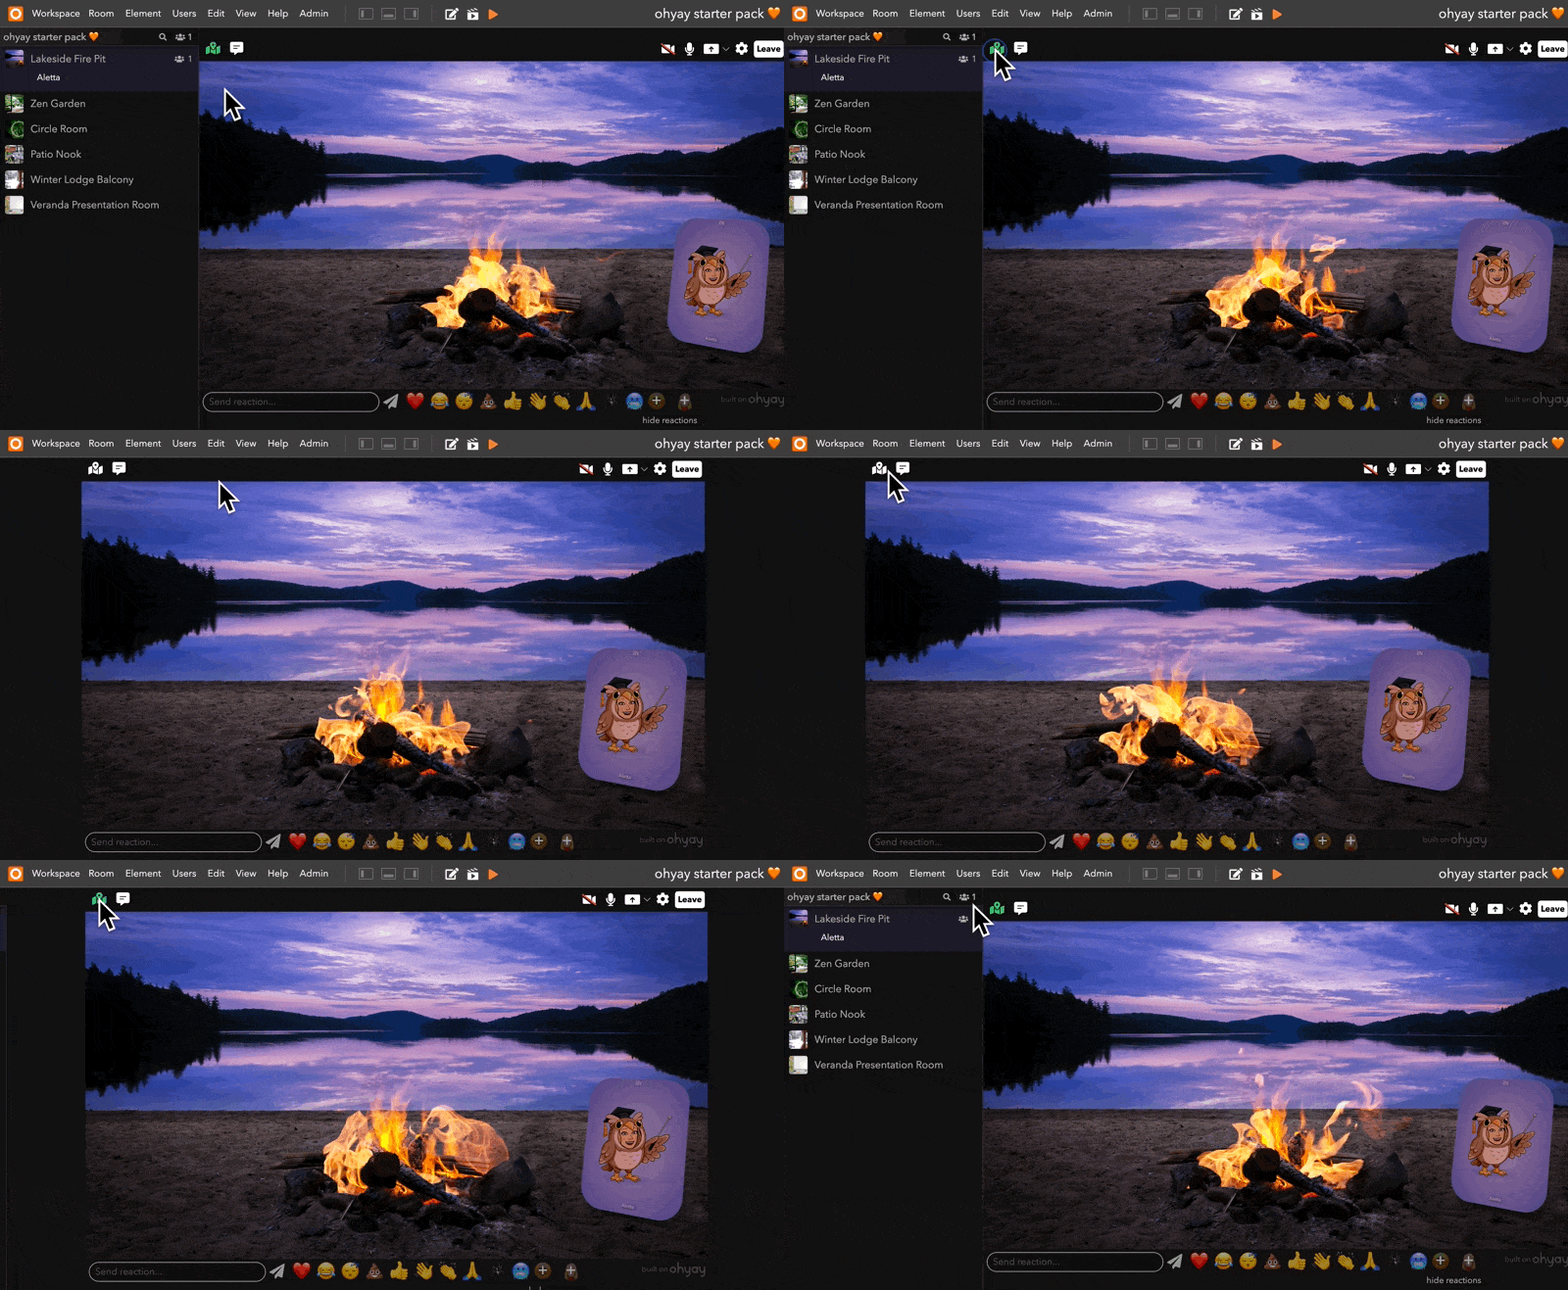
- Toggle the Rooms List by clicking on the map icon on the top left of your screen
- Move into the Zen Garden room by clicking on it in the Rooms List. You’ll see your thumbnail appear under the room name.
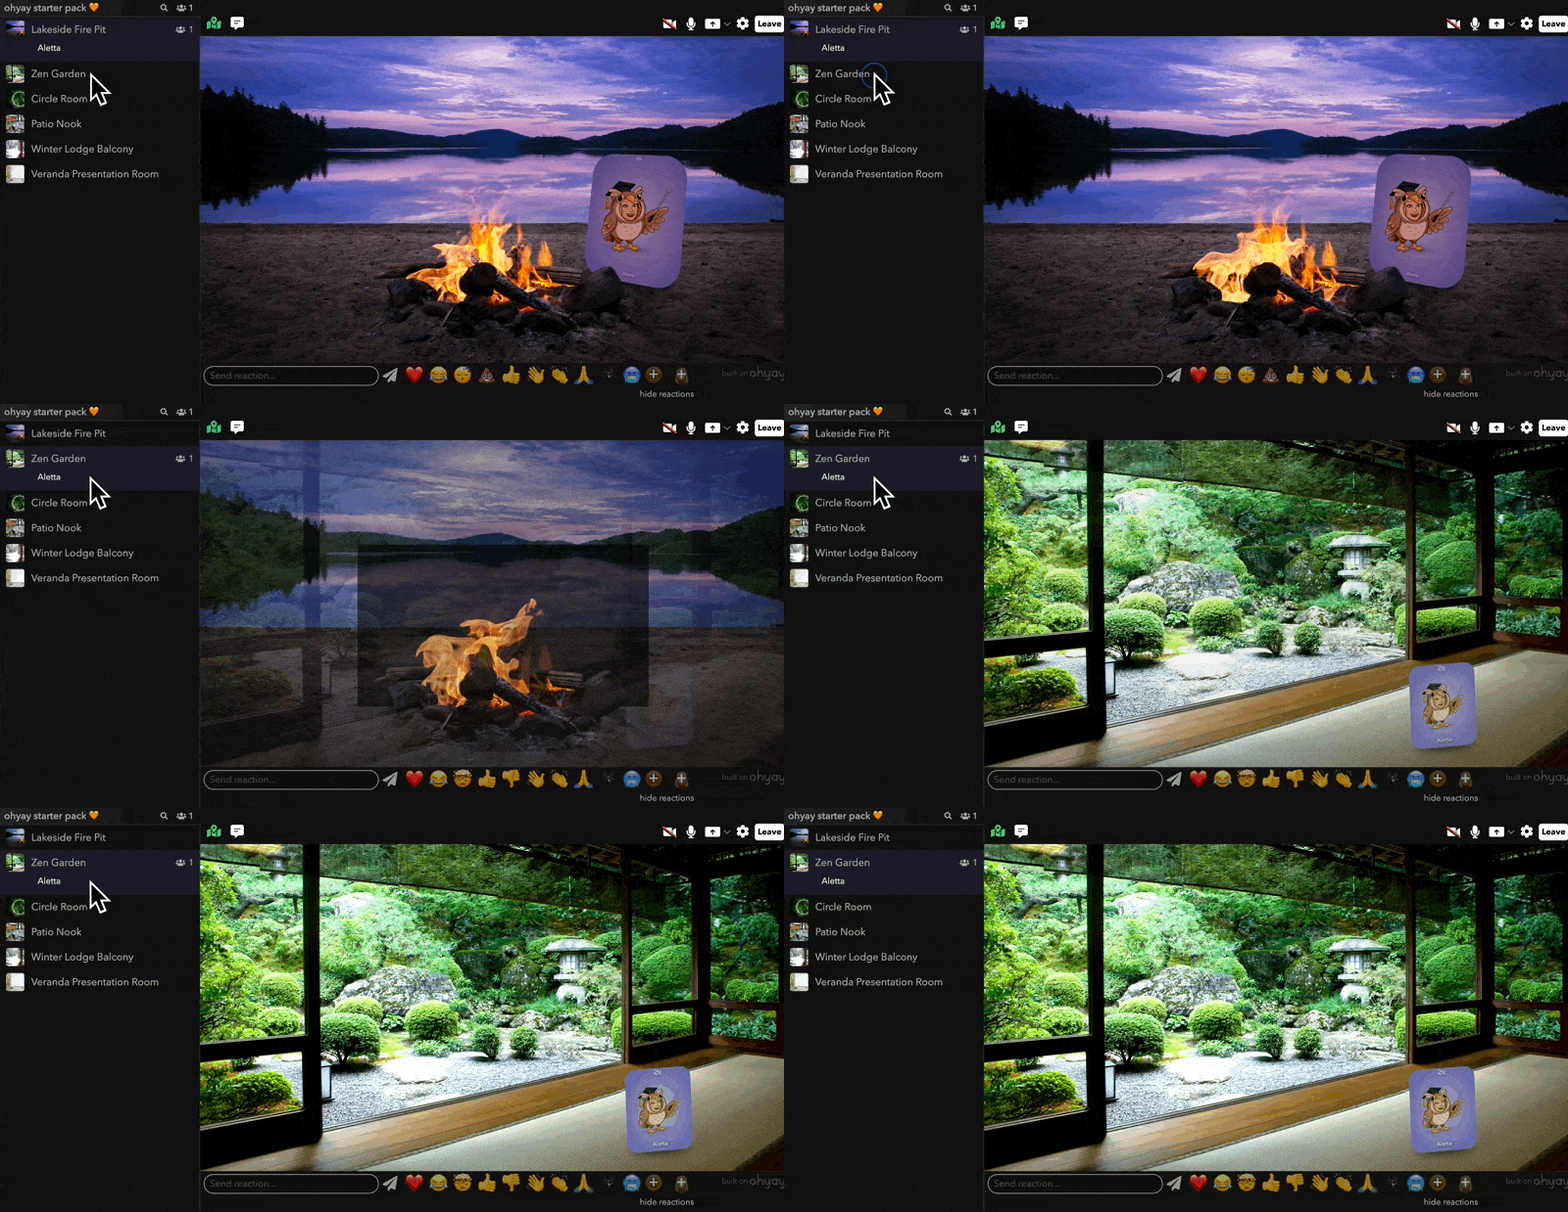
List of rooms ≈ list of slides
If you’re familiar with presentation software, it might be helpful to think about the list of rooms in a workspace like a list of slides in a presentation. However, unlike a slide presentation, rooms can contain users. The left bar displays which users are online in this workspace, as well as what room they are in.
Now that you’re familiar with interacting in ohyay as a guest, it’s time to flip into Edit Mode — the backend that is only visible to you and other admins, or editors, of the workspace.
Navigating ohyay’s interface in Edit Mode
Click on the at the top of your screen to flip into Edit Mode.
![]()
In your browser you should see ohyay’s editor, which looks like this:
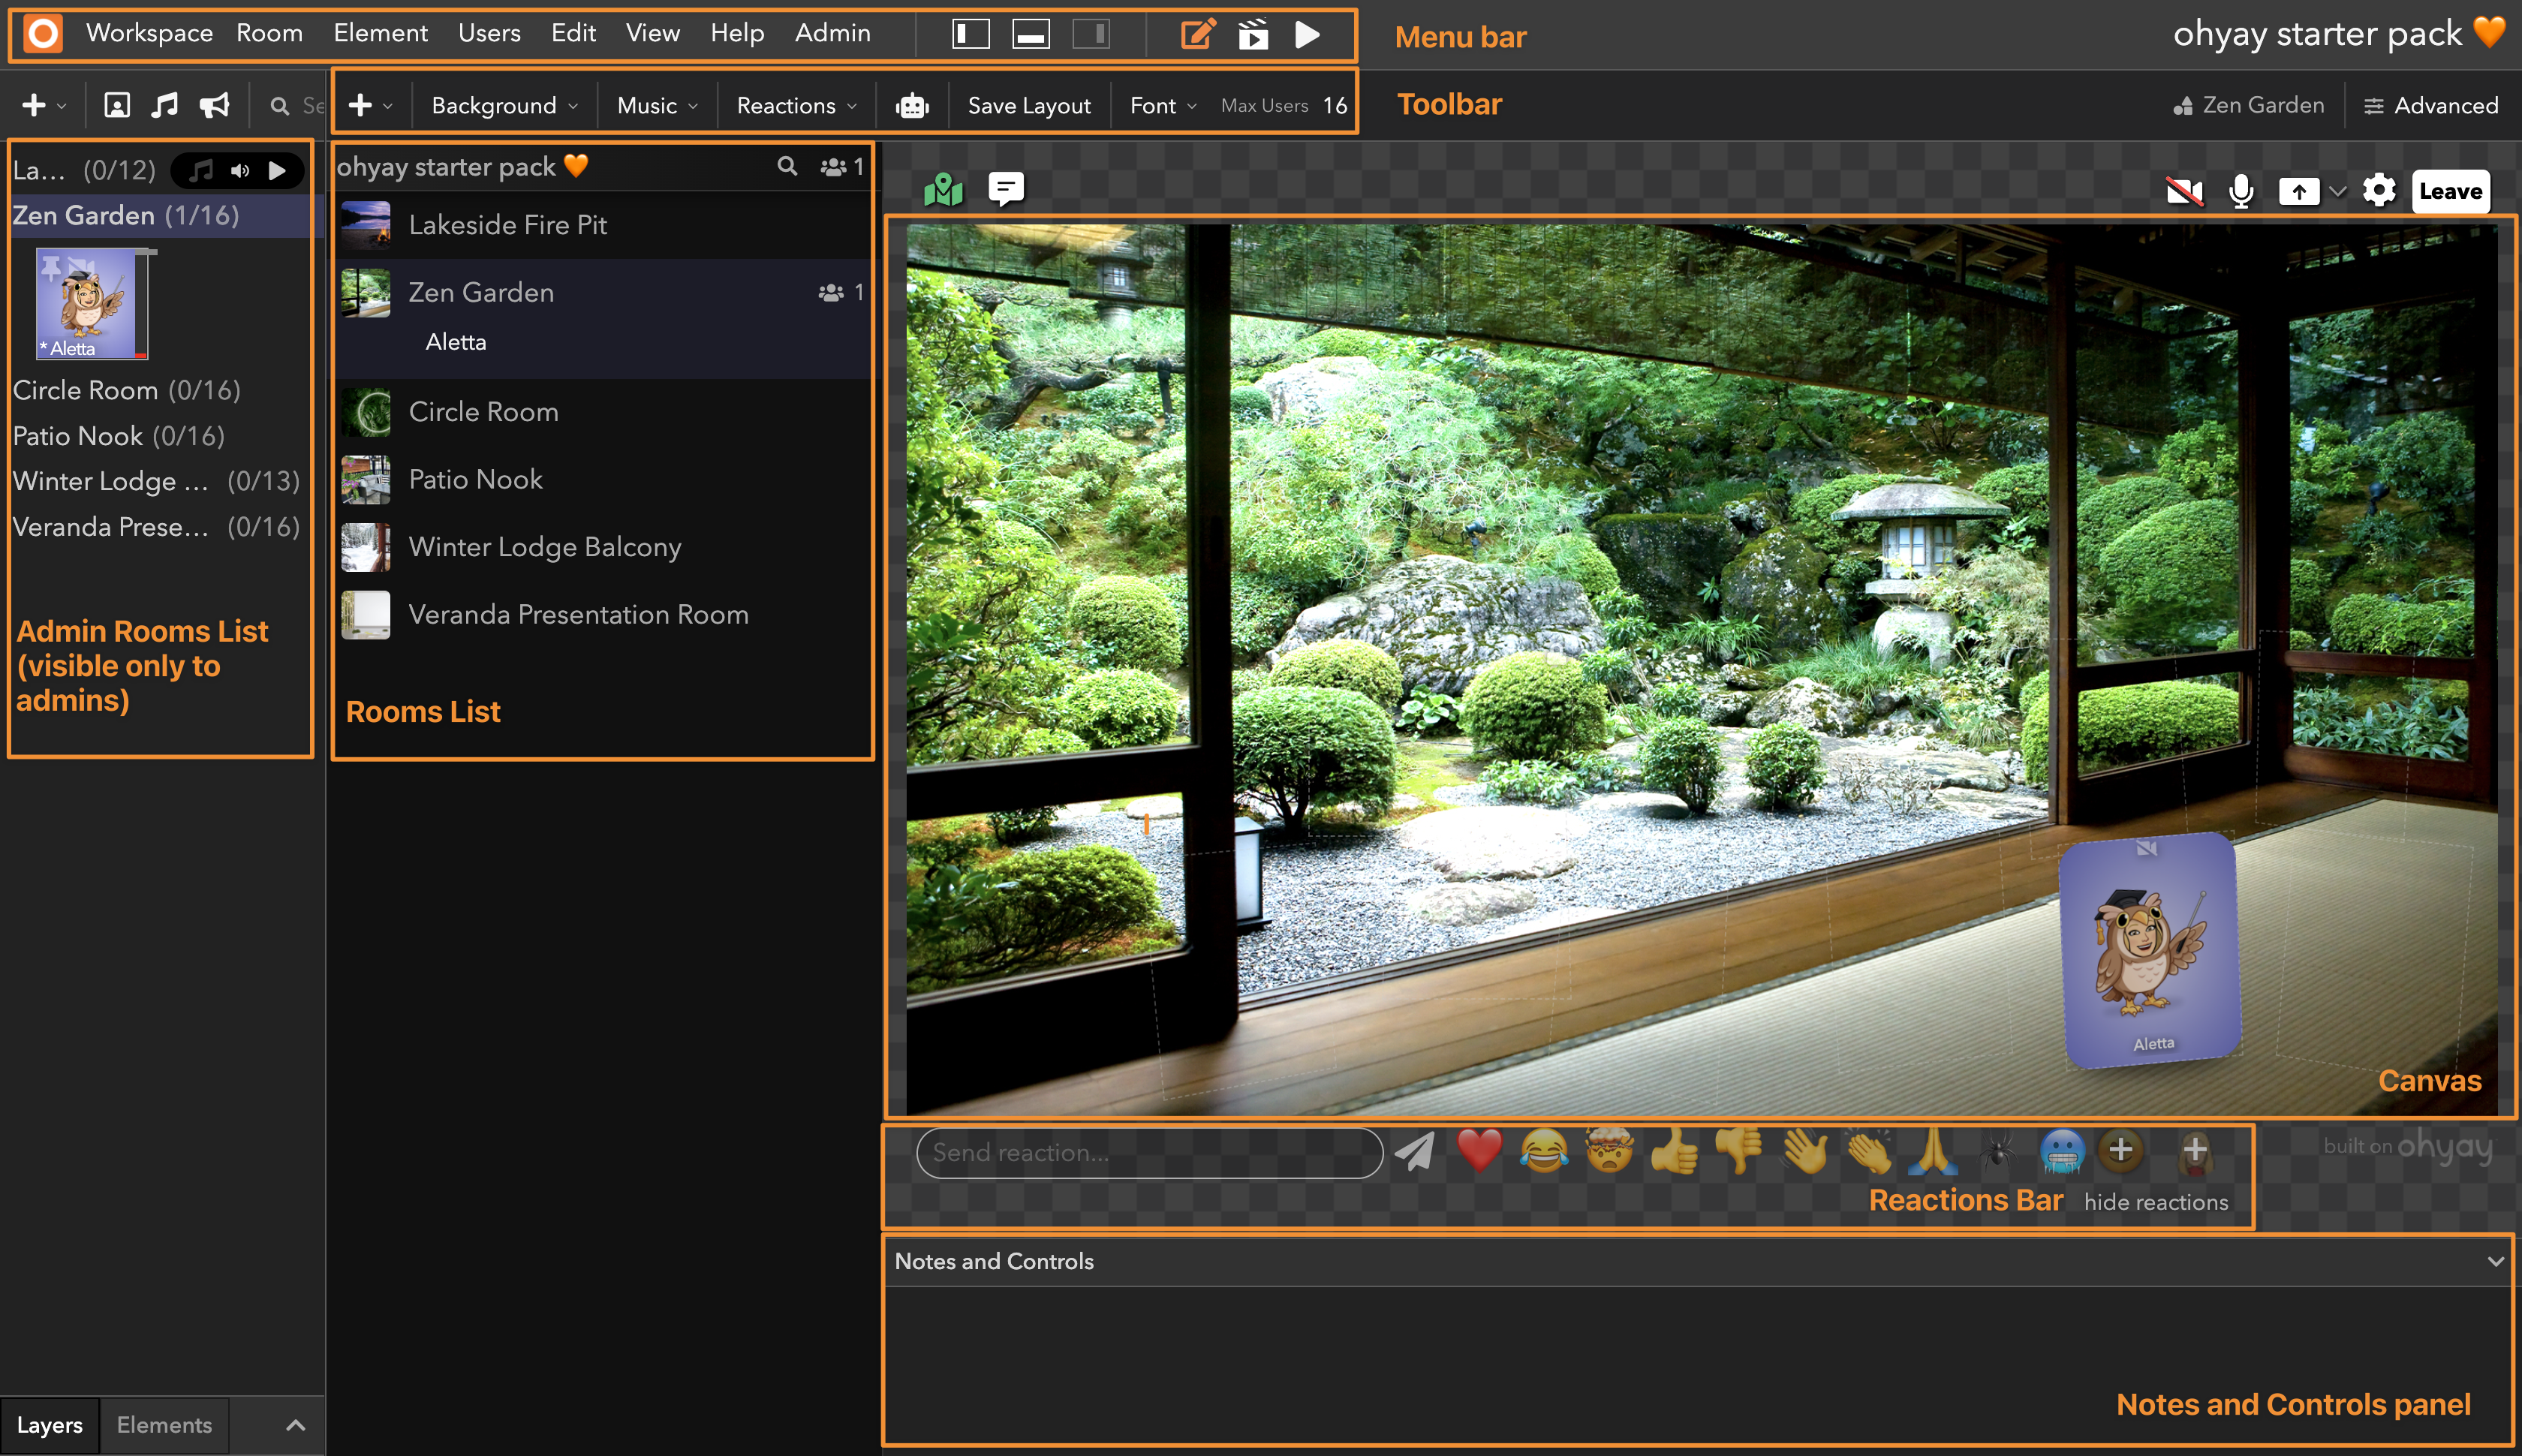
Here are a few major components of the interface:
- The current room canvas. The current room is displayed in the center of the window. Each room contains a collection of elements (e.g. text, images, user slots) that determine its appearance.
Interacting with Elements
You can click on elements in the room to select them and right-click on them to see additional actions you can take. You can also drag elements to re-position them on the room canvas, resize them, rotate them, and more.
- The menu bar. At the top of your screen is a menu bar where you can easily make changes to your workspace, room, and elements. Under the Element dropdown, you’ll find a variety of elements that you can add, including text, images, and polls.

Menu Bar
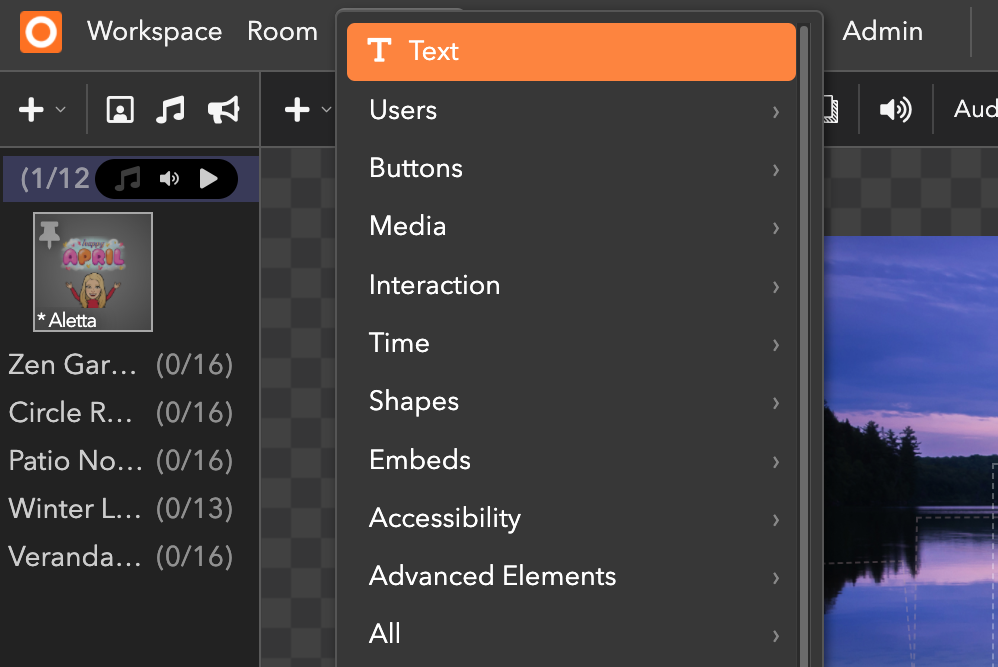
Element dropdown from the Menu Bar
- The toolbar. The region just below the menu bar contains a row of icons with access to ohyay’s most commonly used properties. You should be able to build out rooms just by using the toolbar.

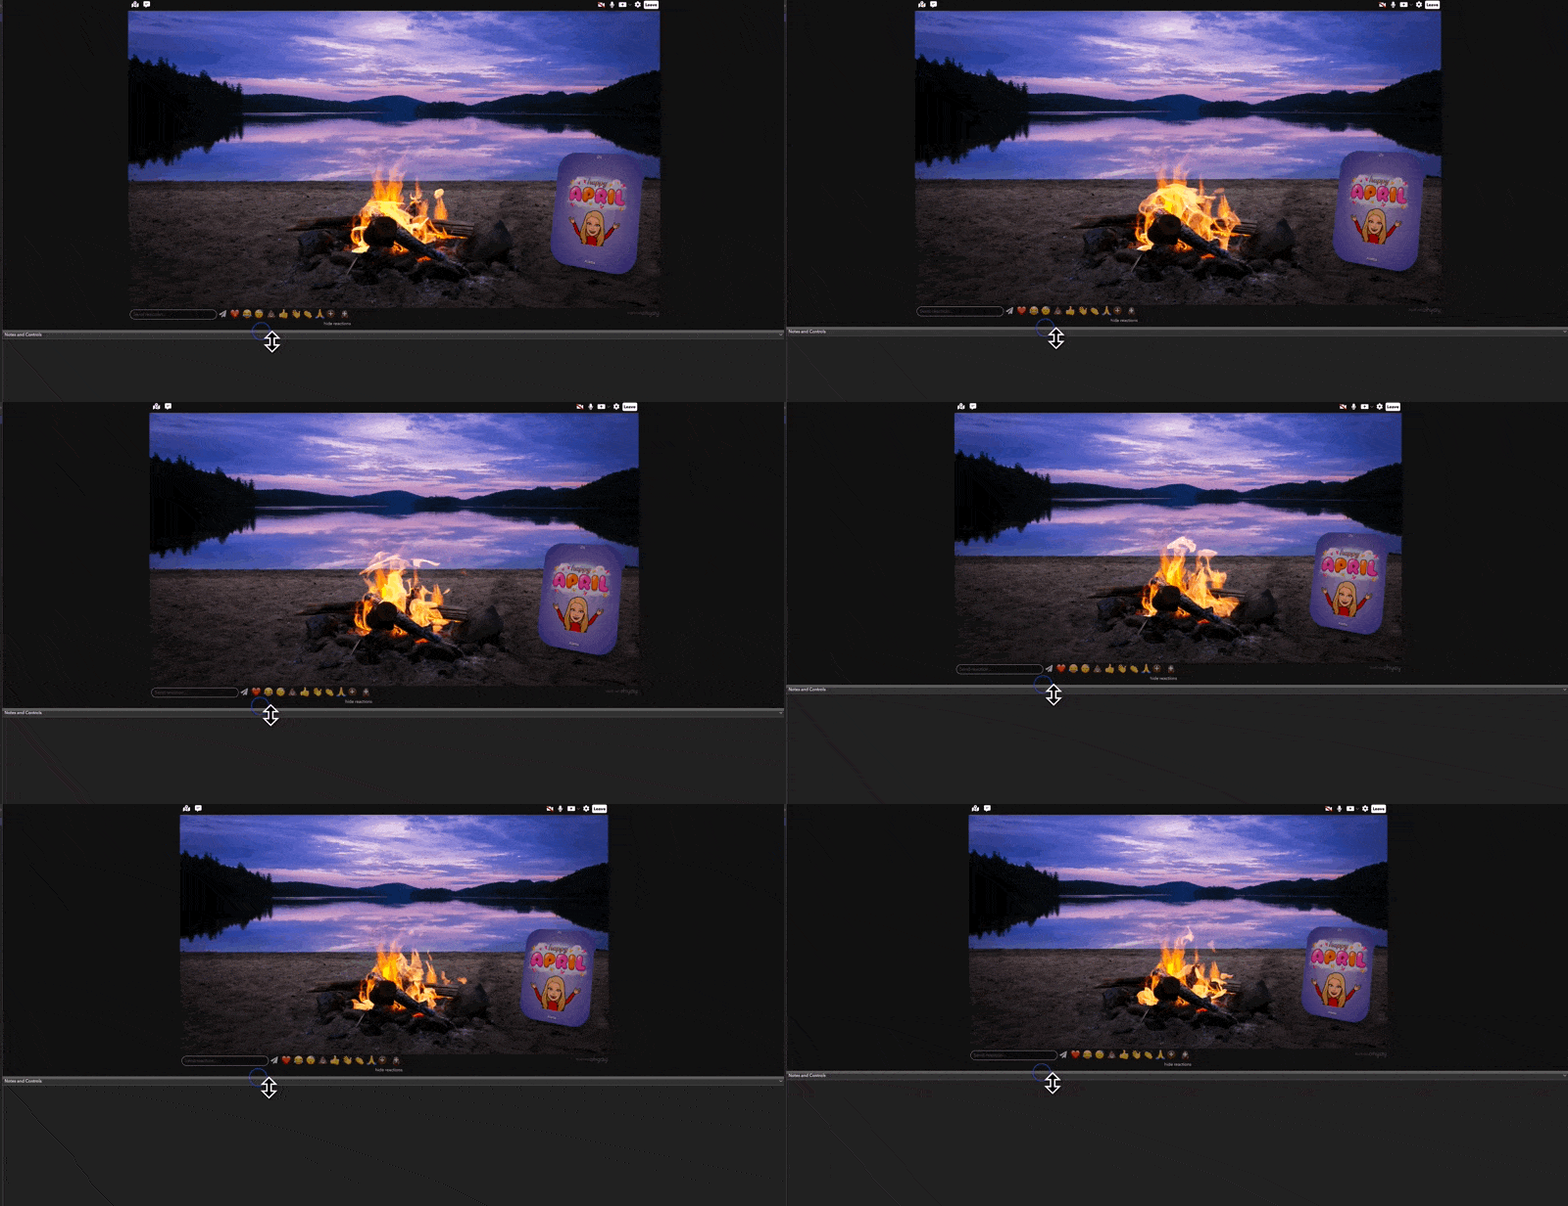
- Notes and controls panel. The bottom region of the interface is a panel called Notes and Controls, which is only visible to admins. In future tutorials, we’ll cover how you can hit buttons in this panel to make different things happen in your workspace.
Creating a room
It’s important to understand that ohyay goes way beyond what a standard video conferencing platform can do. You’ll find a few examples in this workspace alone:
- Lakeside Fire Pit: The flames are animated and the users behind the fire are segmented to make them look like they’re behind the firewood.

- Circle Room: Users can pass around a stone to indicate who is speaking.

- Winter Lodge Balcony: Hats only appear when users move into specific slots.
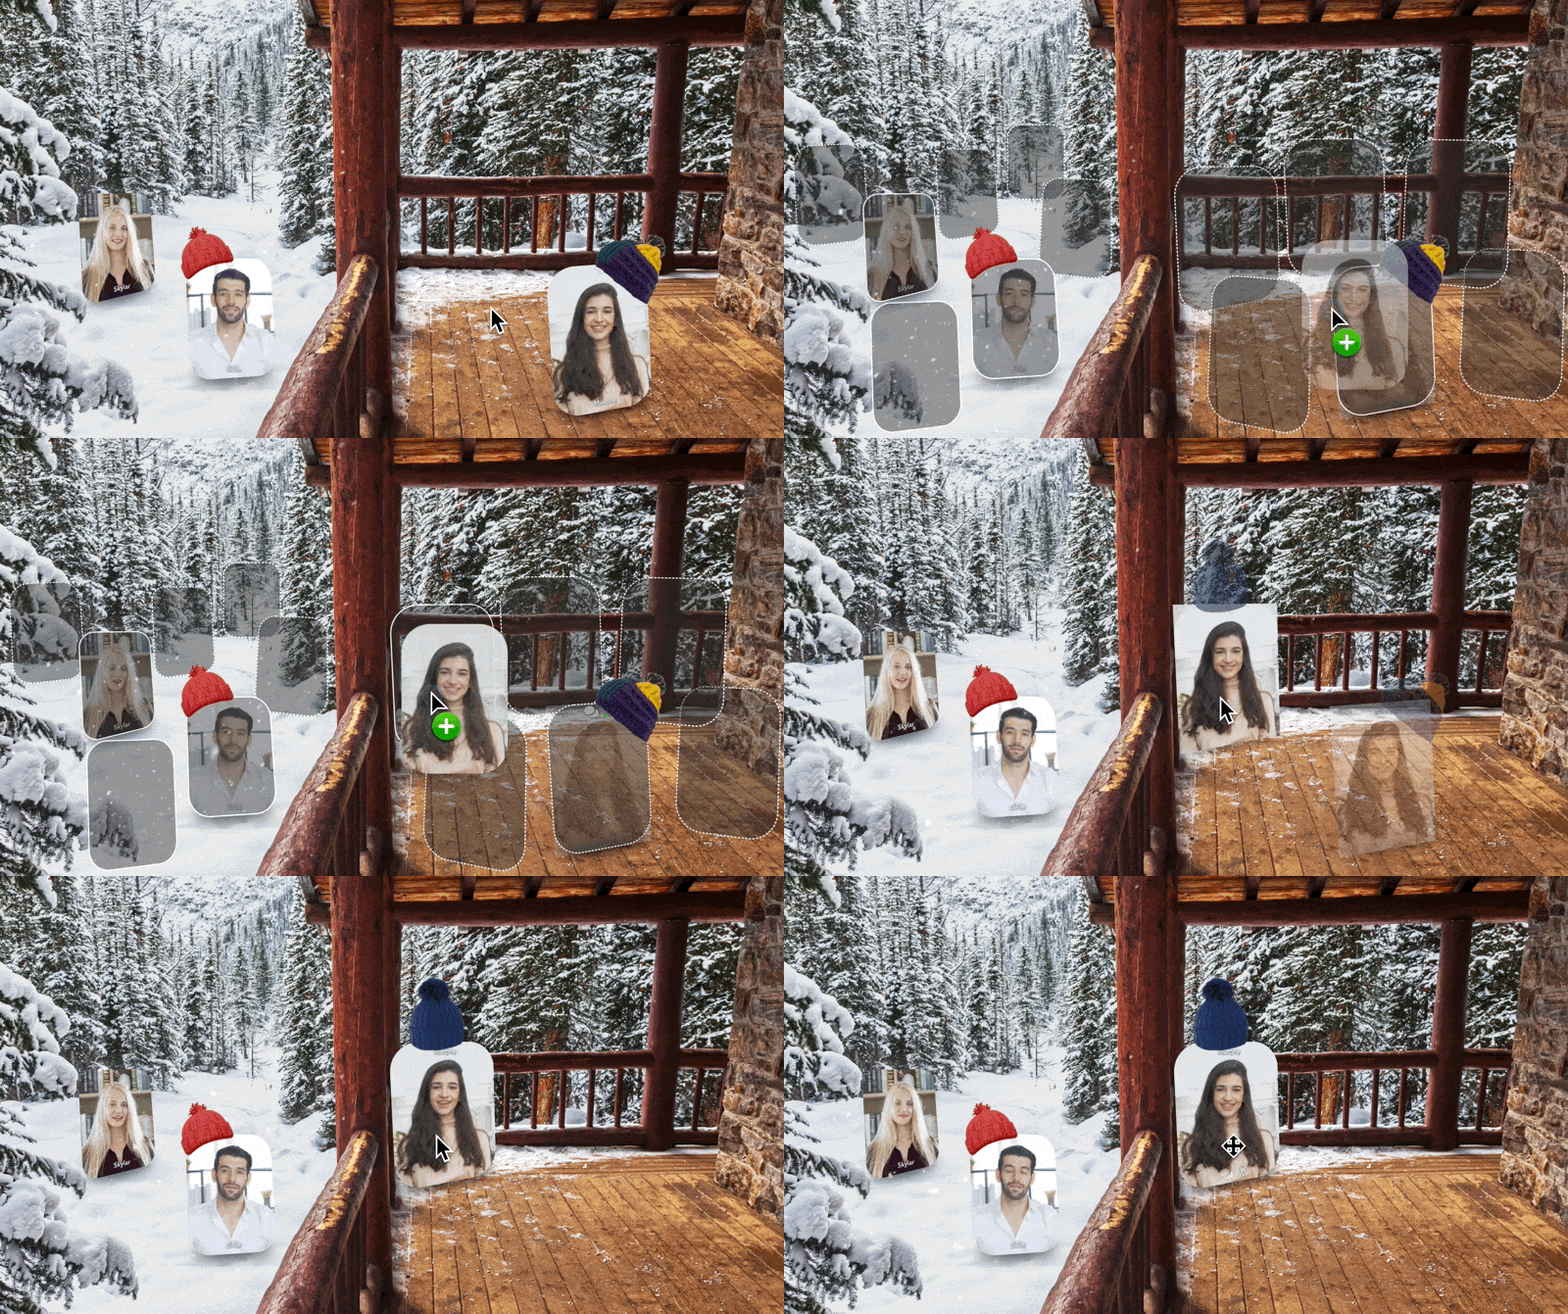
These types of rooms give you a taste of what’s possible in Edit Mode. Today, we’re going to create a version of this desk room:
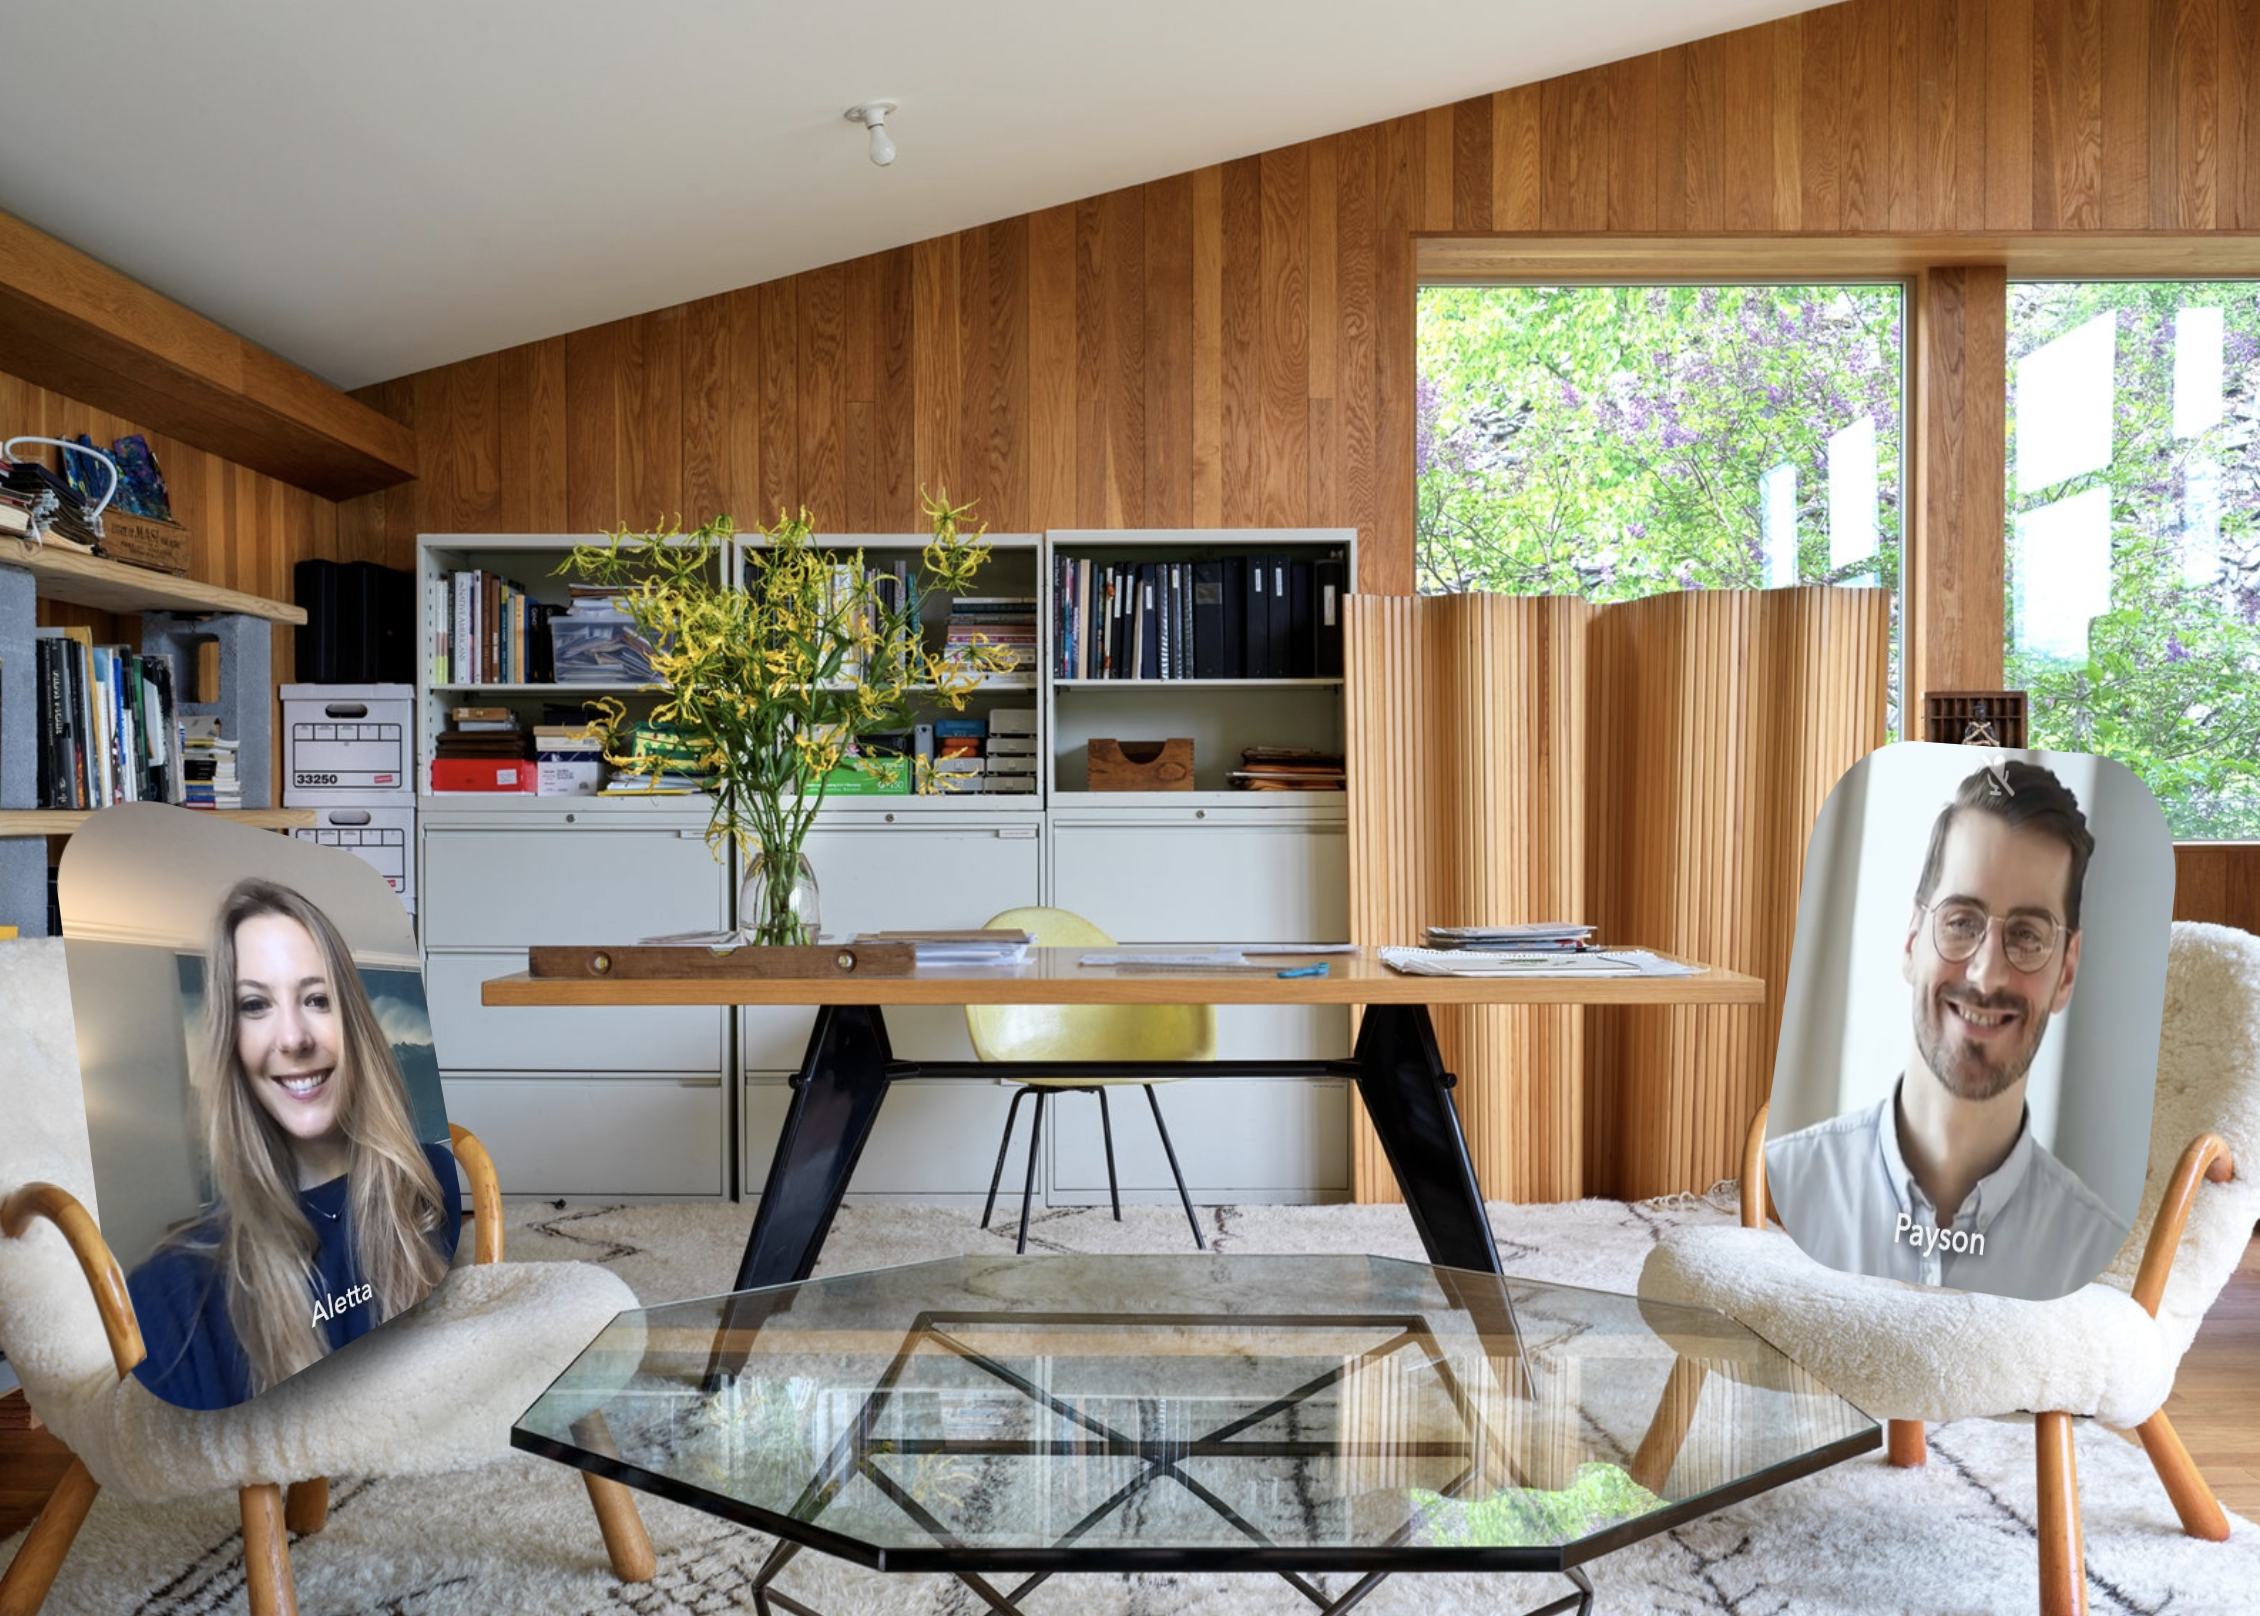
Your first step is to add a blank room by following these steps:
- Click on
in the toolbar to ensure that you’re in Edit Mode.
![]()
-
Hover over the
above the Admins Rooms List (the list of rooms in your workspace that is only visible to admins).
-
Select Empty Room.
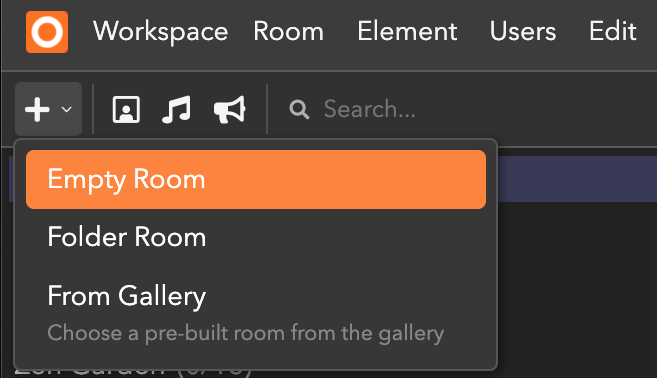
Once you’ve added your room, you’ll see it appear in the Admins Rooms List on the left-hand side. It should be called (new room) by default.
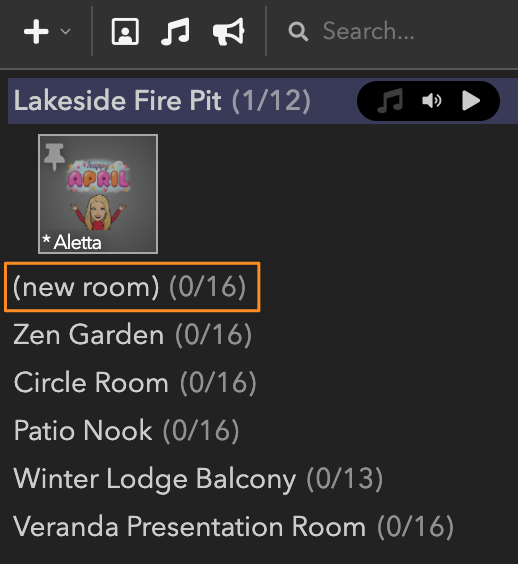
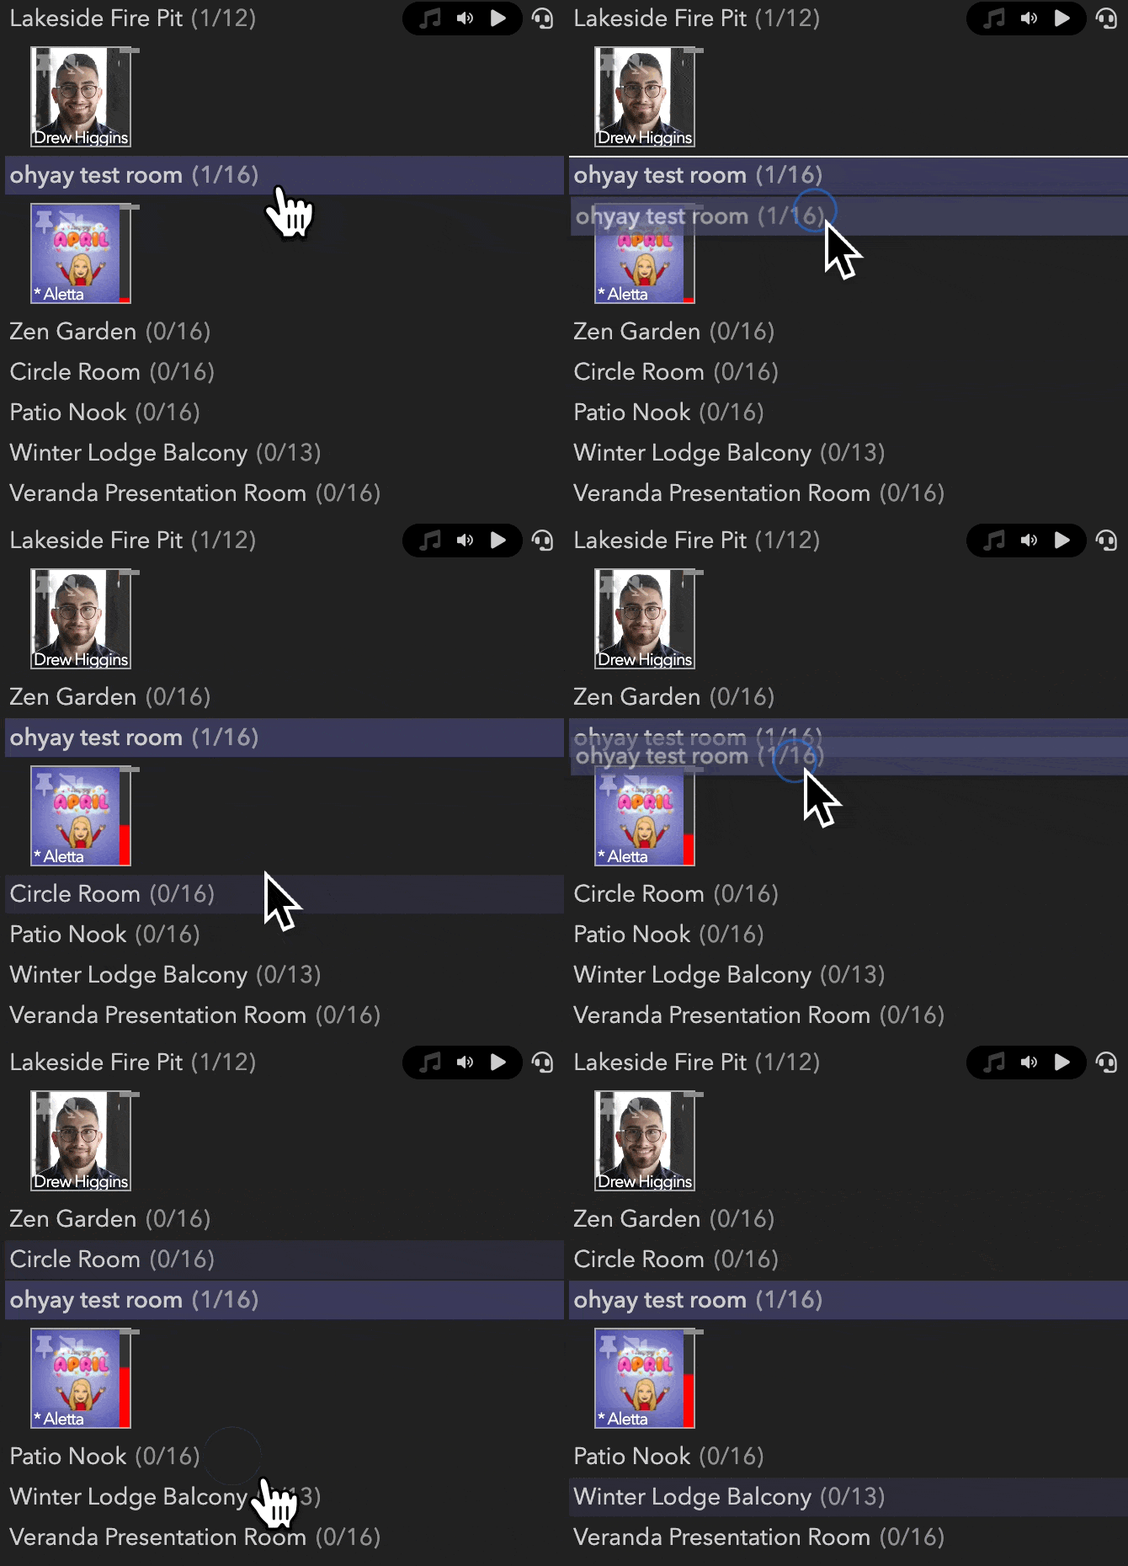
To get a feel for how you can interact with your new room in the Admin Rooms List, try:
- Clicking on its name in the list and typing in “ohyay test room”
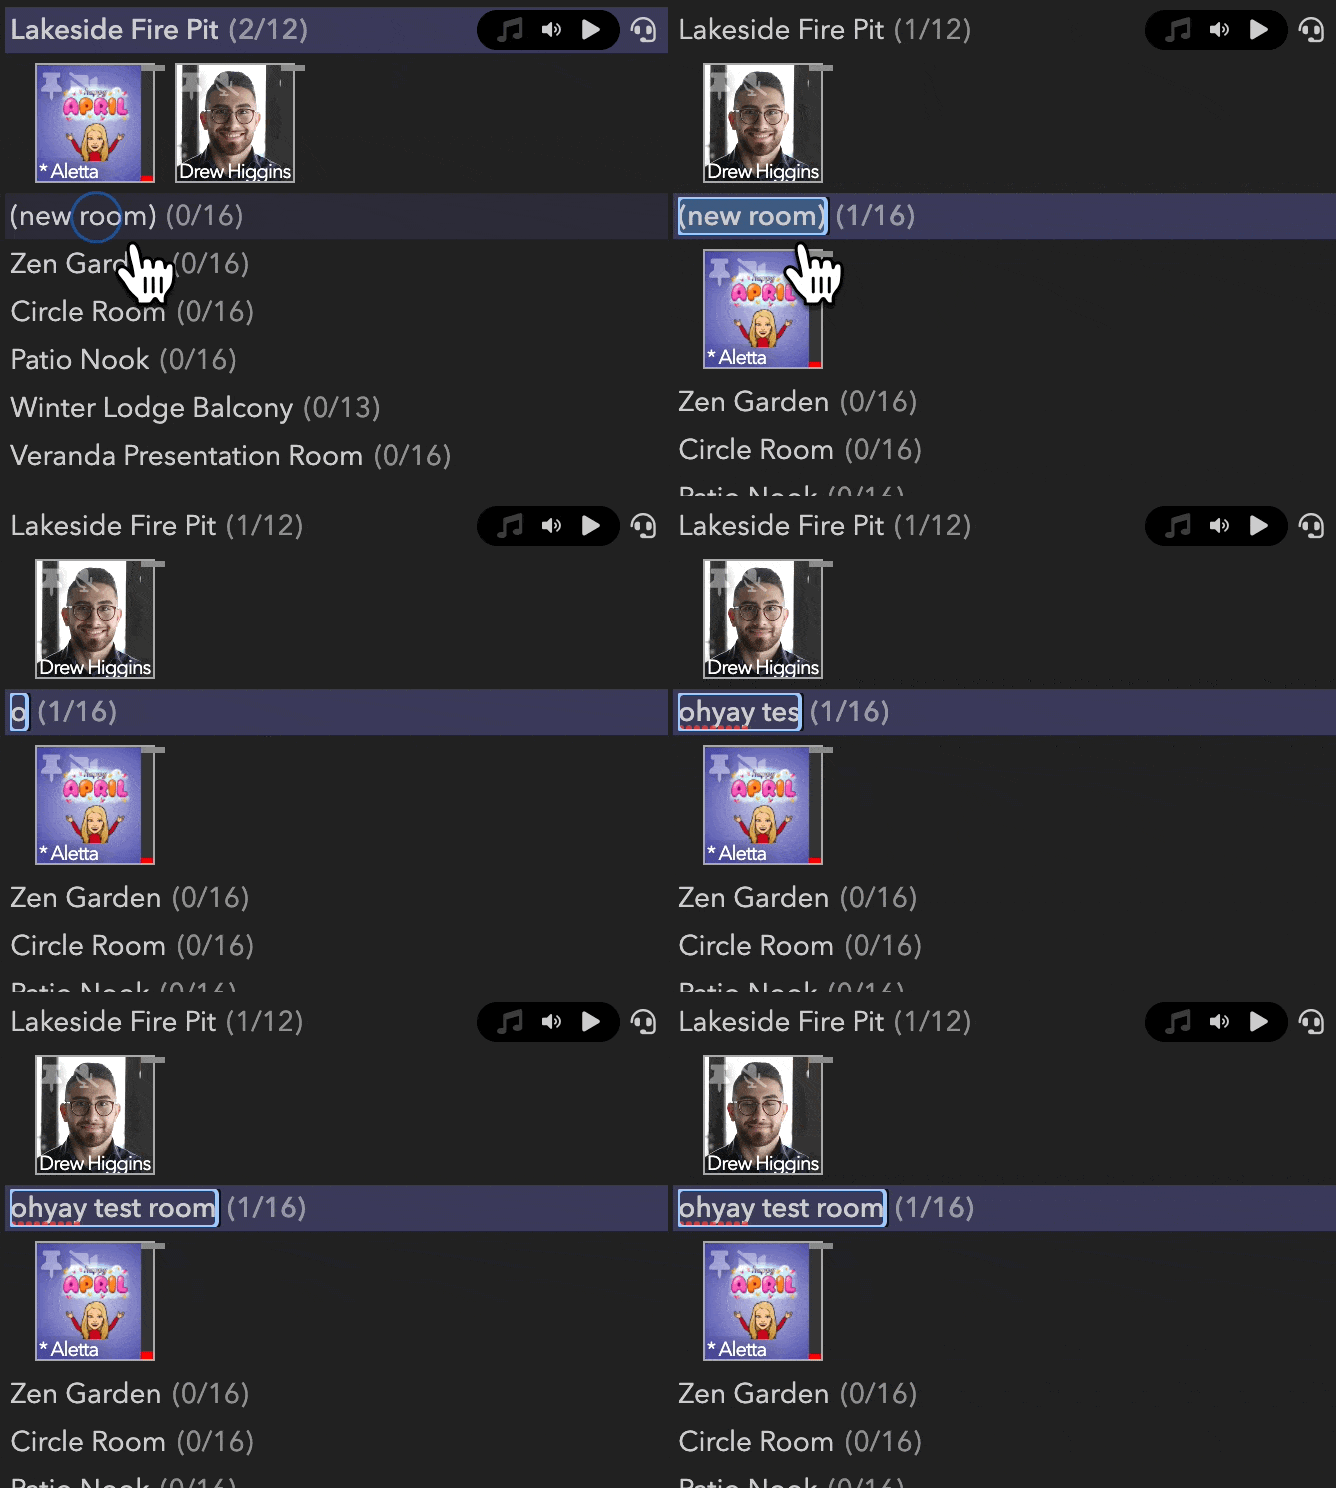
- Dragging it up and down in the list
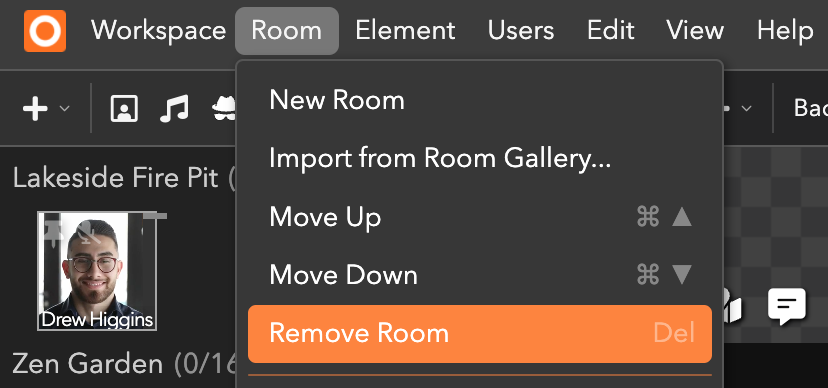
If you ever want to delete your room, you can select it in the Admins Rooms List and hit your back key or click on Room > Remove Room from the menu.
Control-Z
If you ever want to undo anything you’ve done in ohyay, including deleting a room, you can hit Control-Z.
We won’t do this today, but you can also import a pre-made room from our Room Gallery — a collection of rooms designed for small team meetings, networking events, classroom lectures, and more.
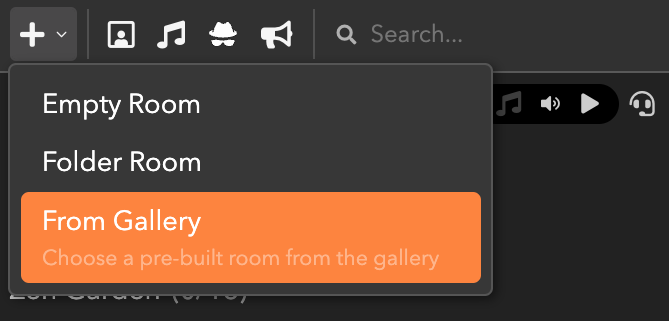
To import a room, simply click on above the Admins Rooms List, select From Gallery, click on a room’s thumbnail image, and click Import. The room will automatically be added to your workspace and will be ready to use.
While examples in the Room Gallery are available for you to use in your workspaces, the real power of ohyay is that you can customize your own rooms to meet your specific needs.
Adding a background
Let’s return to your new, blank room and choose an image for its background, which by default is black.
Your background can be anything you want — from a pastel gradient to an image of an oceanfront cabana — and will play a big part in setting the tone for your room.
Choose an image for your background by following these steps:
-
Click on the room in the Admins Rooms List (or part of the room canvas that doesn’t have an element) to ensure that the room is selected.
-
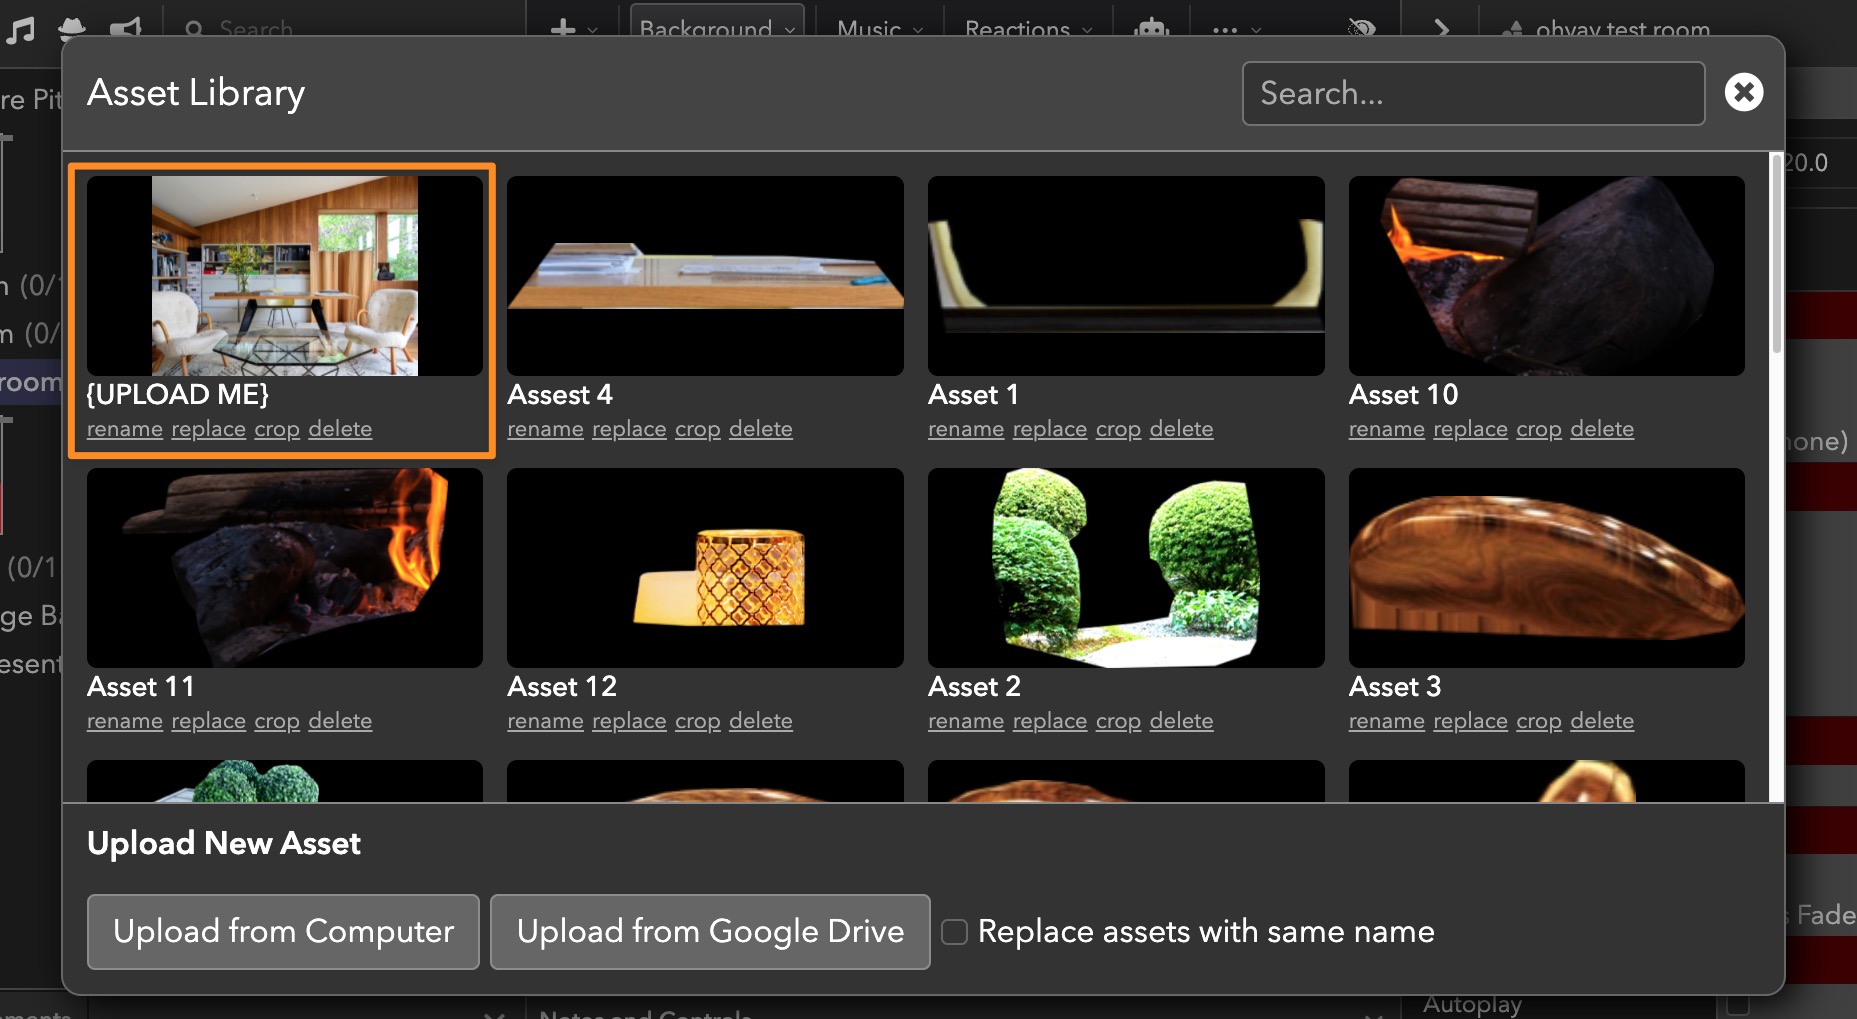
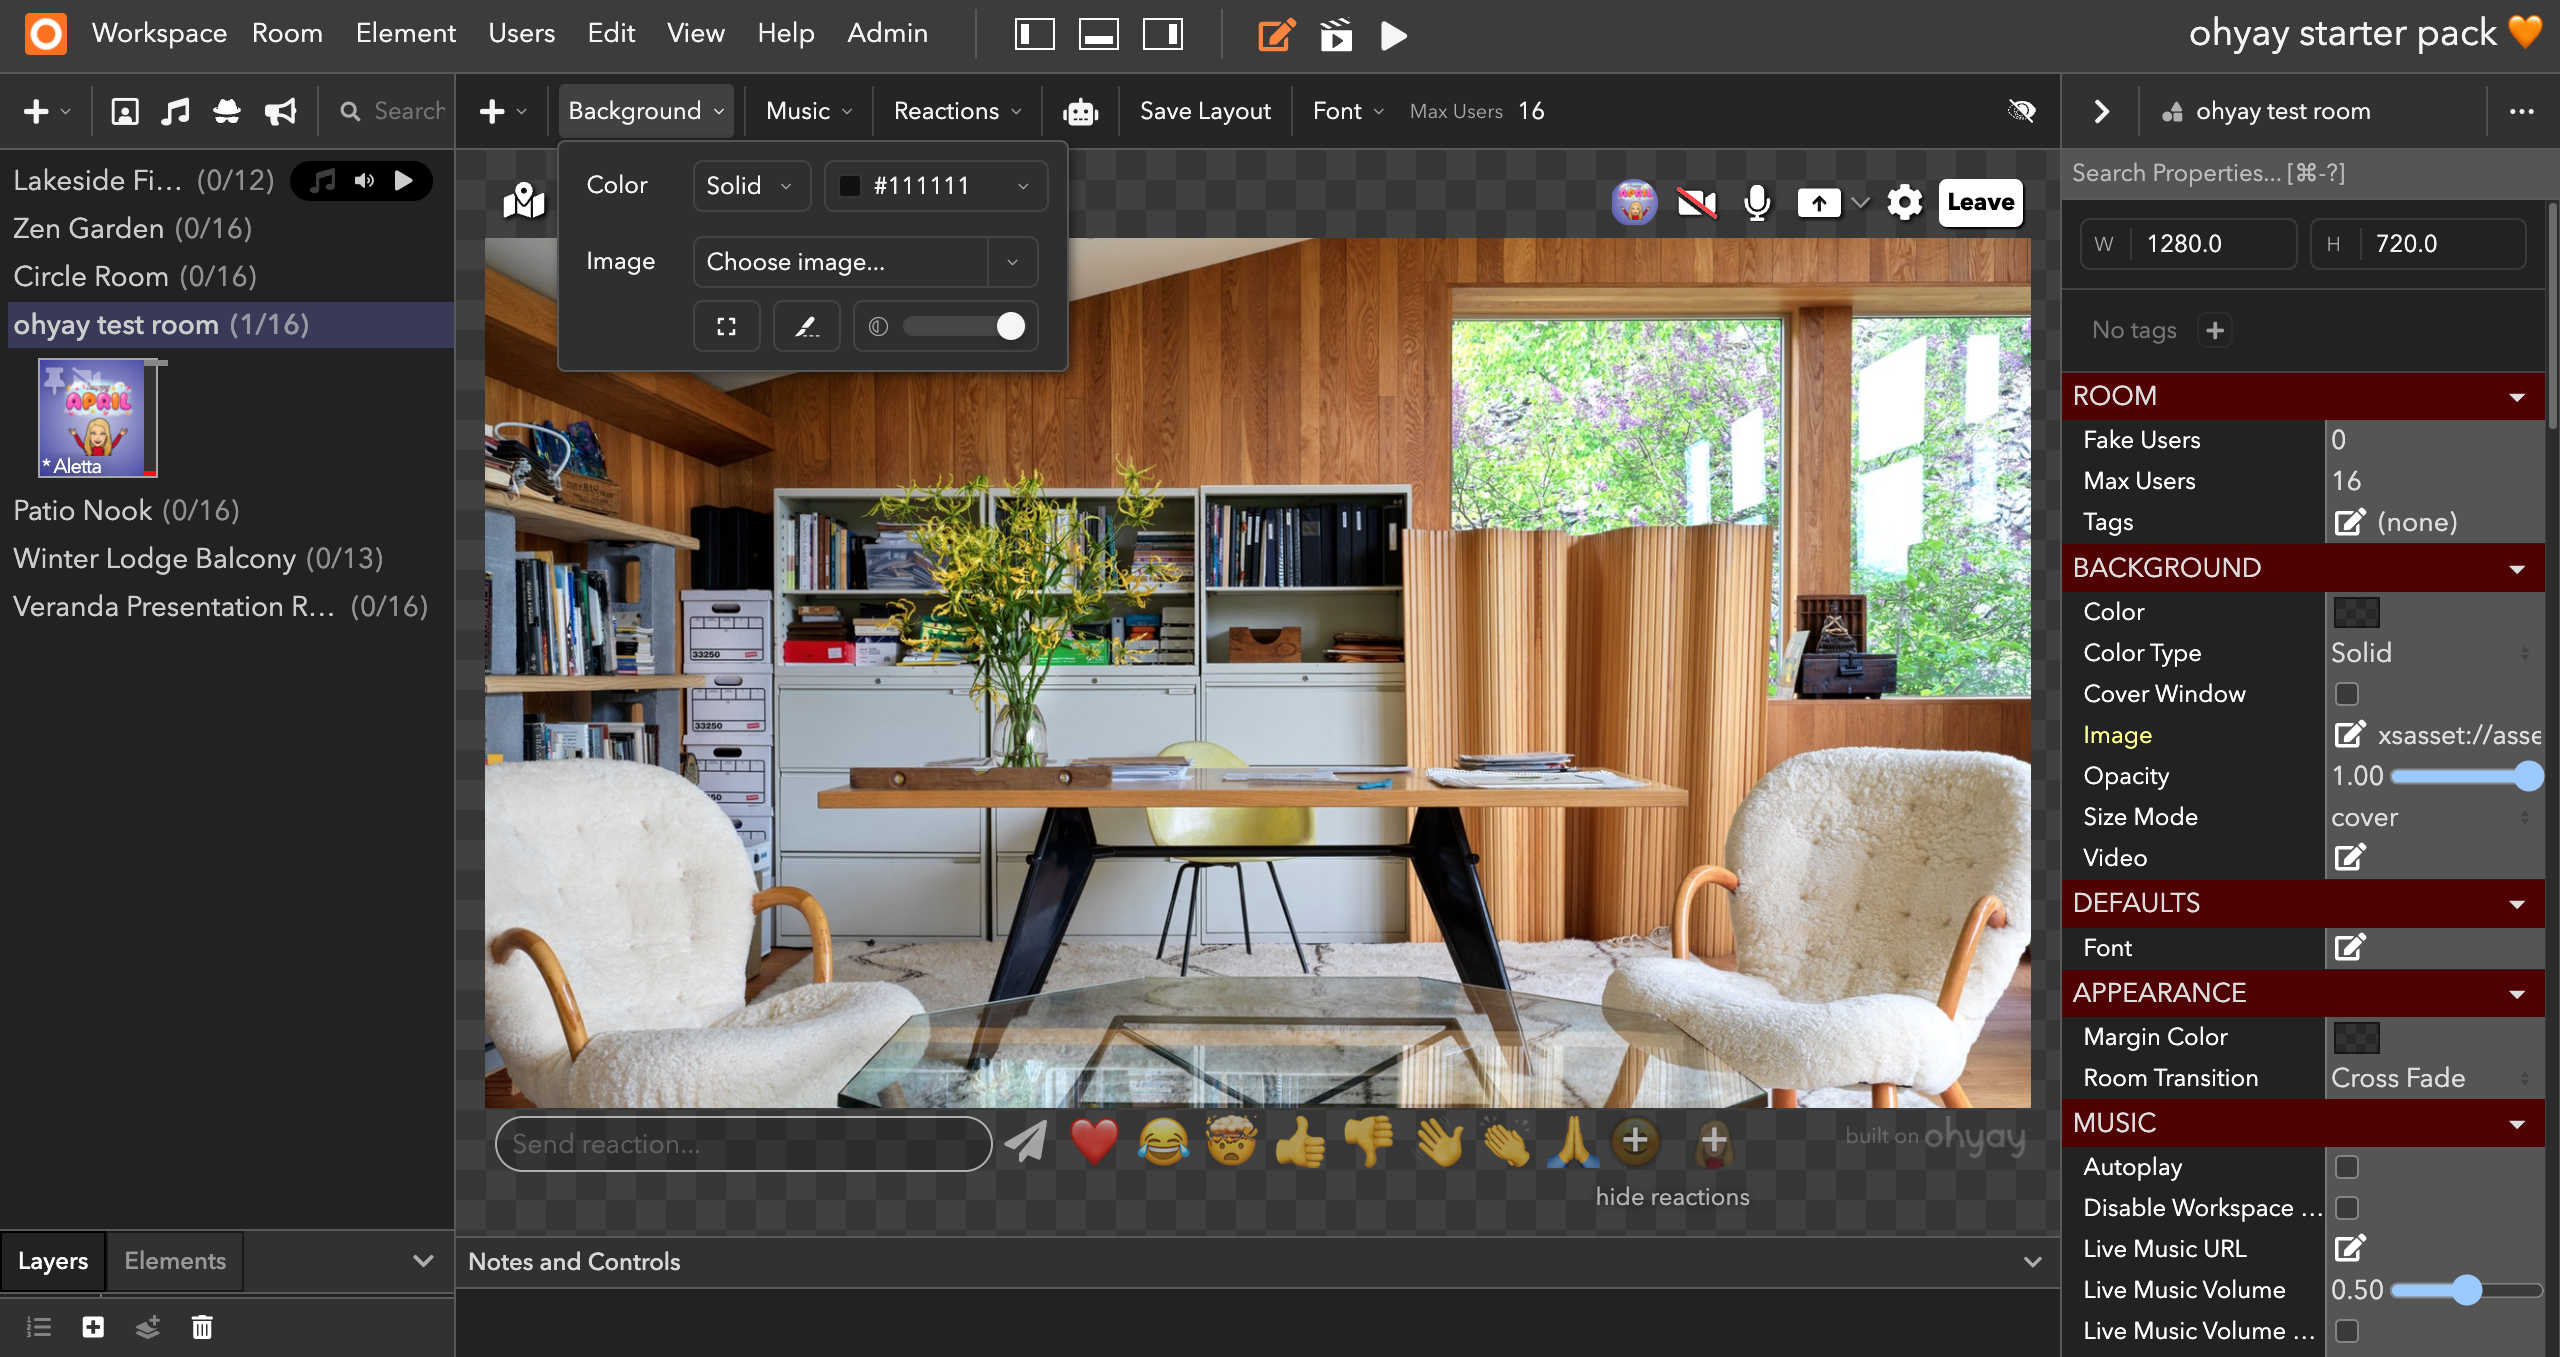
Click on Background > Choose image… from the toolbar. You’ll see that the Asset Library, a scrollable set of assets across your workspace, will pop up.
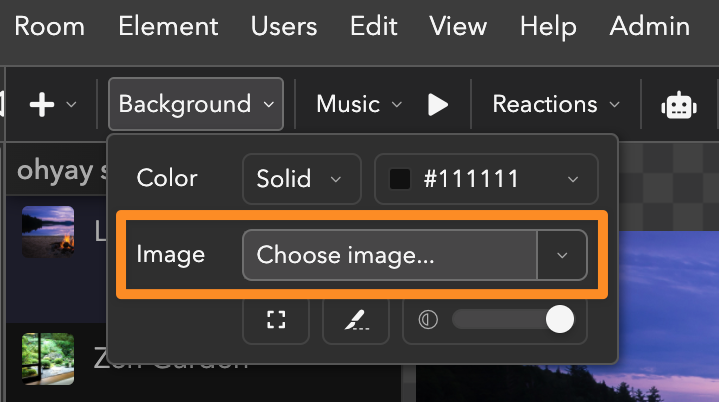
- Select the first image in your Asset Library titled {UPLOAD ME}.
- You’ll see the image fill up your canvas.
Background Image Resolution
We recommend a 1920 x 1080 resolution (16:9 aspect ratio) for background images. You can also upload a video as your background.
Adding a user slot
Once you’ve added a background, you’ll want to add a user slot.
In ohyay, user slots are frames that hold user video feeds. Without these slots, your guests will not appear on screen.
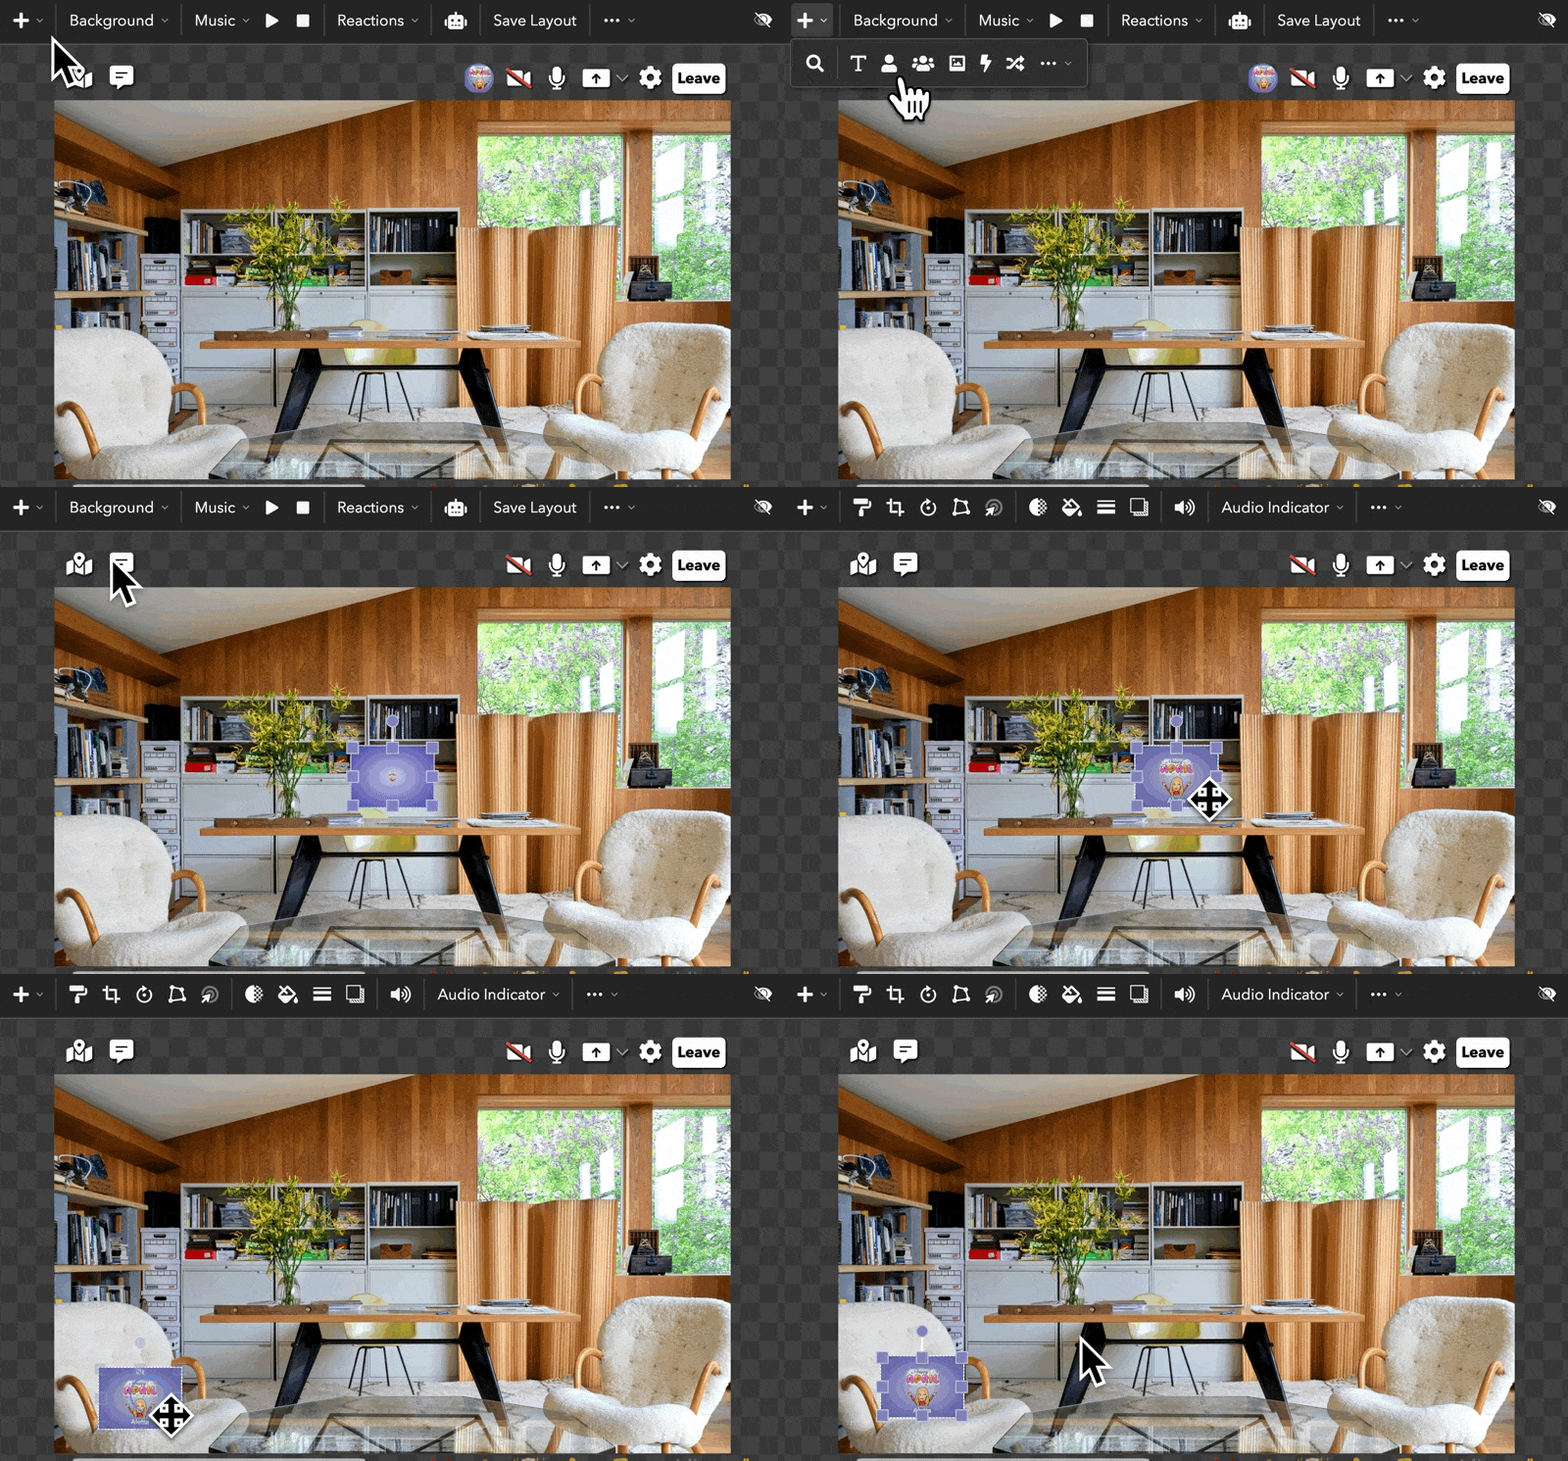
To add a user slot:
-
Hover over
in the toolbar.
-
Click on
. Your video feed will pop into it.

- Drag the user slot onto the left chair.
Moving Your Video Feed
You can move your video feed into the other slot by holding down the option key and dragging it, or by pulling your thumbnail from the Admins Rooms List into the slot.
Adding a multi-user slot
Multi-user slots or “grid chats” are a great way to accommodate an unspecified number of guests in your room.
They look like regular user slots, but they're a bit different. They will automatically adjust based on how many guests join, similar to the grid format that you may be familiar with on other video conferencing platforms.
20 people per room
We recommend a maximum of 20 user video feeds in each ohyay room. Anything more than that may slow down your computer.
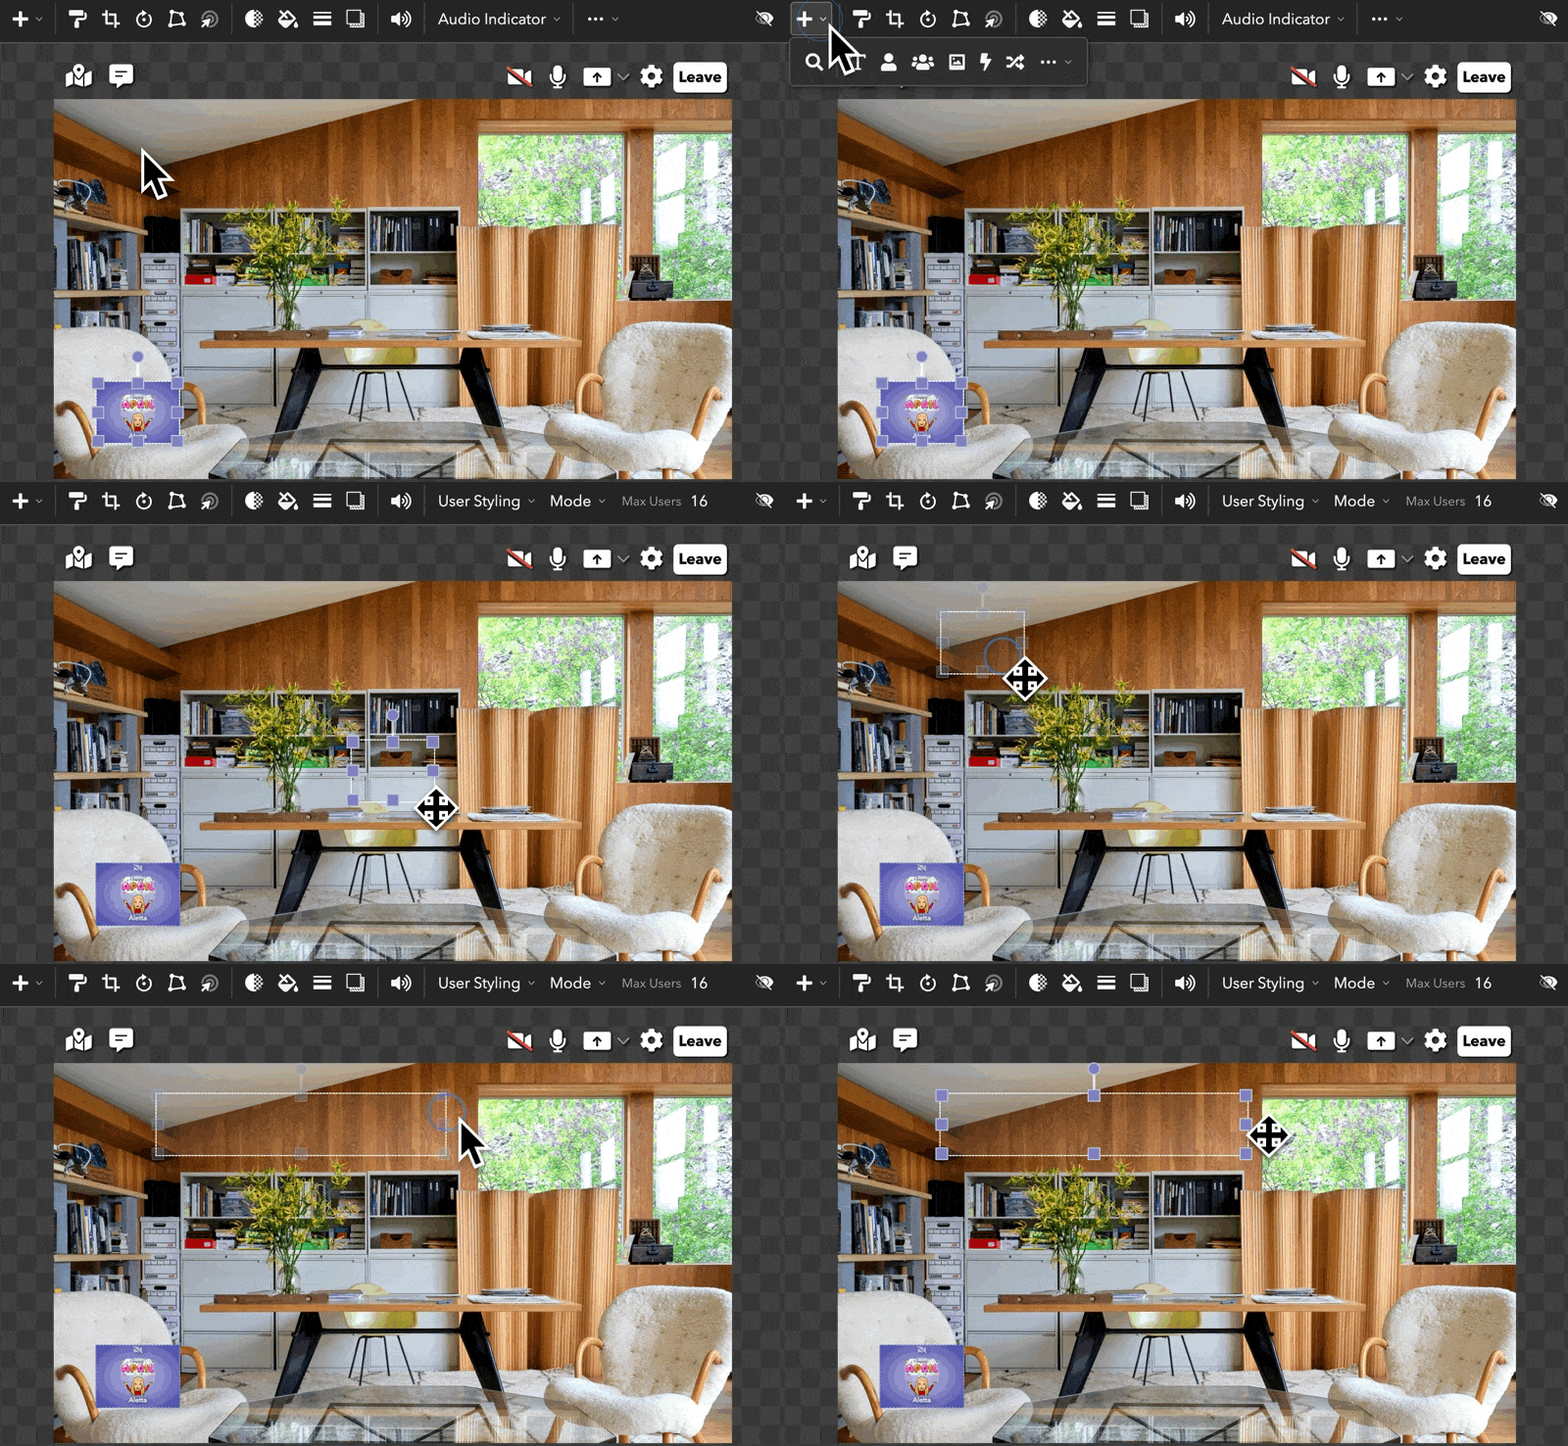
Go back to the in the toolbar, hover over it, and select the
.
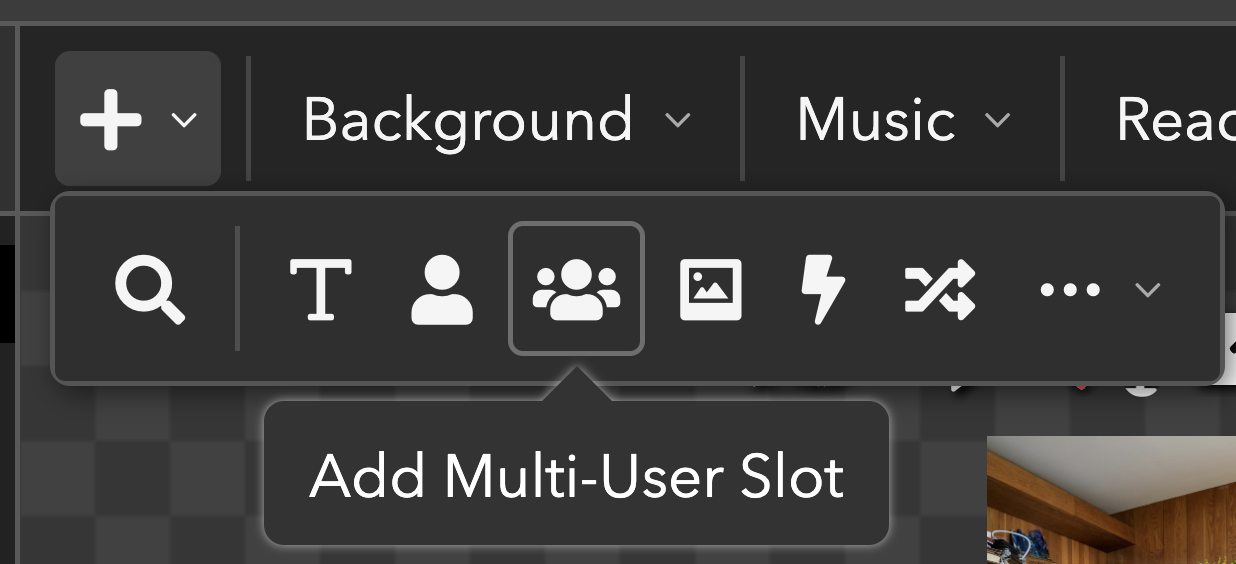
You'll see the slot appear in the middle of your screen. Drag it up to the top of your screen and extend it.
Adding music
A lot of users want to add music to their rooms to liven things up. ohyay currently supports YouTube music links and mp3 files (not yet Spotify).
Let’s try adding some lofi hip hop to our room. Follow these steps:
-
Click on the room (or part of the room canvas that doesn’t have an element) to ensure that the room is selected.
-
Click on the Music dropdown in the toolbar.
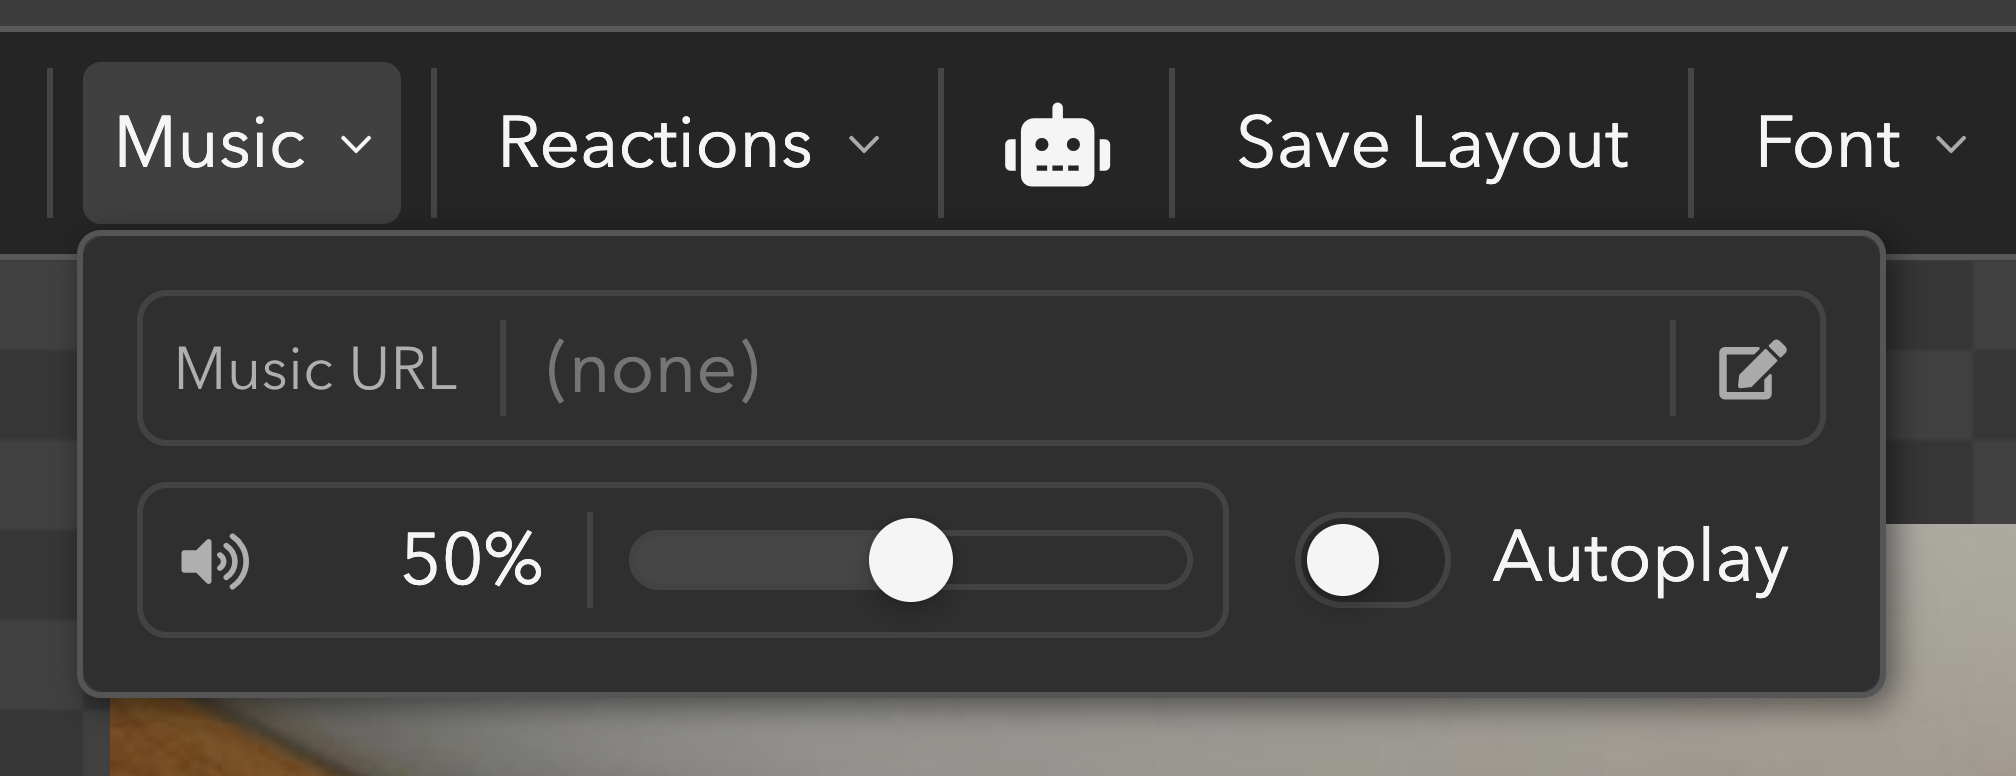
- Copy and paste this YouTube link (https://www.youtube.com/watch?v=5qap5aO4i9A) into the Music URL box.
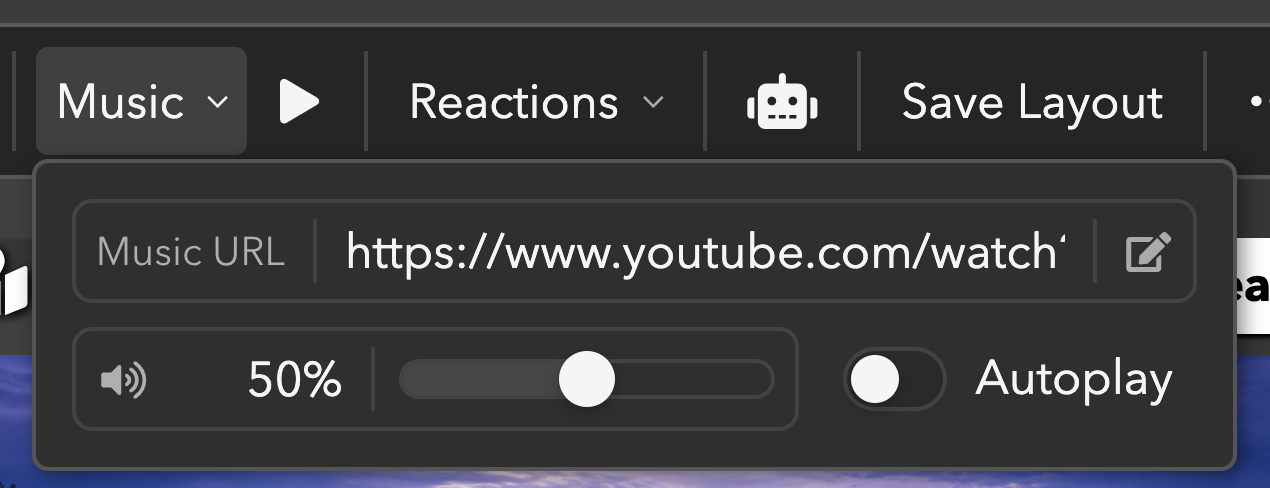
- Slide the toggle next to Autoplay. It may take a few seconds for the music to start playing.
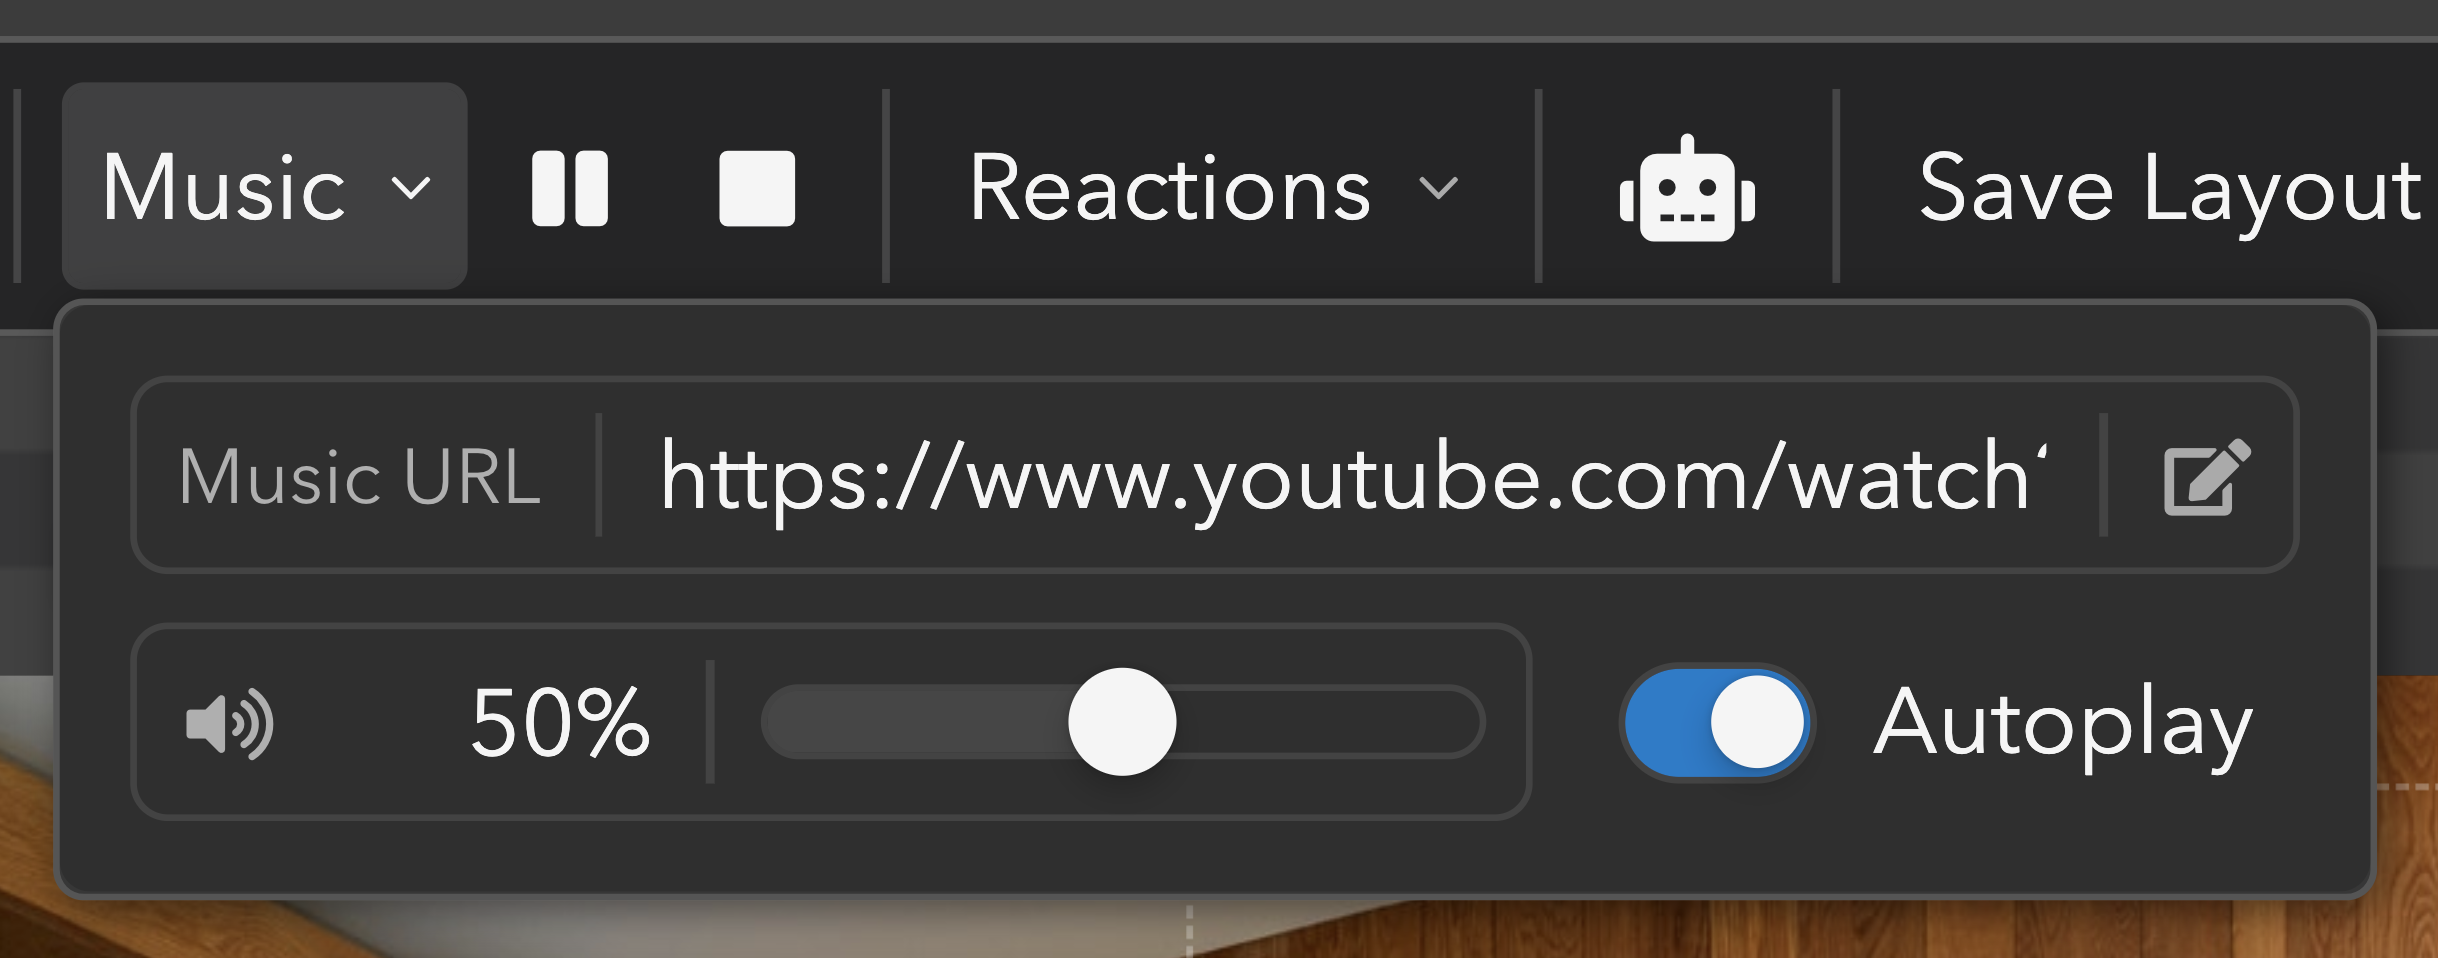
- Use the slider to adjust the music volume. We recommend leaving it around 10% or 20% if you want to have a conversation in the room.
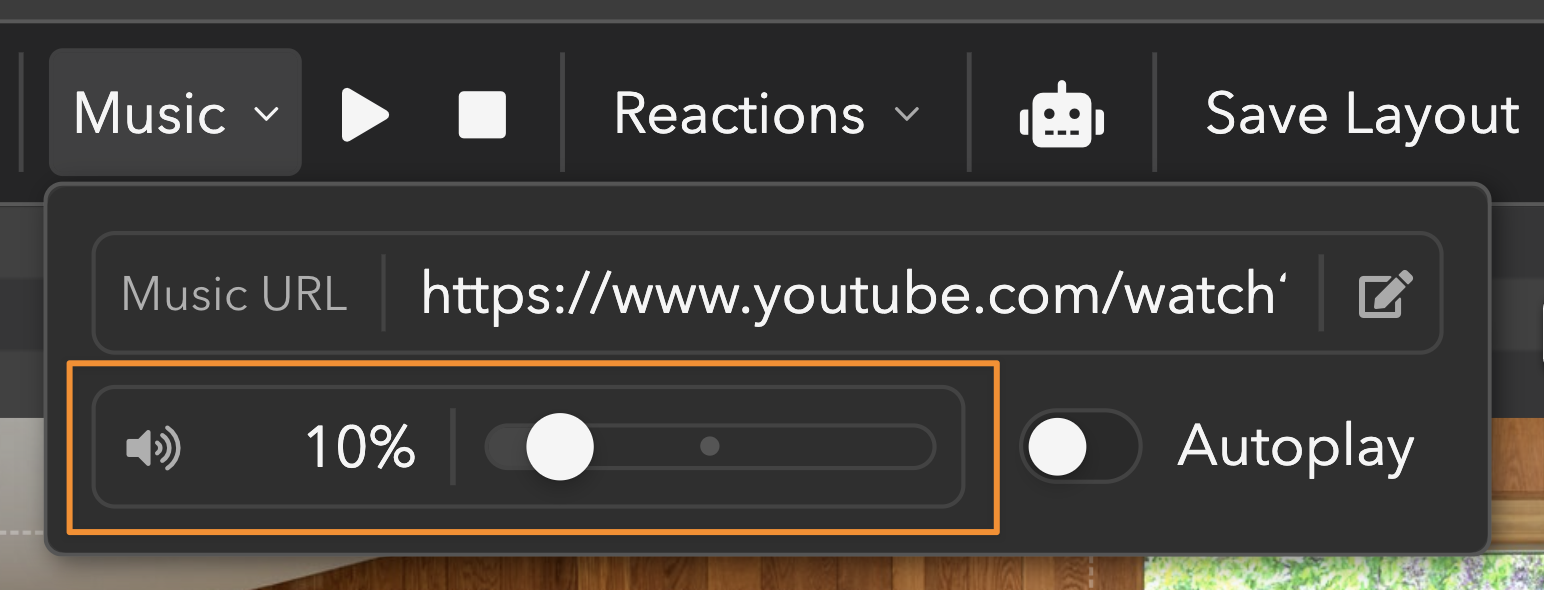
At any time, you can pause your music by hitting the pause icon next to Music in the toolbar.

Customizing reactions
One of ohyay’s most popular features are reaction emojis. During an event, users can click on emojis in the reactions bar to express how they’re feeling.
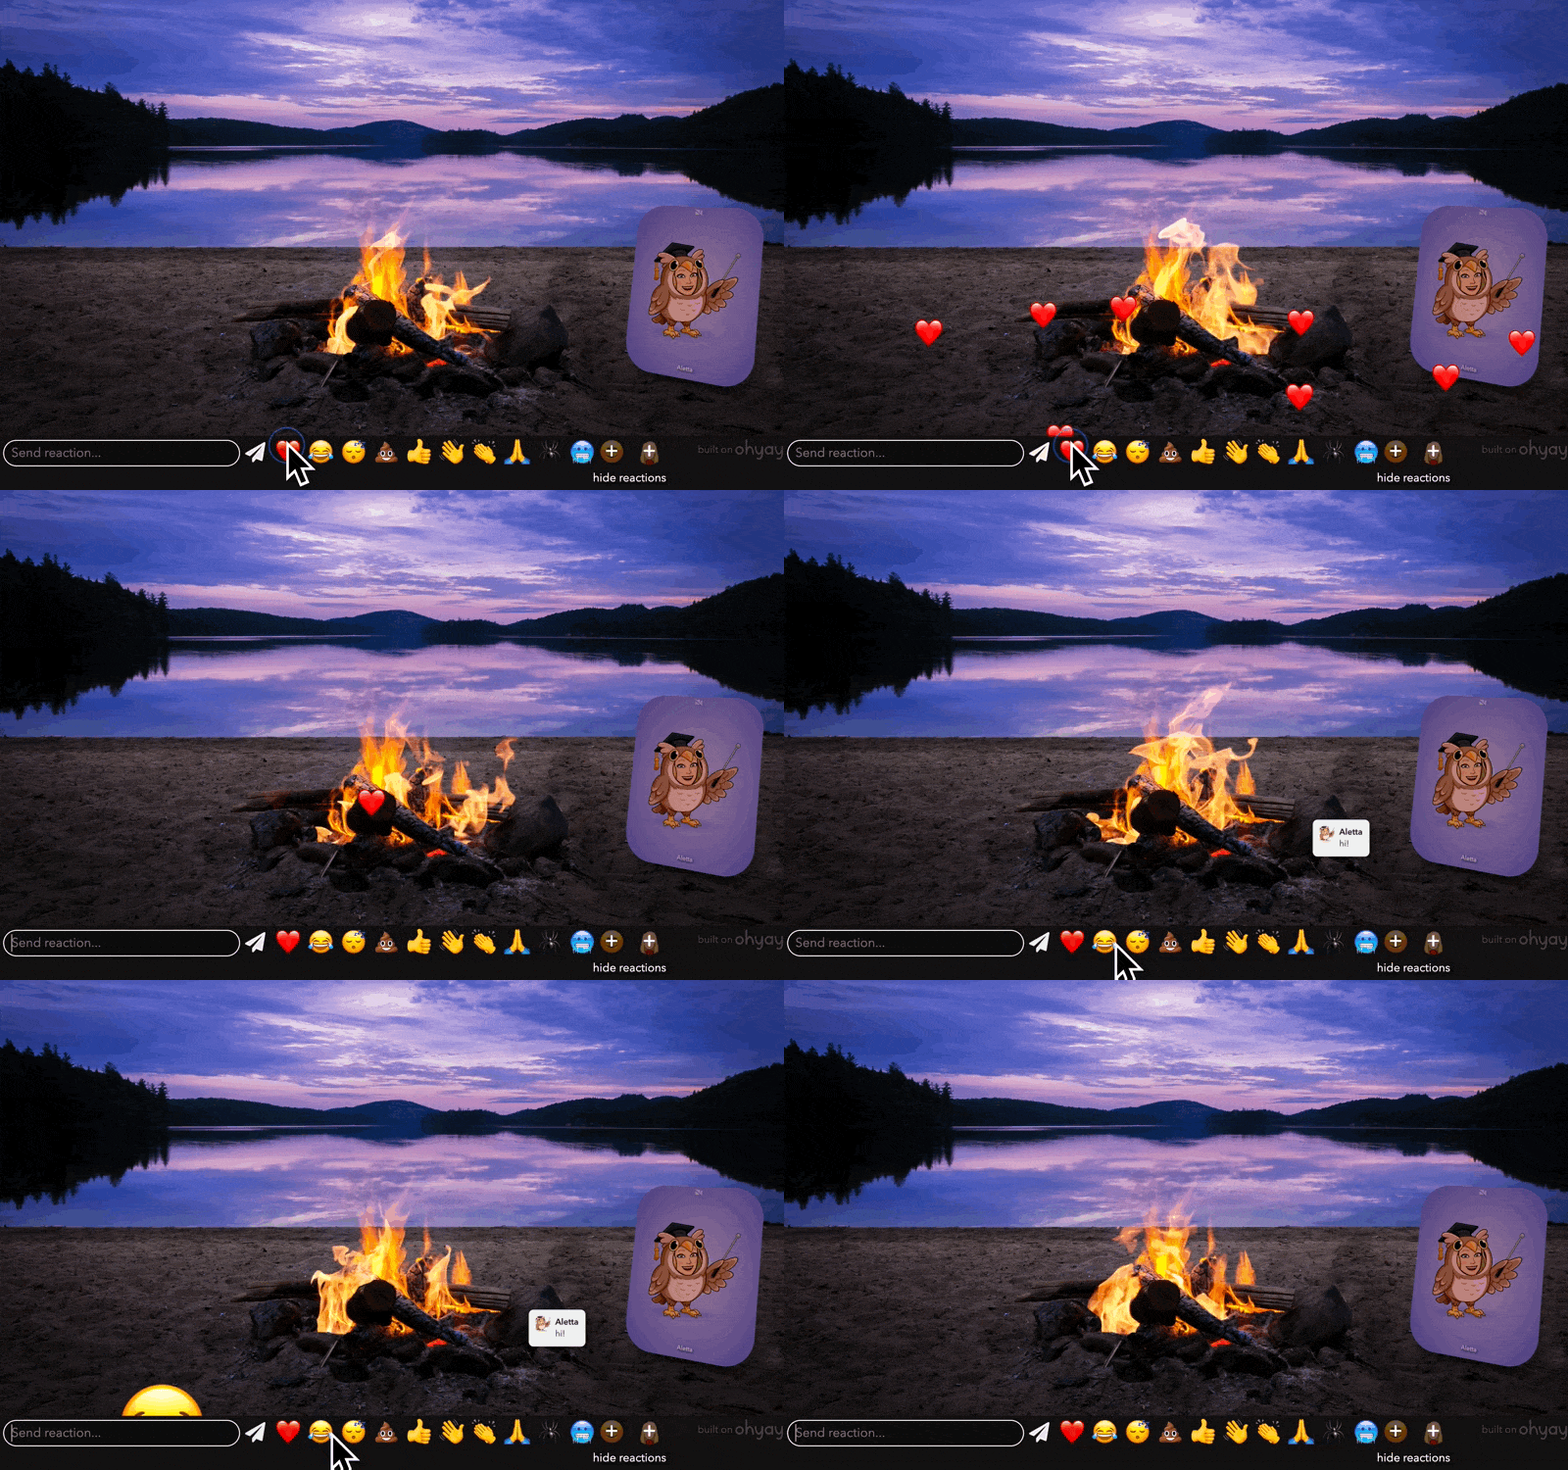
Some reactions even produce sound:
🥶 = sheesh
👏 = applause (hold down for cheering)
🦗 = cricket chirps (perfect for awkward silences)
🥁 = drum roll
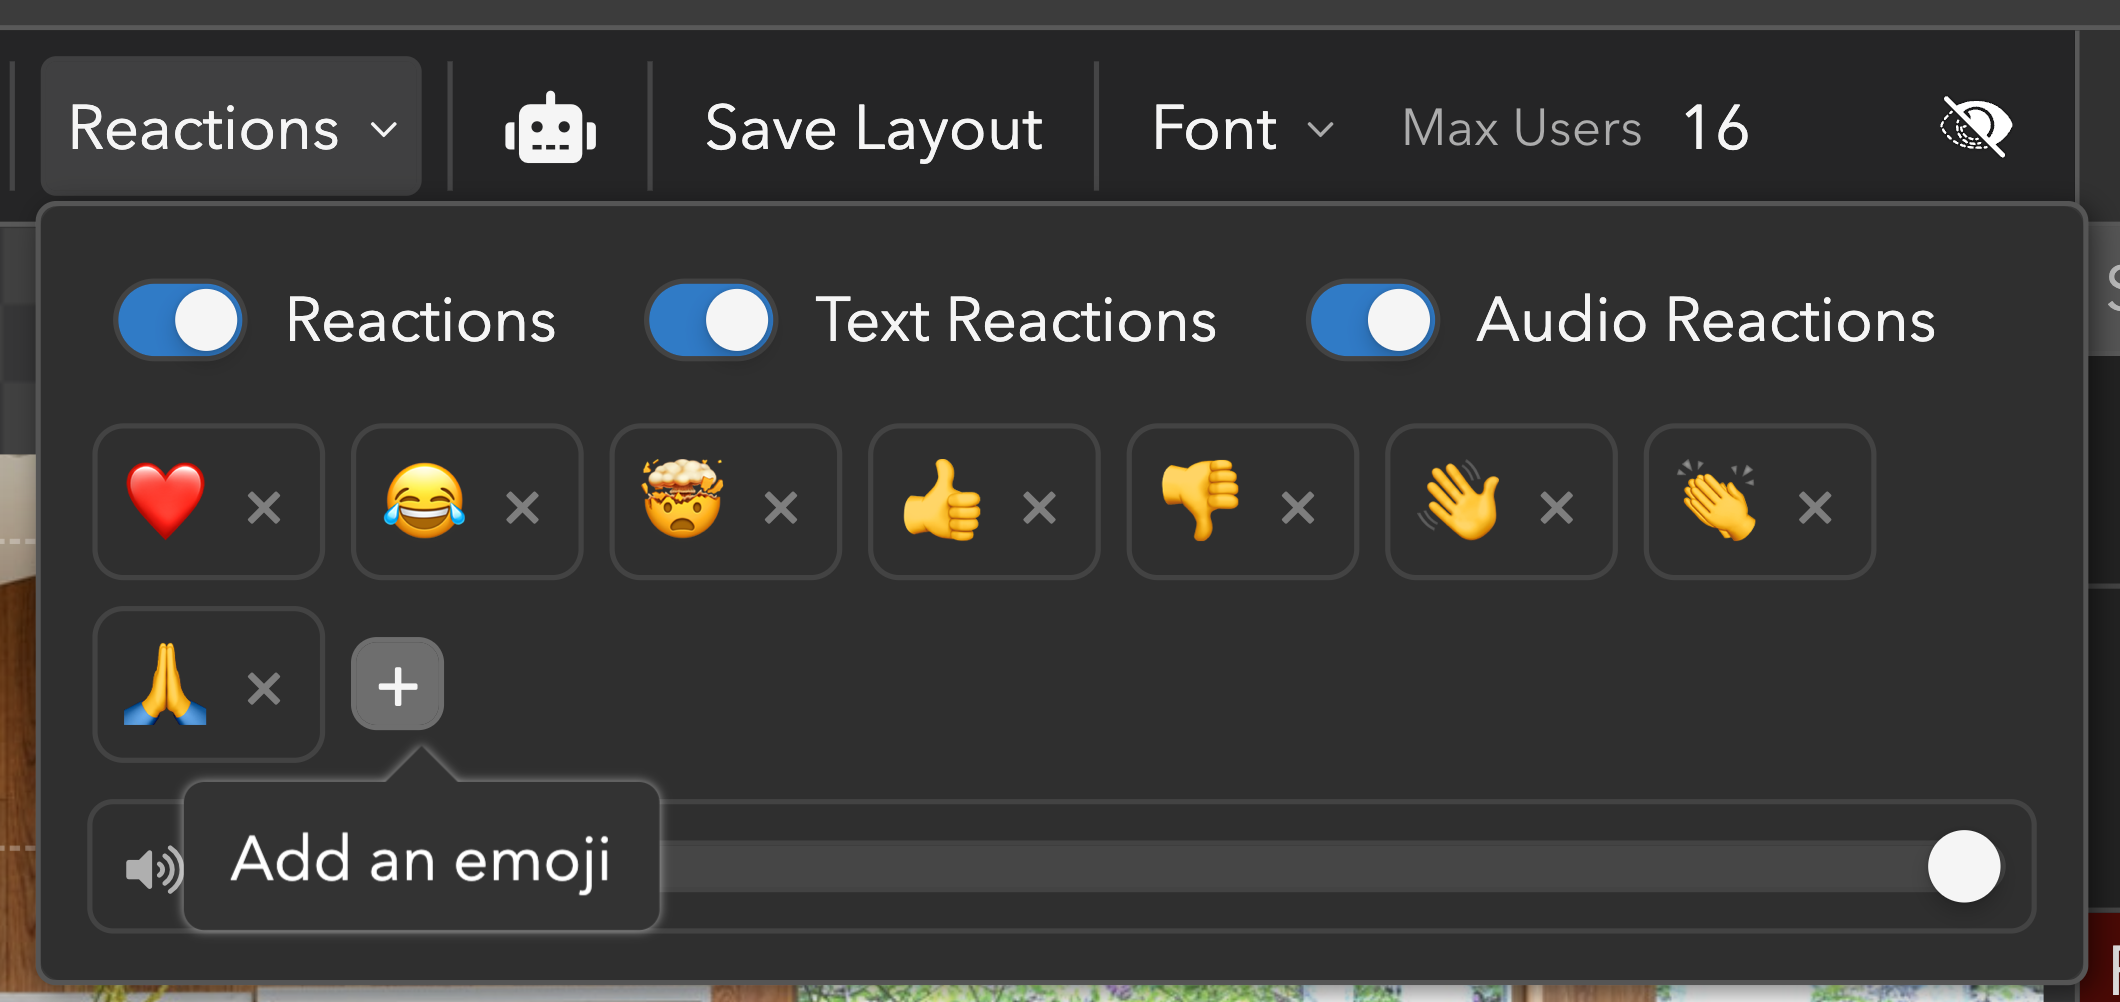
The default emojis that appear in every ohyay room are ❤️😂🤯👍👎👋👏🙏 but you can customize them by following these steps:
-
Click on the room (or part of the room canvas that doesn’t have an element) to ensure that the room is selected.
-
Click on the Reactions dropdown in the toolbar (next to Music).
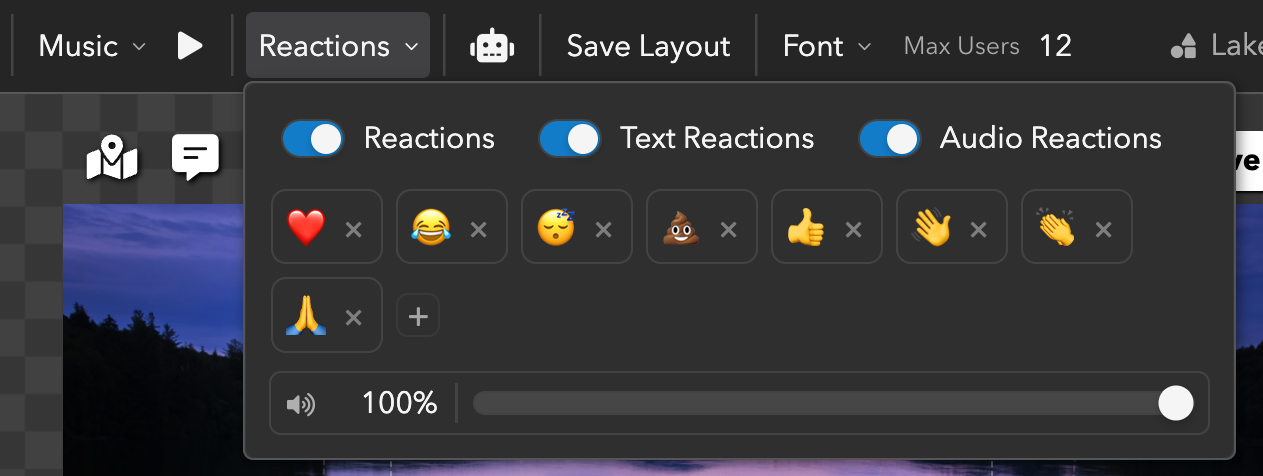
- Upload new reaction emojis by clicking on the
to the right of the box, opening up the emoji picker, and selecting emojis.
You can also click directly into the reactions box to delete and switch the order of the reaction emojis.
Adding Elements
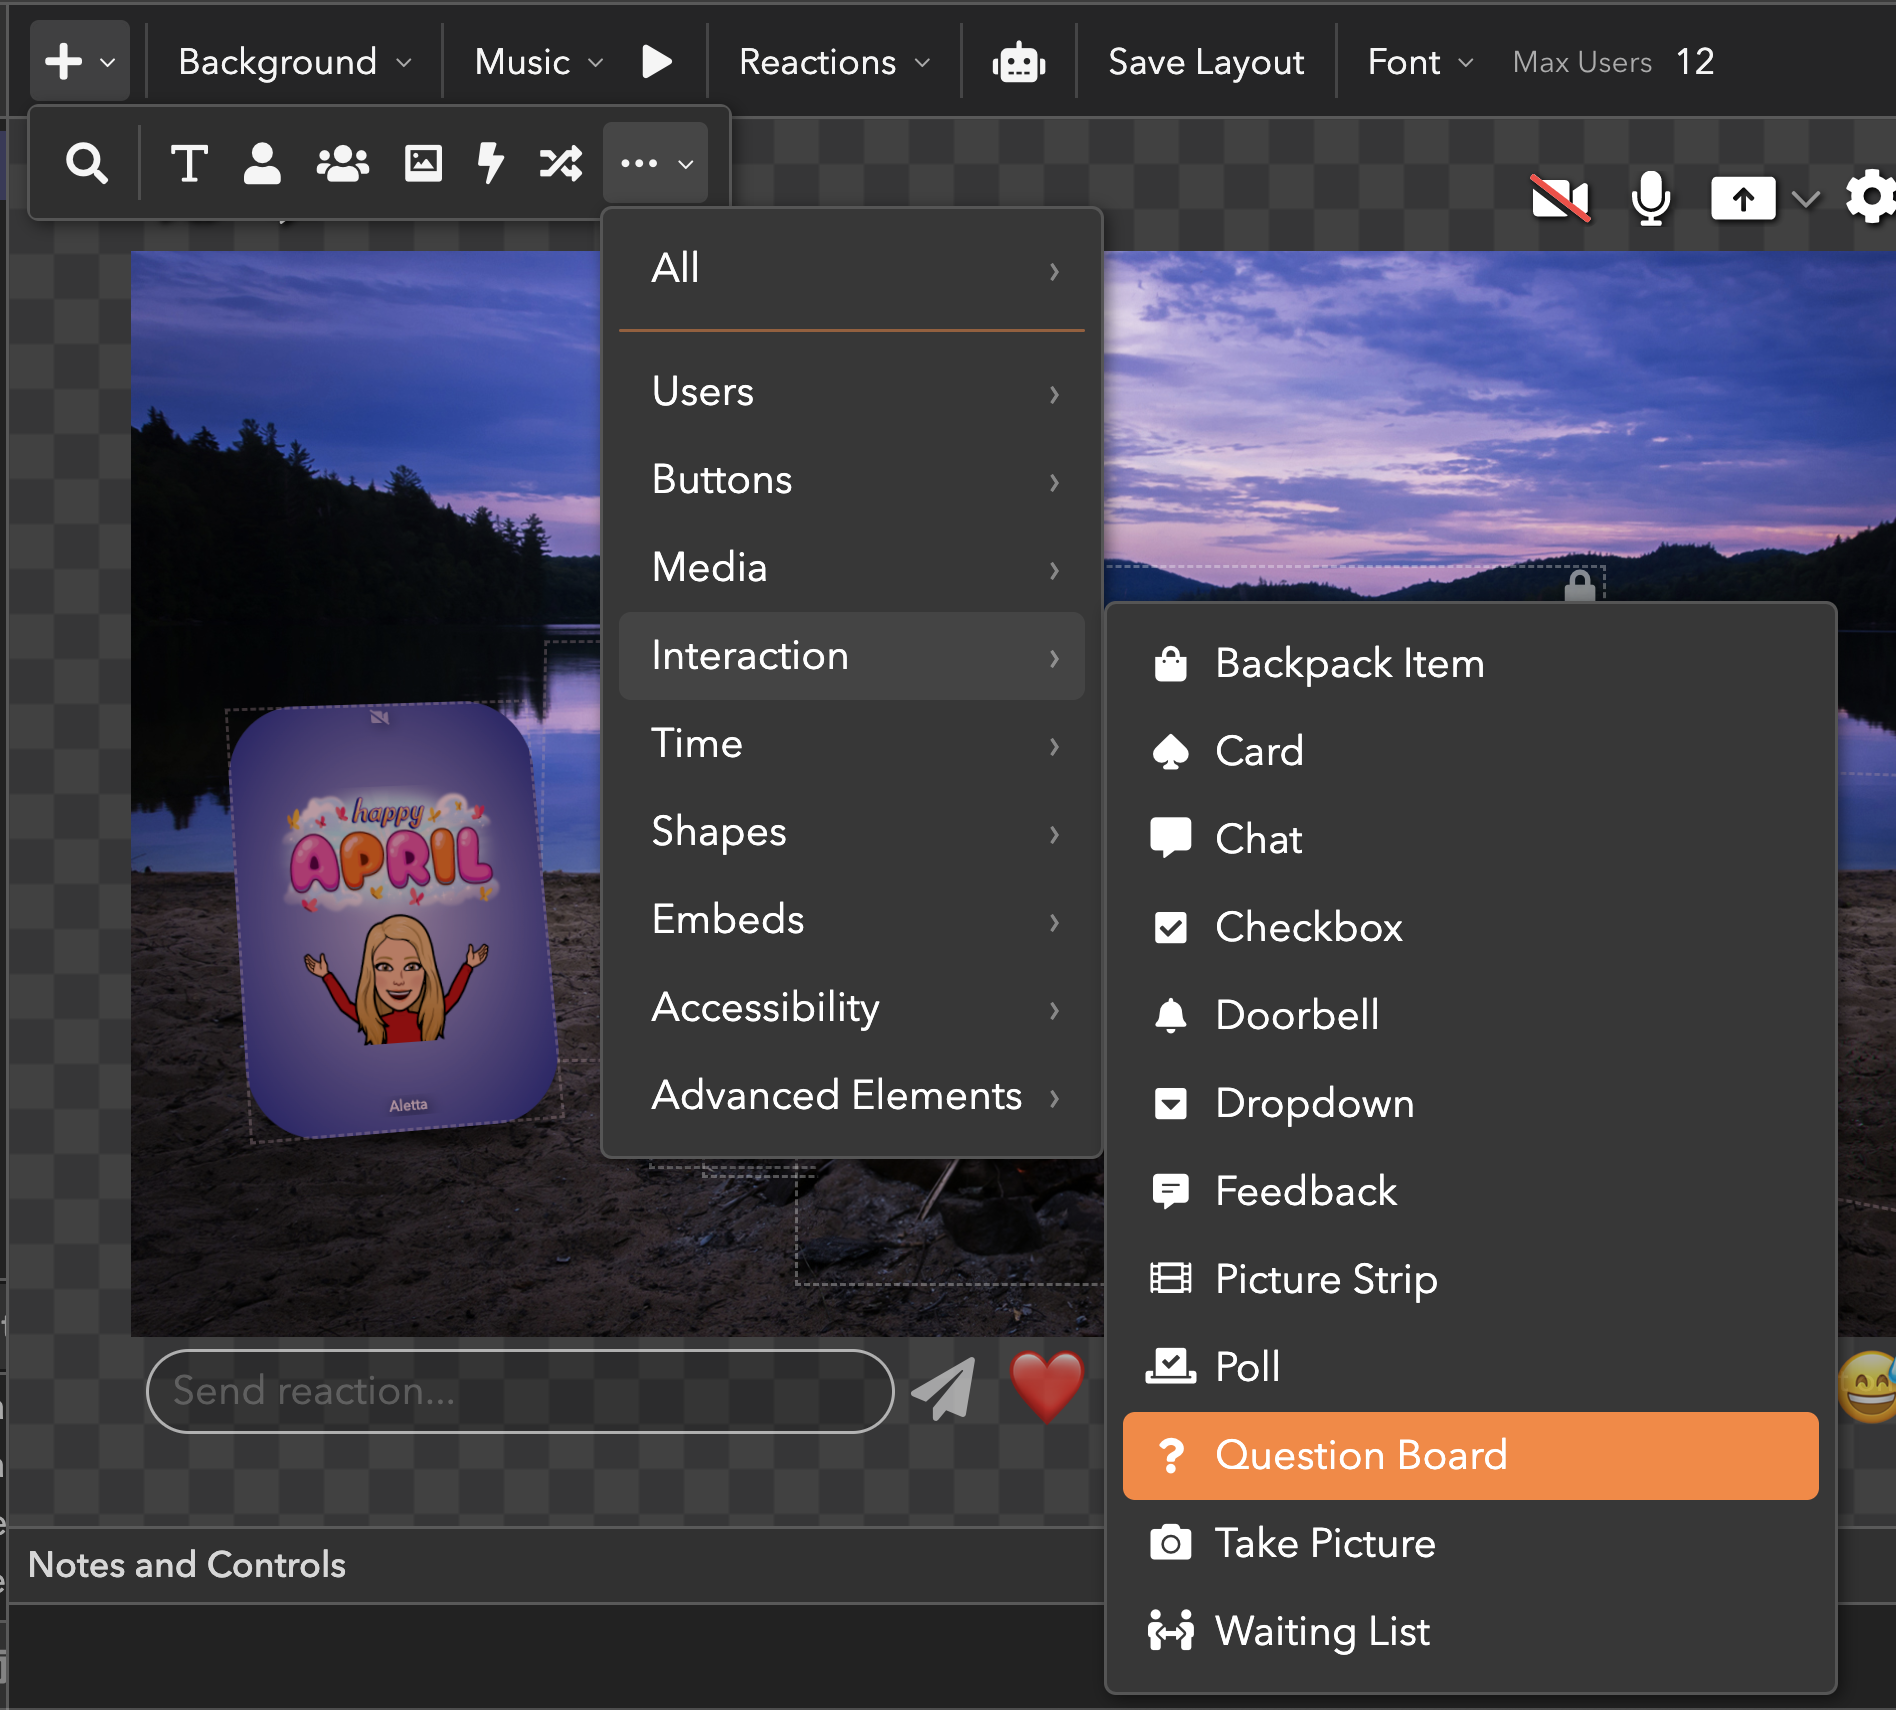
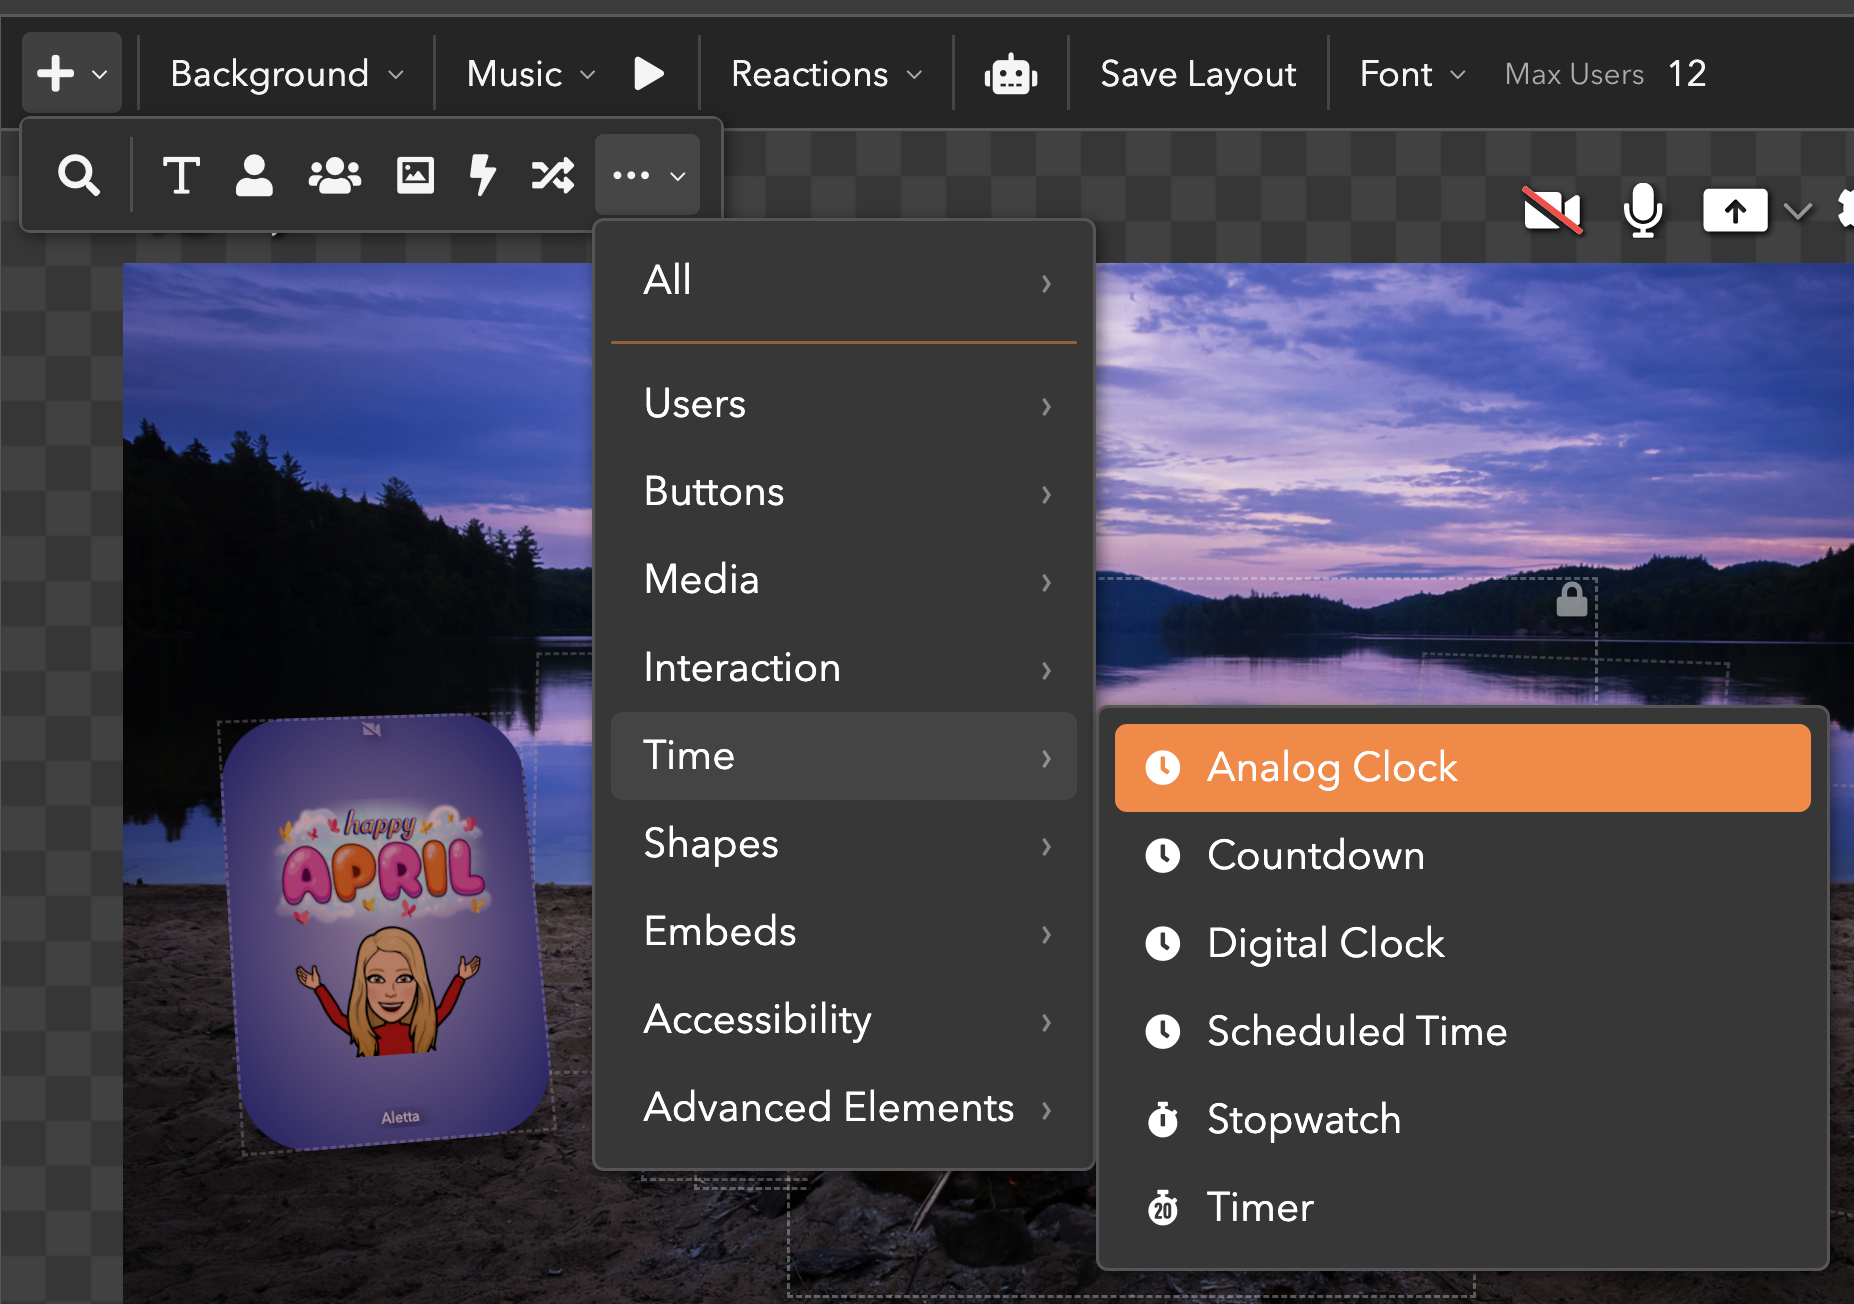
Music and reactions are just a few examples of how you can make your ohyay workspace interactive. To see other customizable elements you can add:
- Go to the
in the toolbar.
- Click on the
.
- Select All.
You can also explore elements by navigating the categories in the dropdown (e.g. Users, Buttons, Media, etc).
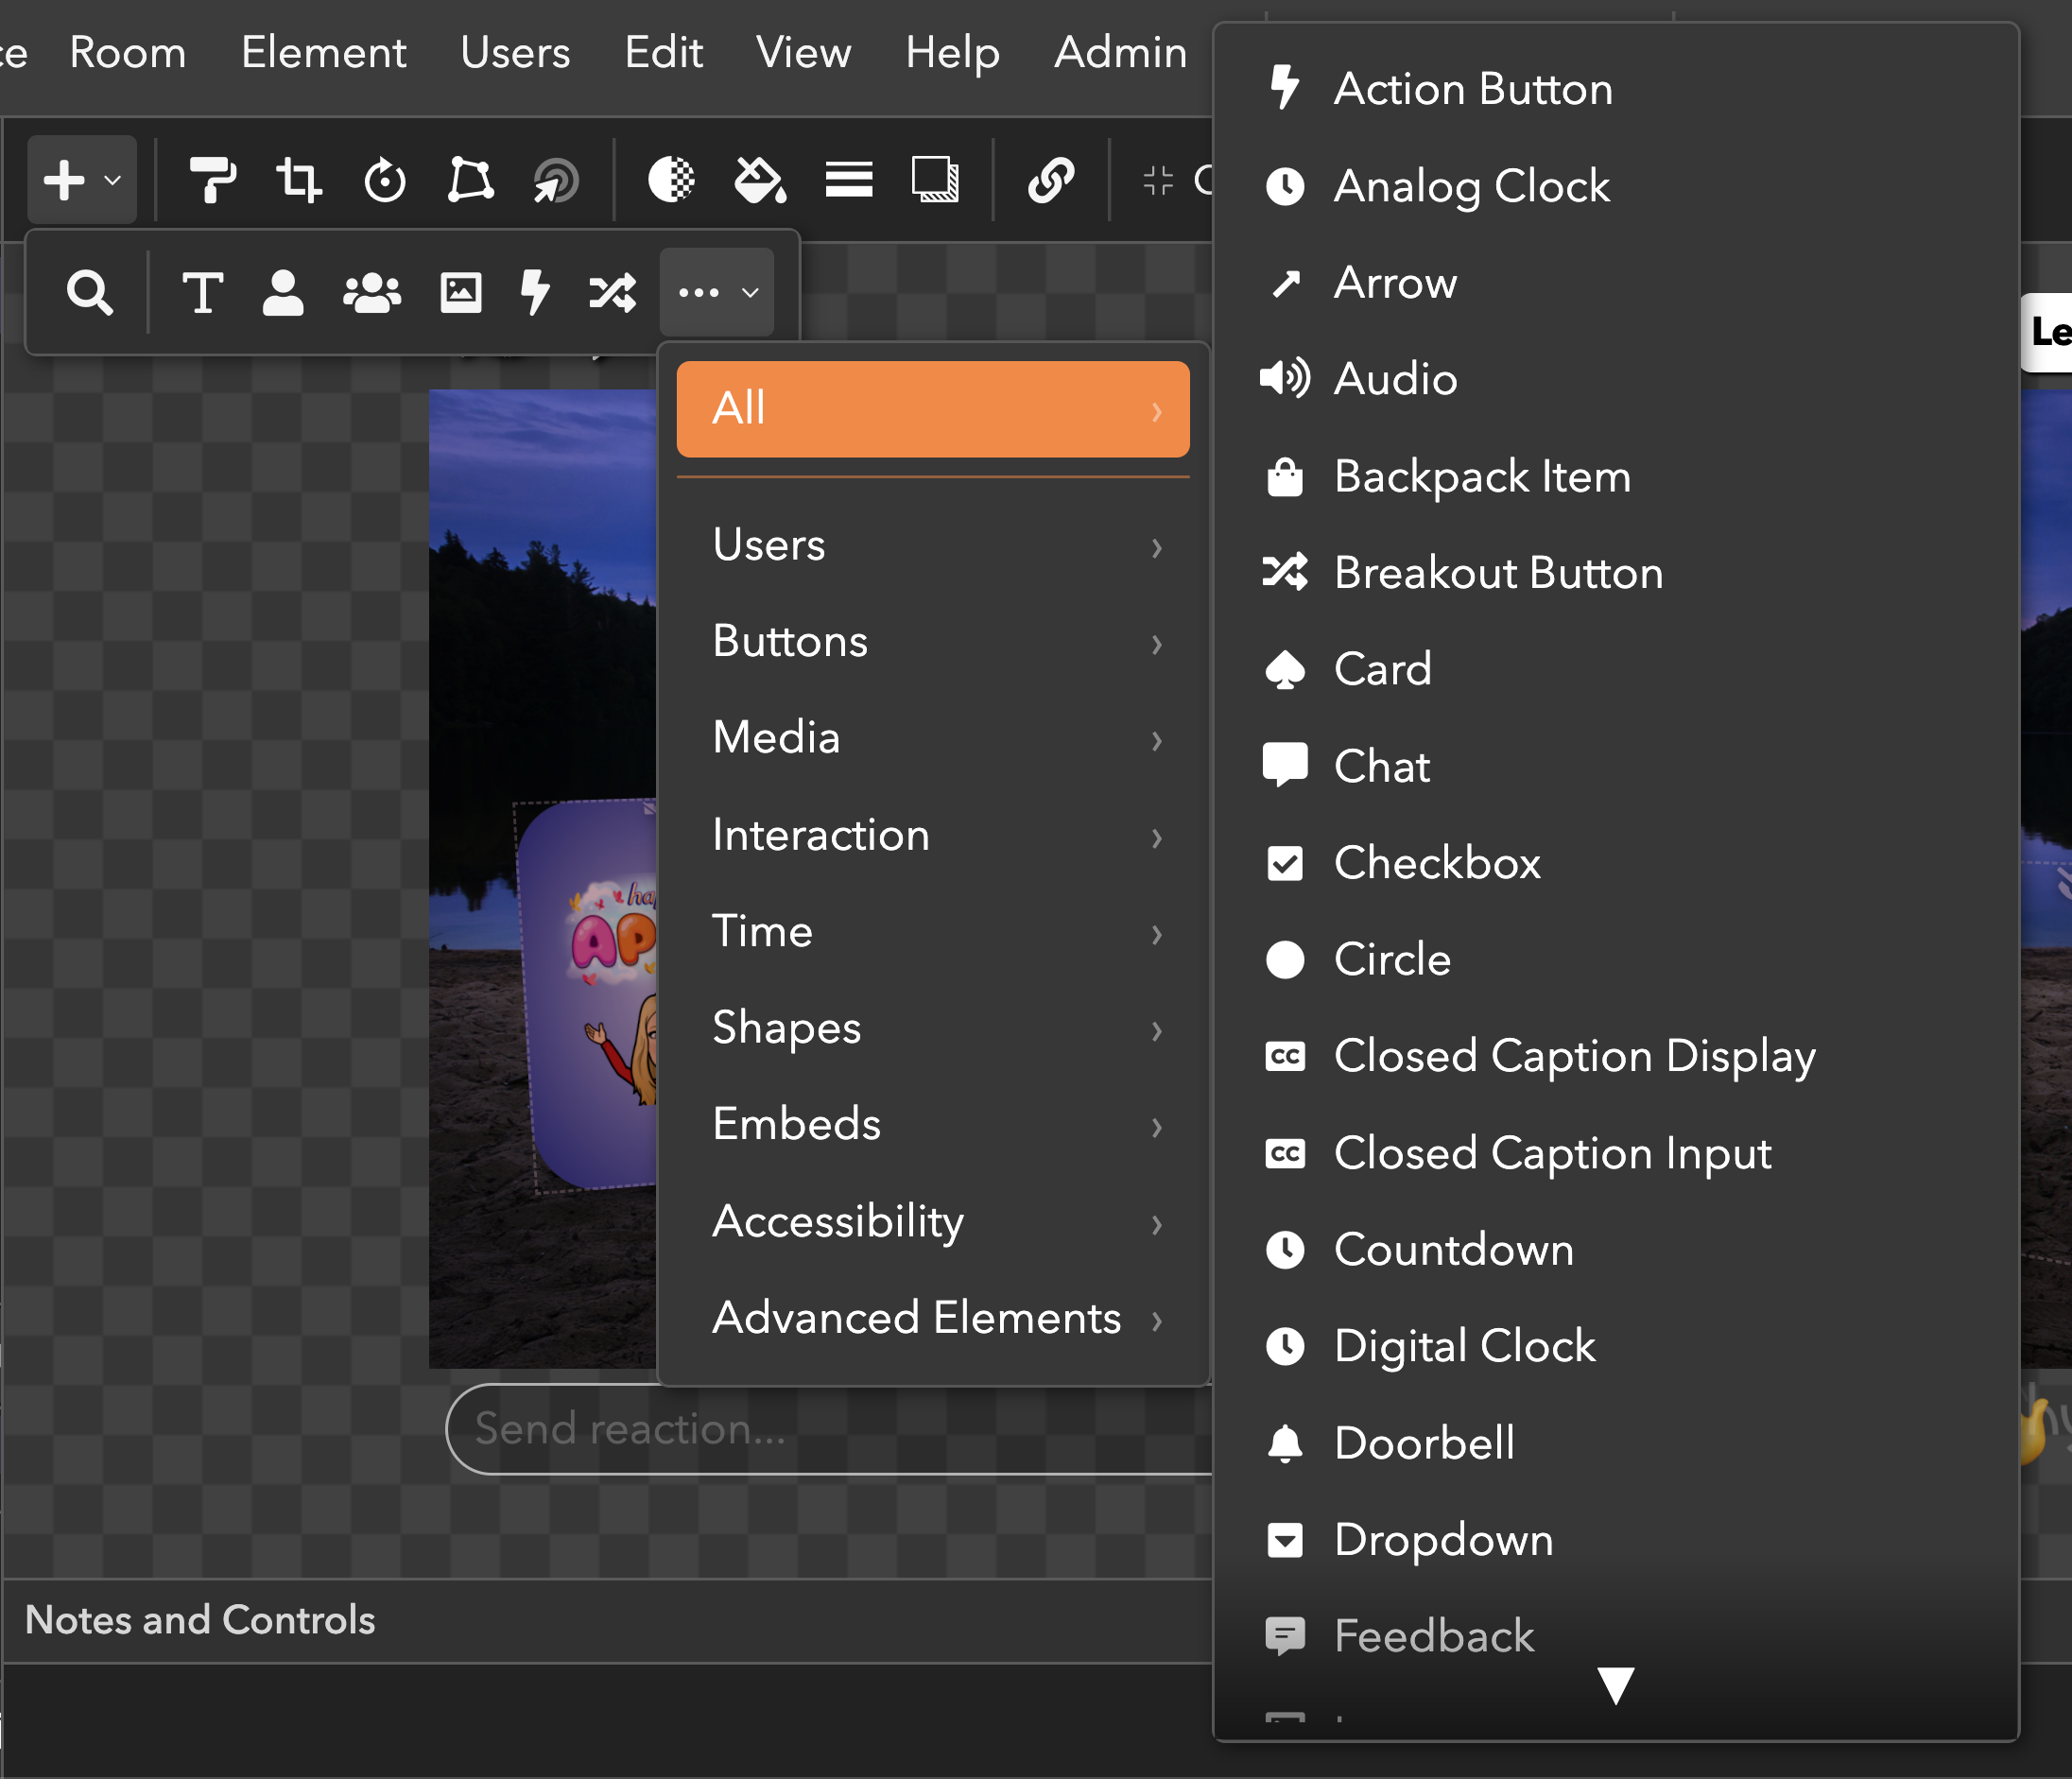
Here are some of the most popular elements:
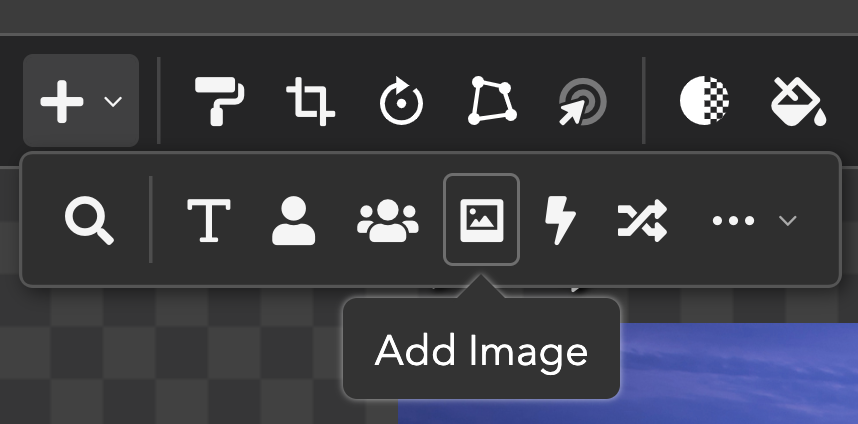
- Image: A visual asset from your asset library, computer, or Google Drive.
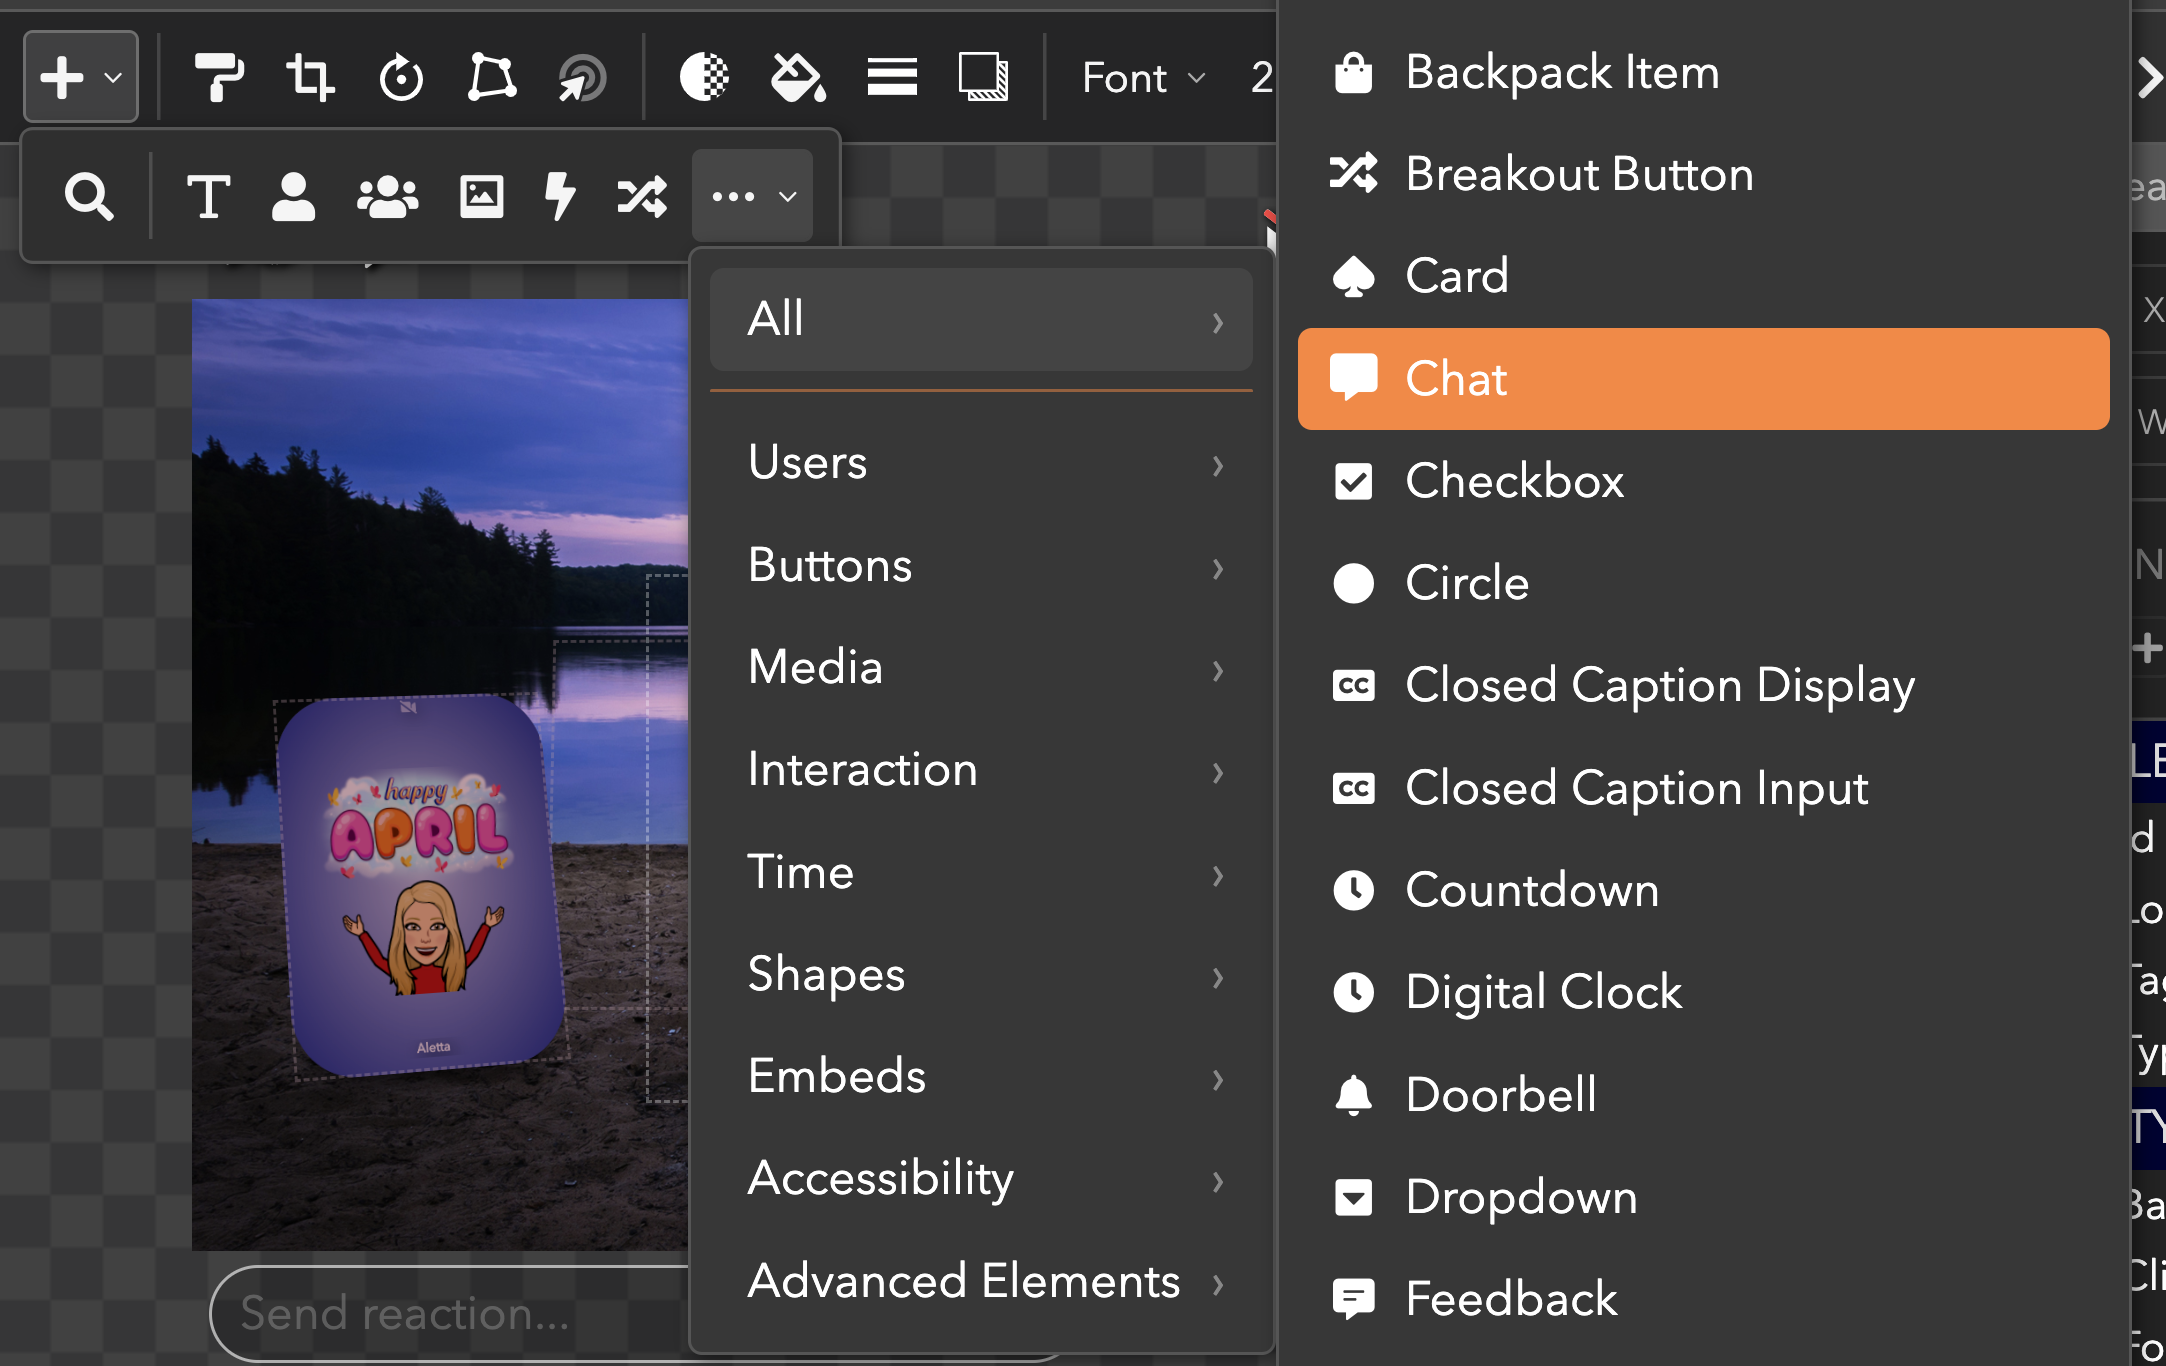
- Chat: A chat box that you can add instead of (or in addition to) the chat bar on the left-hand side.
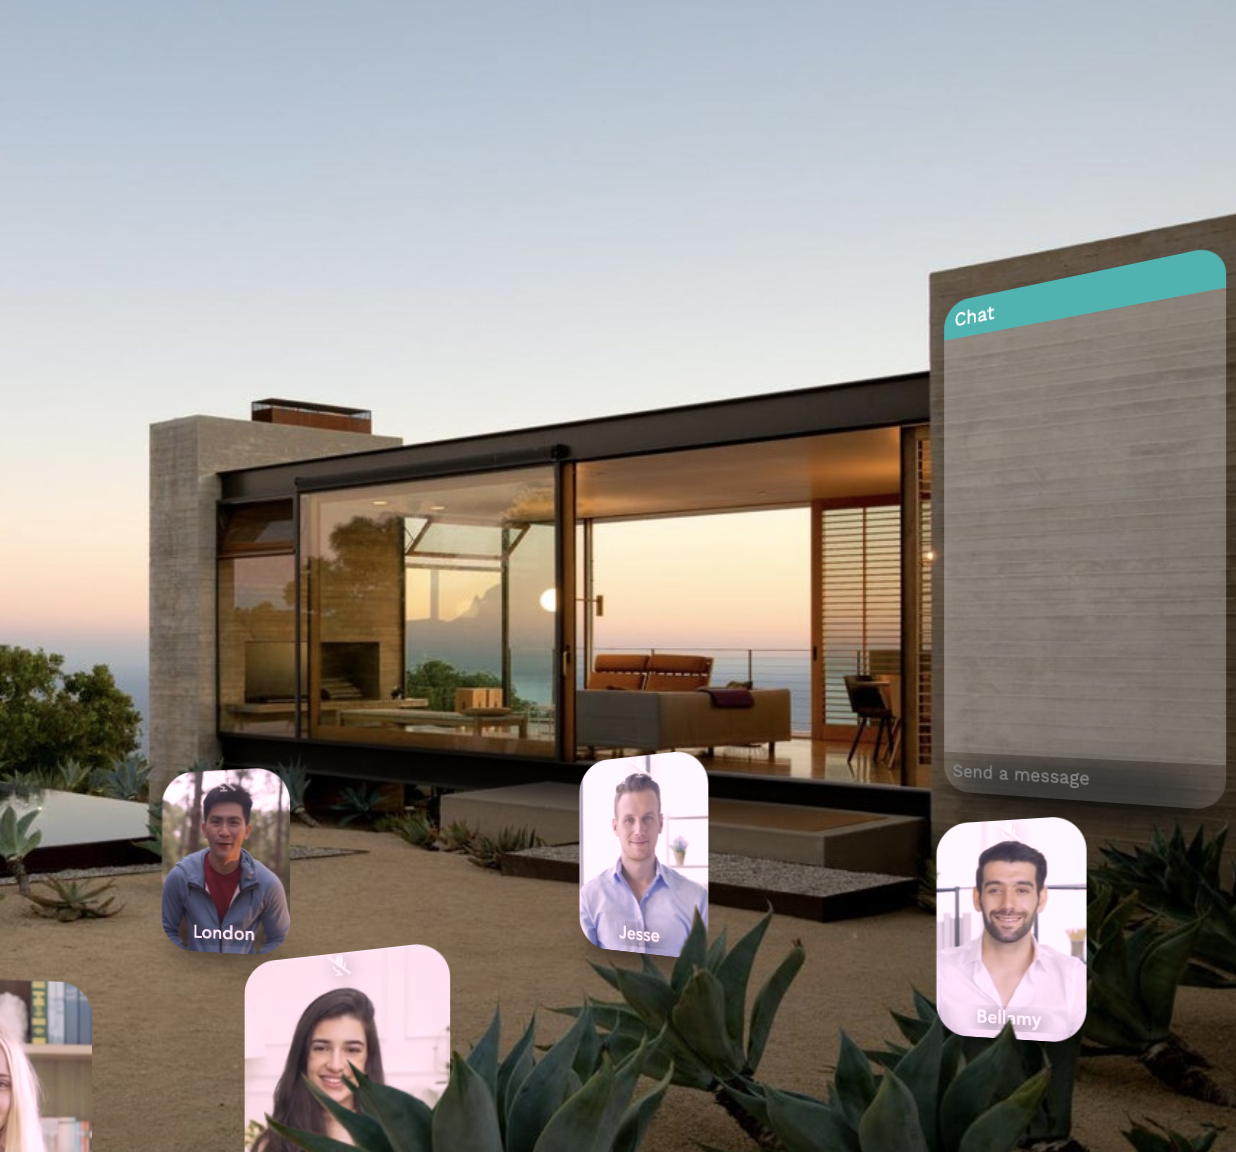
Example of a chat element blended in with a wall
- Question Board: Allow users to submit questions to a question board during a panel.
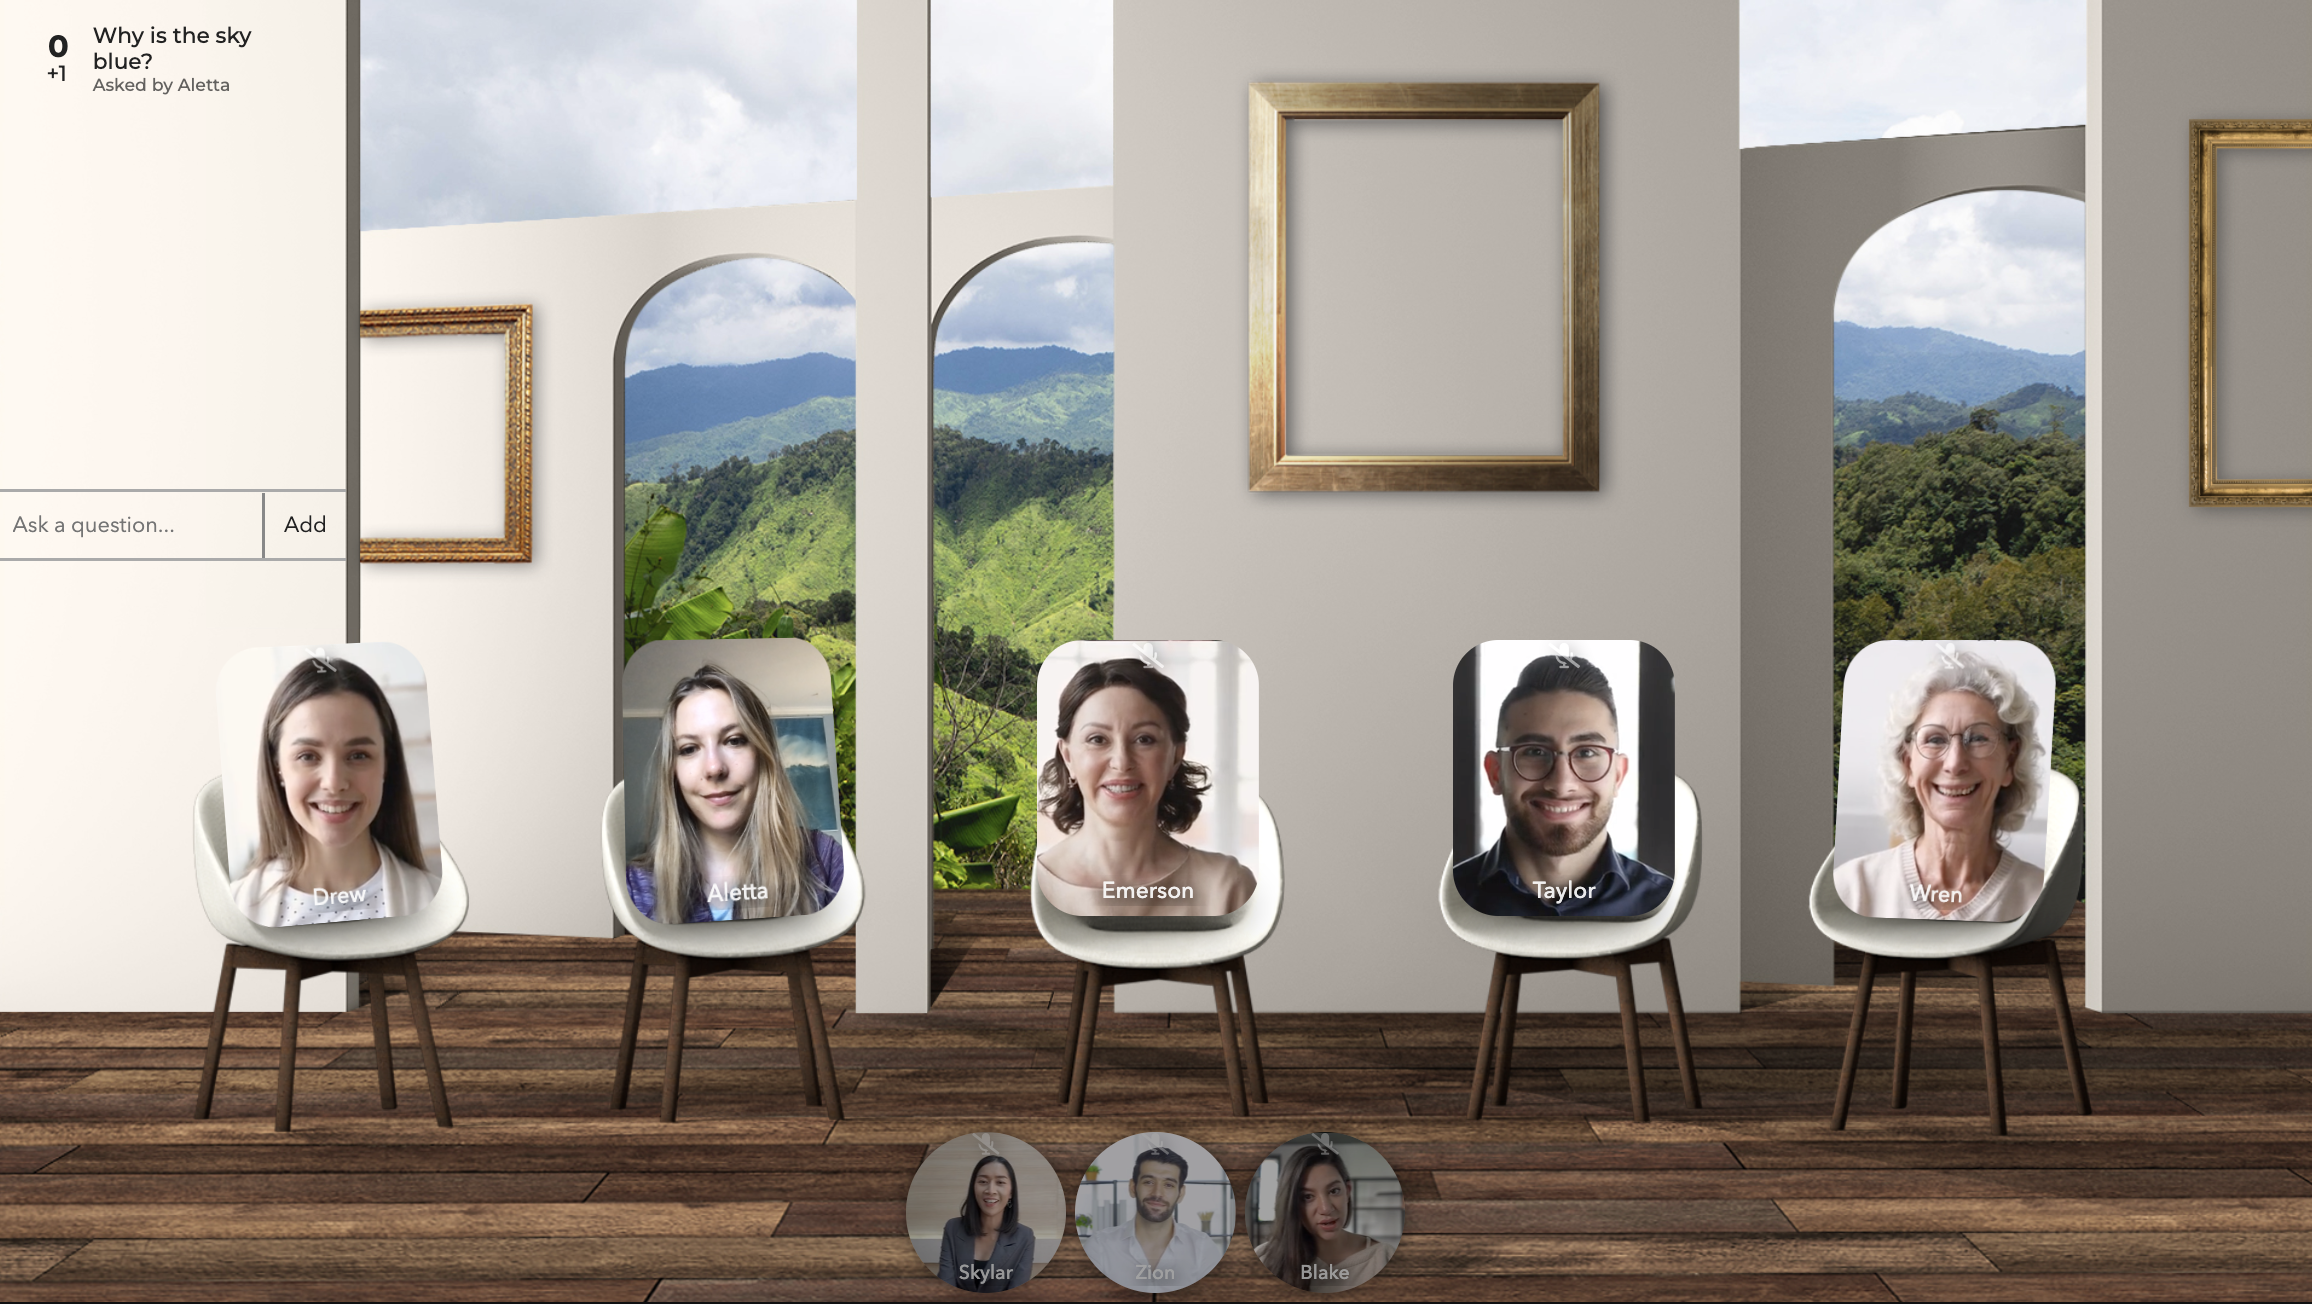
Example of a question board in the top left of this panel room
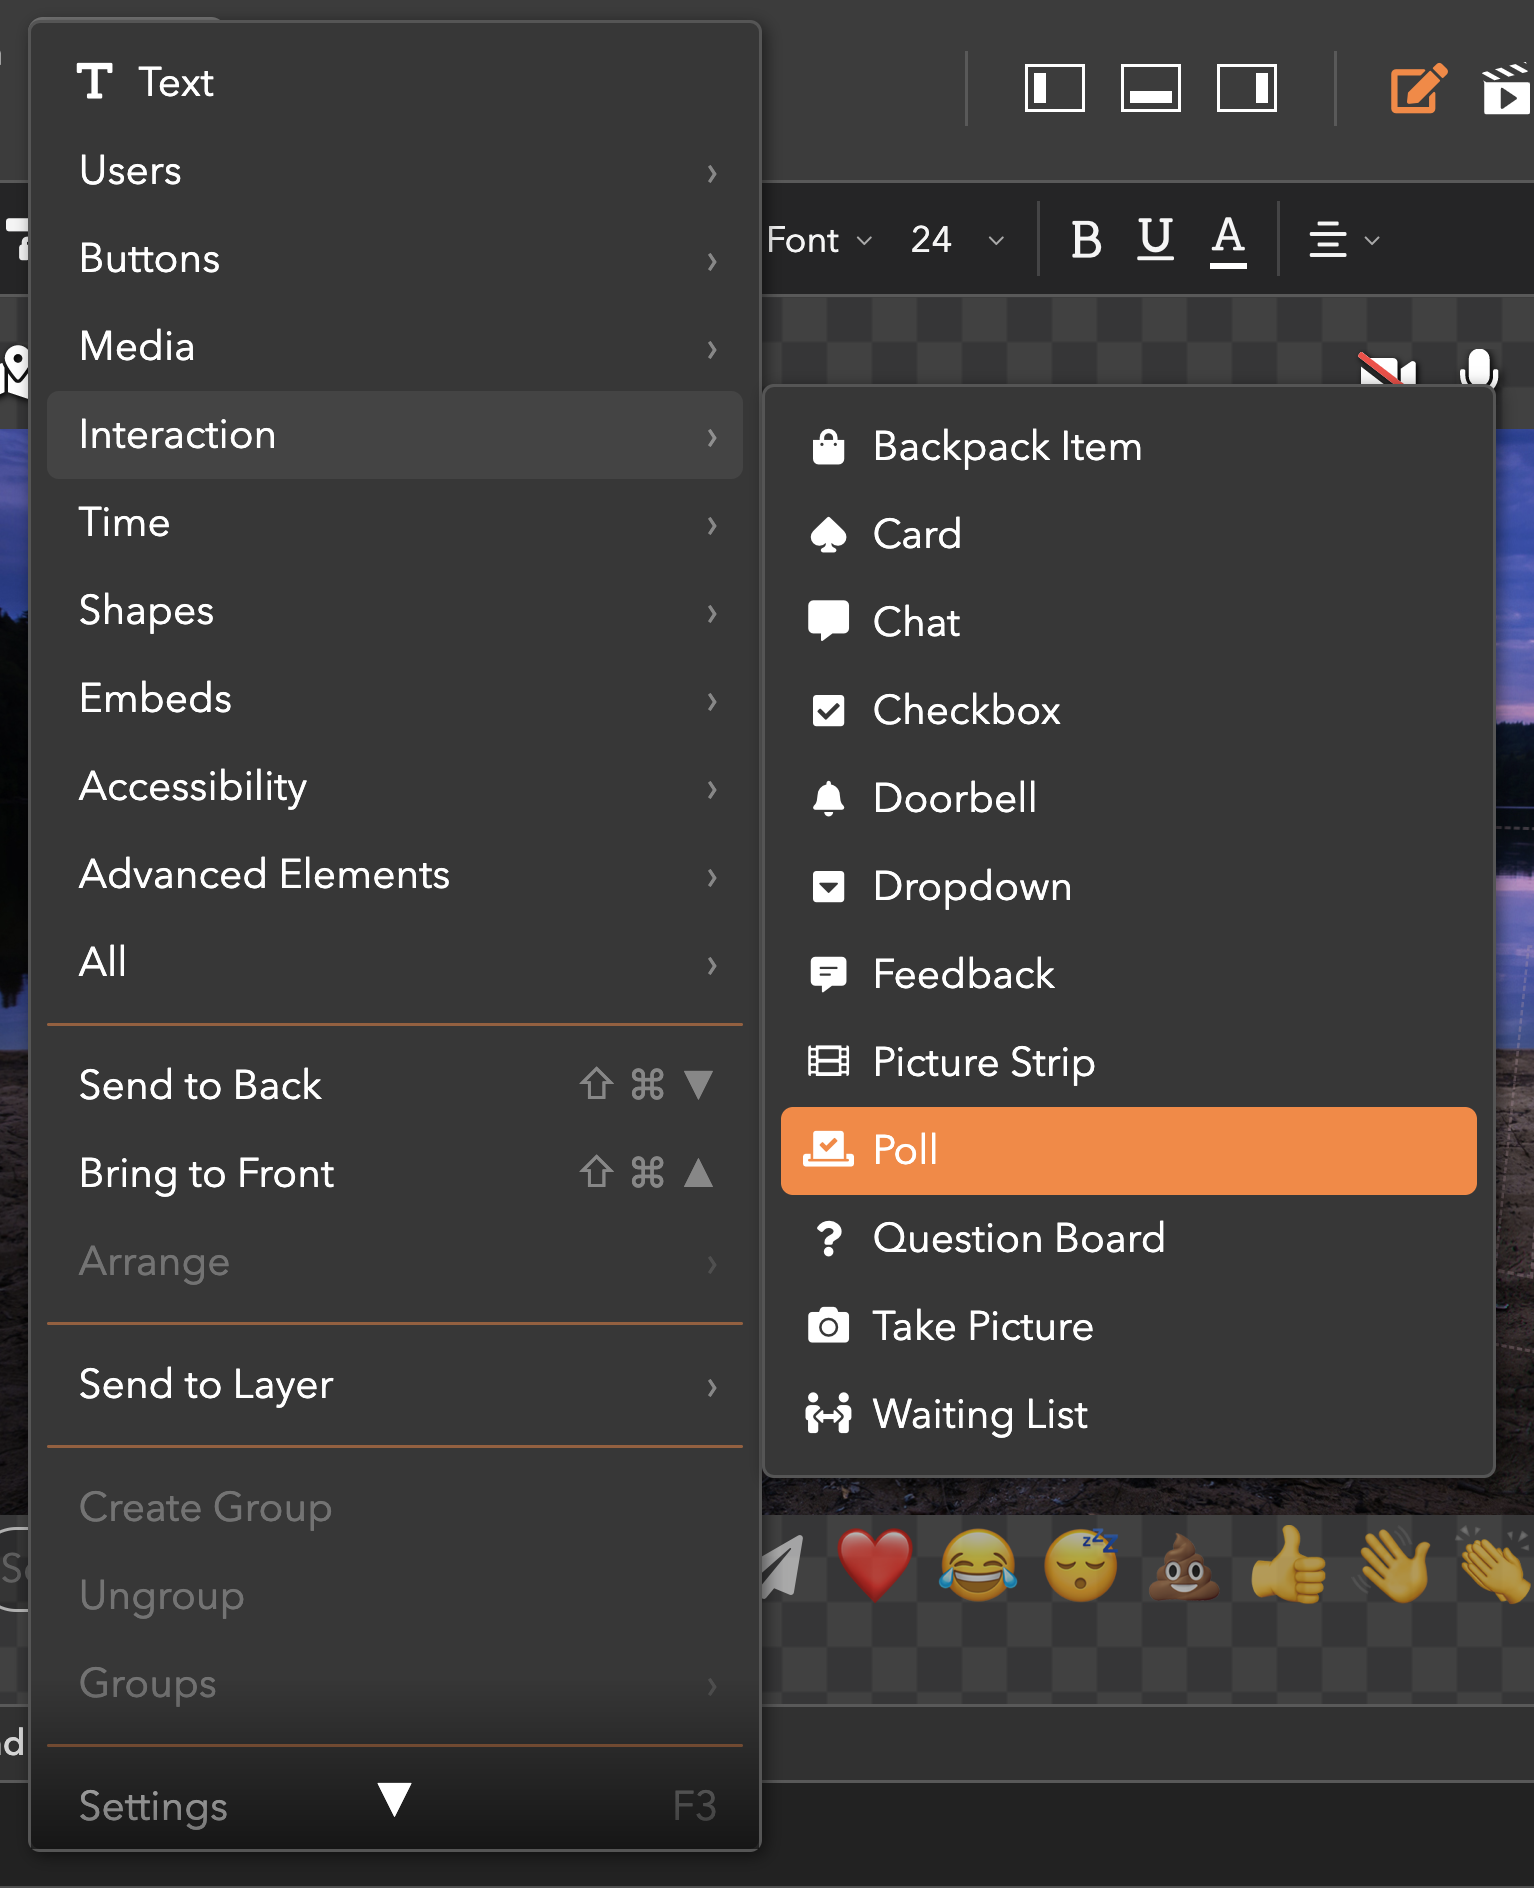
- Poll: Allow users to respond to a poll (by default, the options are “yes” and “no.”)
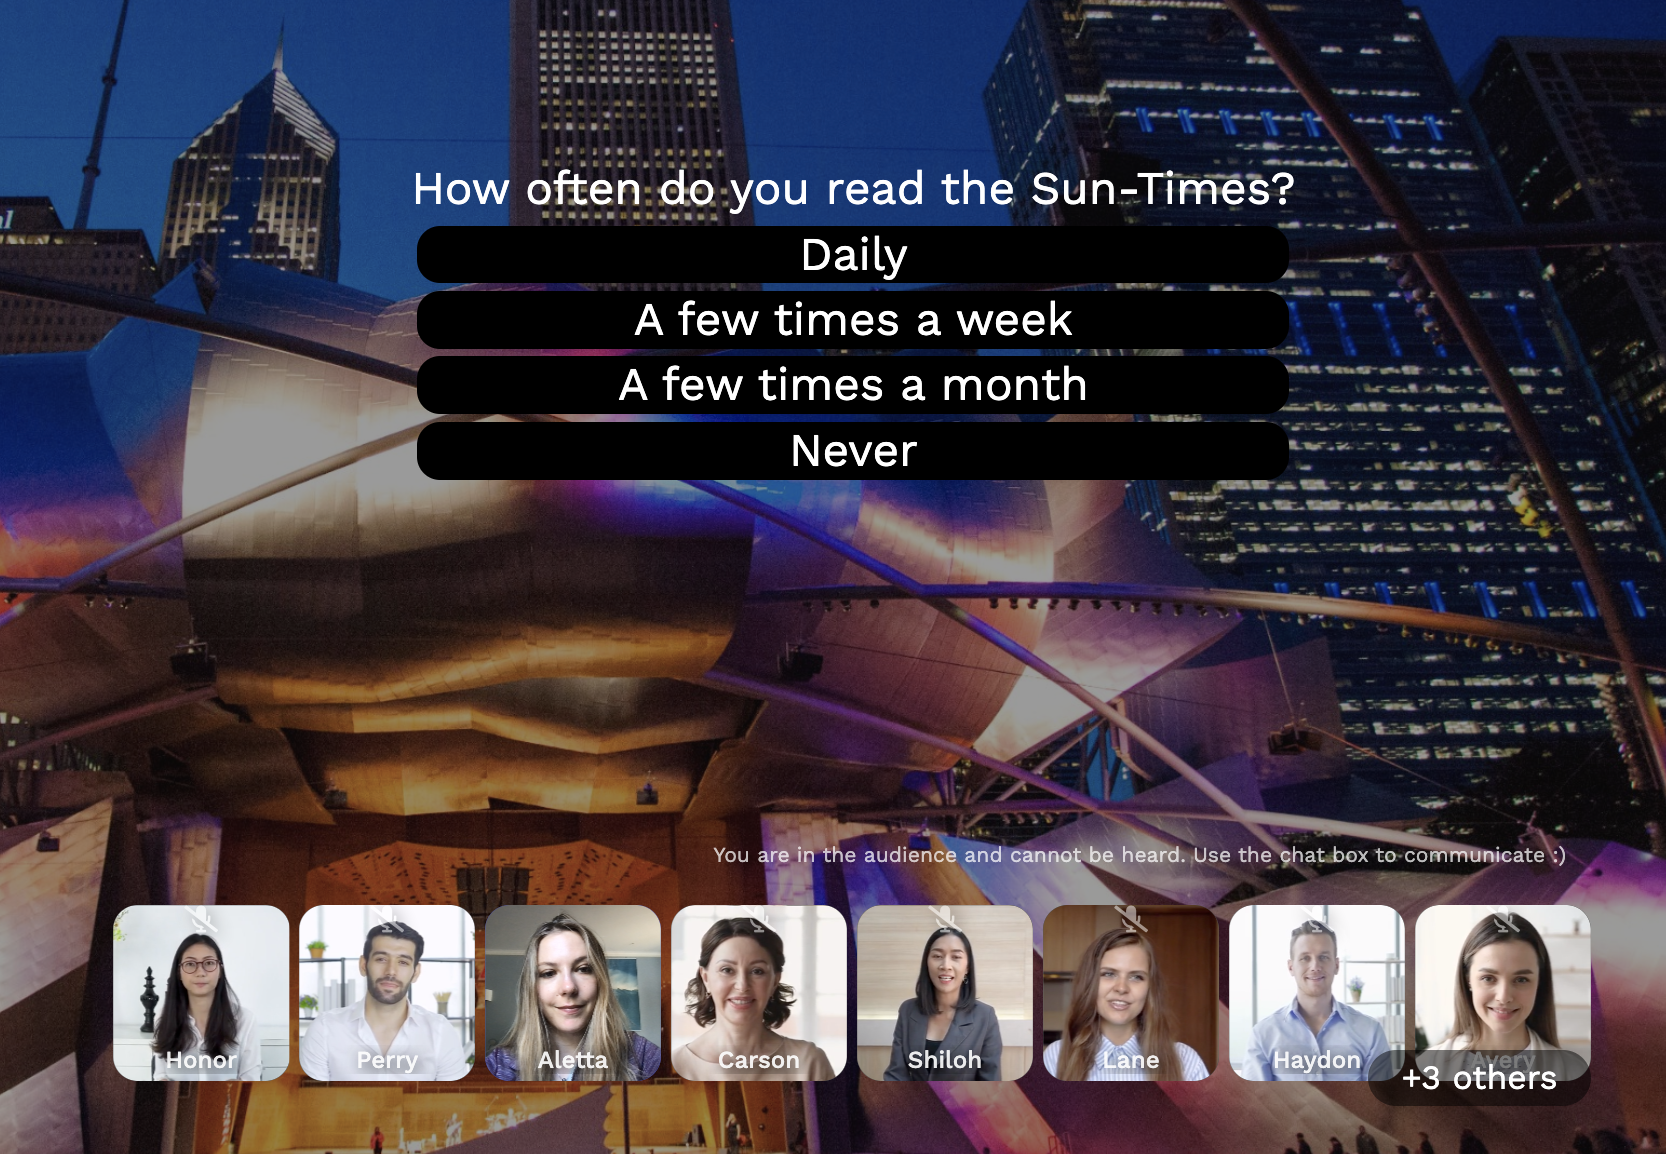
Example of a poll that audience members responded to after an event
For now, try adding an Analog Clock by going to the > Time > Analog Clock.
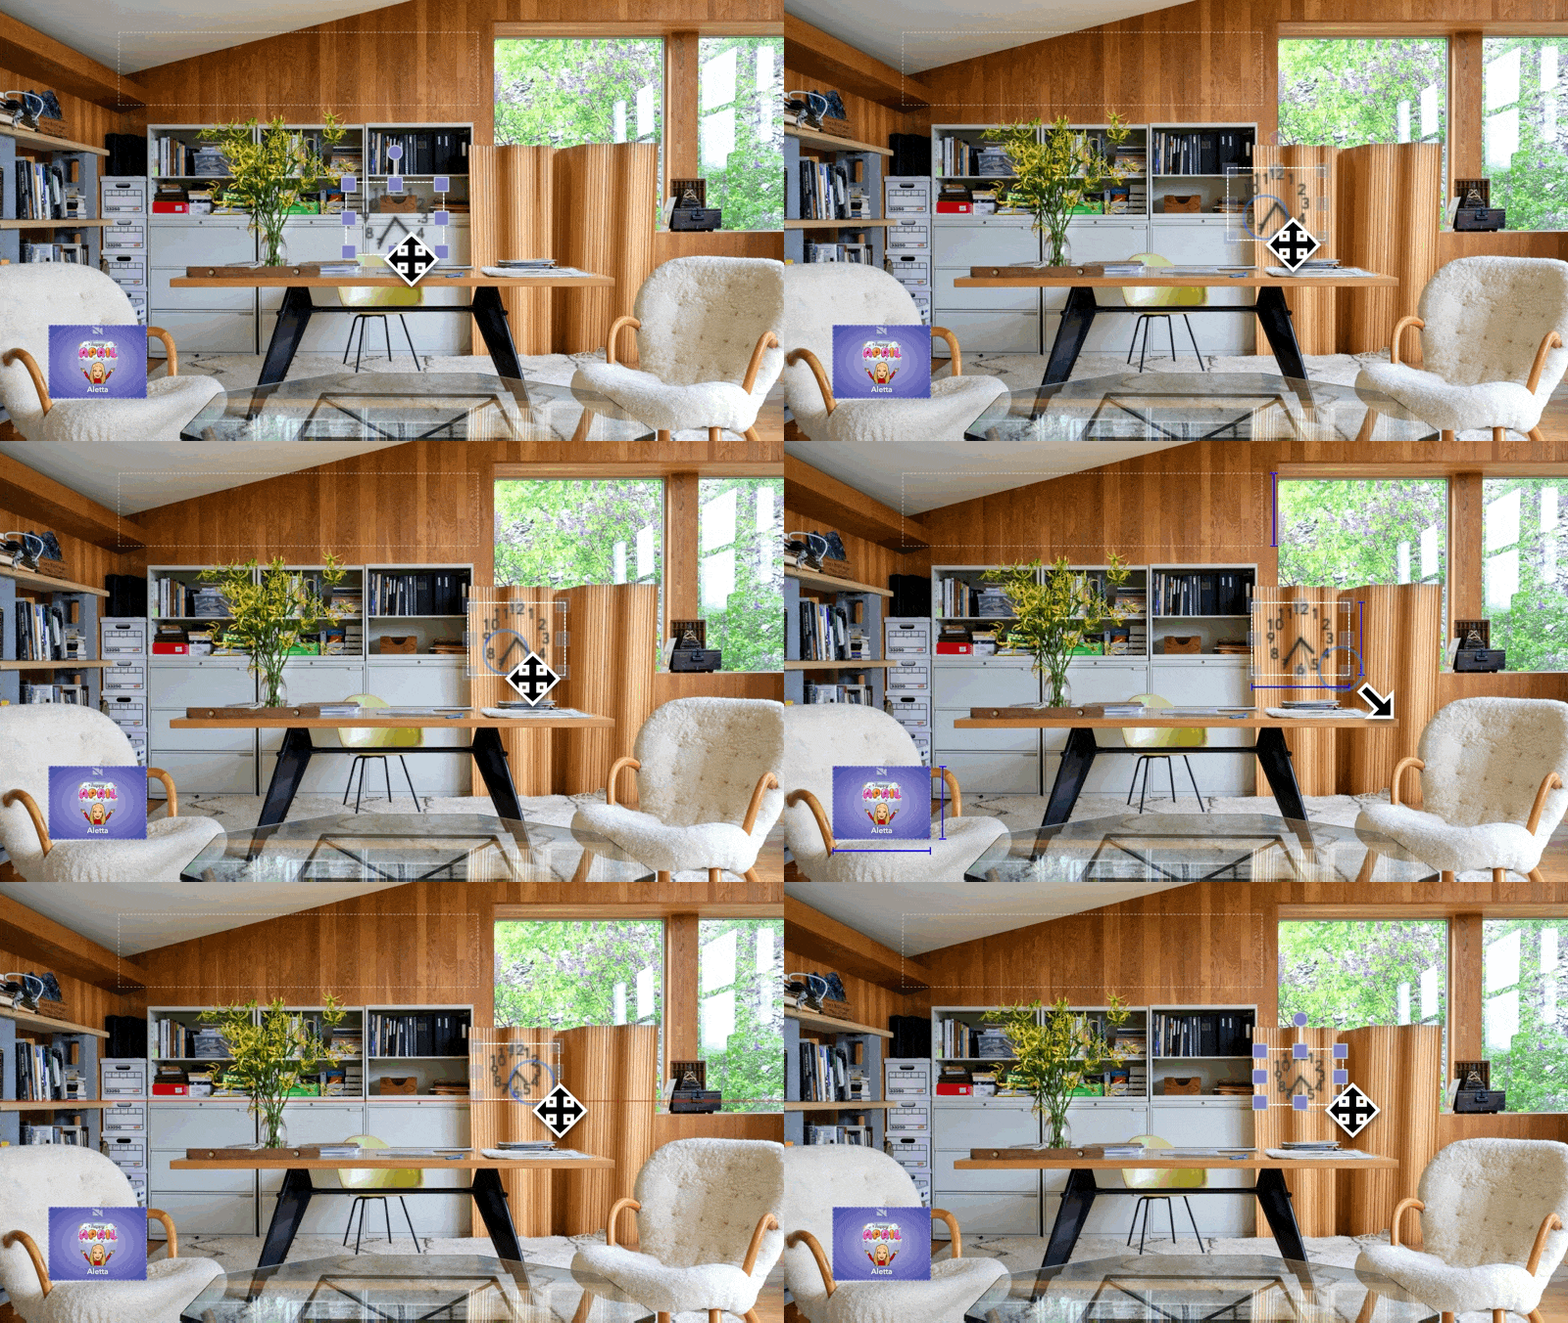
When you click on the clock, you’ll see different ways to edit it in the toolbar. We’ll learn what each of those toolbar icons mean in the next section.
Learn more about all of the available elements and how to use them using our Elements docs.
Adding test bots
Remember the user slot that you added to the chair? Now, using the toolbar, we’re going to style it and make it look like they’re part of your room.
It is easier to see your edits if you drag test bots into slots. Test bots, like their name implies, are used for testing out what you’ve created in ohyay. You’ll notice that they look and act like real users. They have names, mute states, and even the ability to talk.
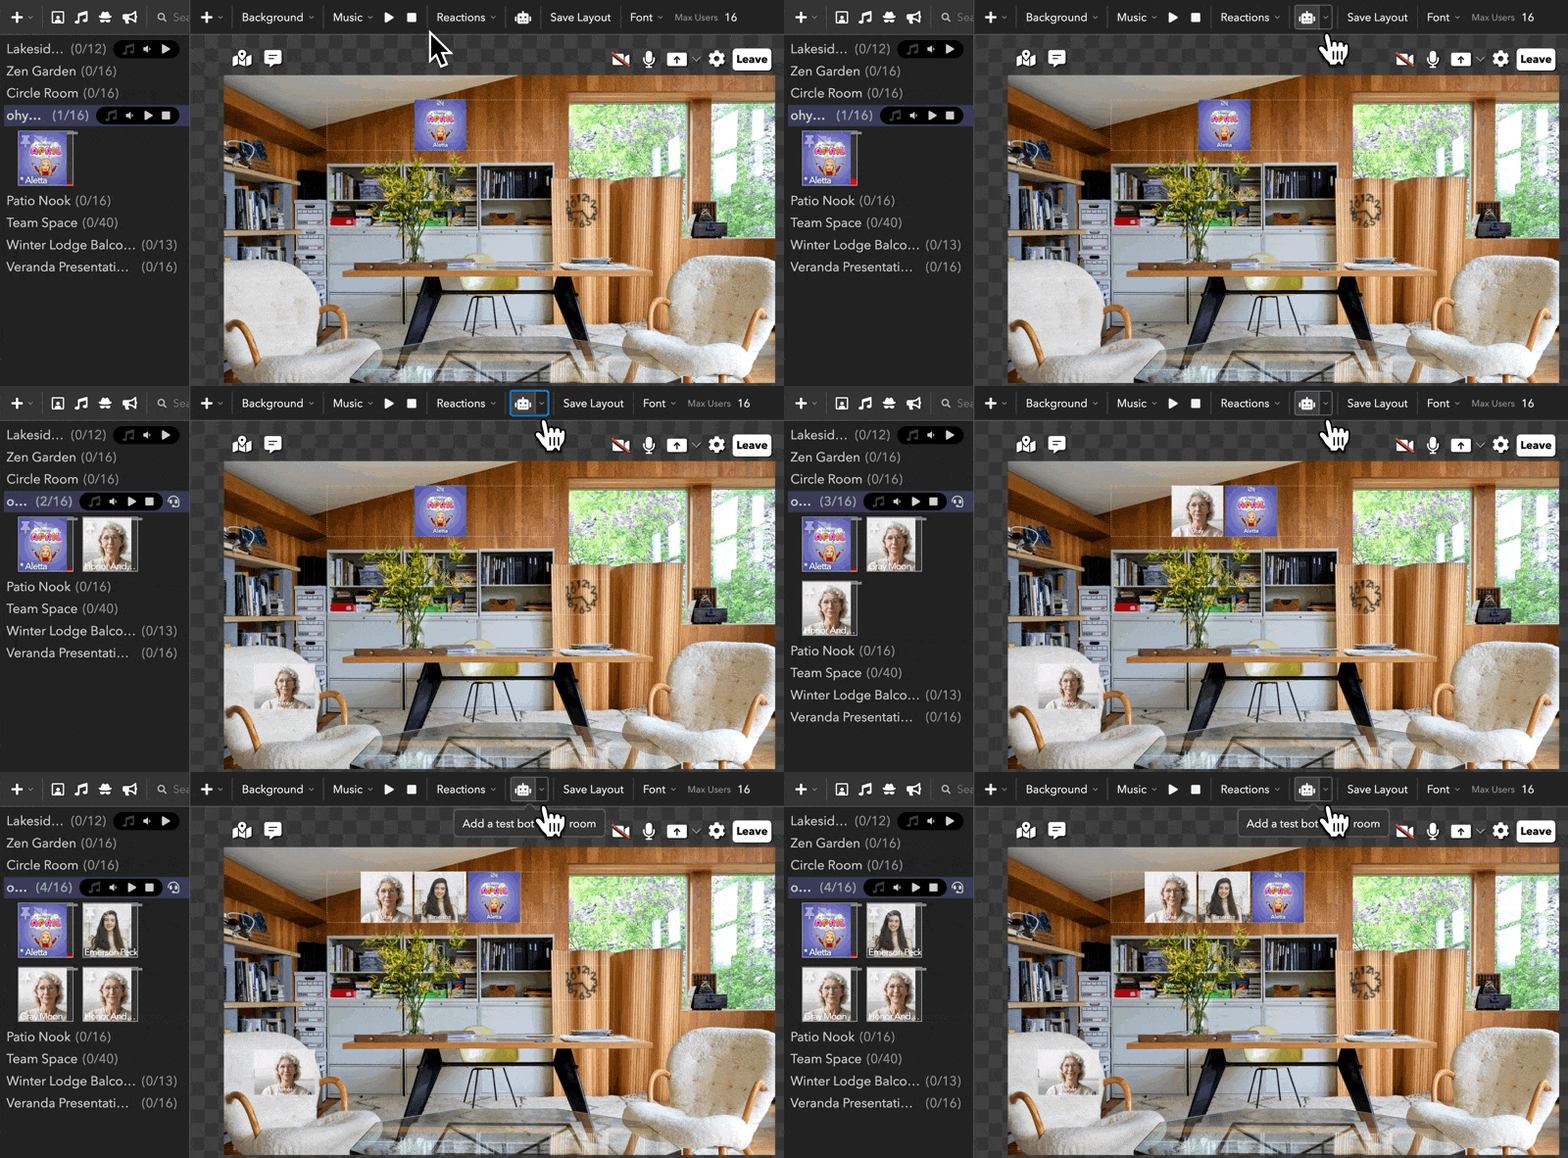
To add a few test bots, follow these steps:
-
Click on the room (or part of the room canvas that doesn’t have an element) to ensure that the room is selected.
-
Click on the
icon in the toolbar a few times and watch the test bots populate the user slots in your room.

You’ll notice that their thumbnails will appear under the room name that you’re in.
Users will be able to see the test bots in your workspace, so you’ll want to remove them after editing by clicking on the dropdown next to the robot icon and selecting Remove all test bots.

Styling your elements
Without further ado, let’s start editing one of your user slots. Click on it and you’ll see a few icons in the toolbar that will be your best friends:
Opacity
Borders and corners
Shadows
Before we do anything, you'll want to resize your user slot so that it's in better proportion with the chair.
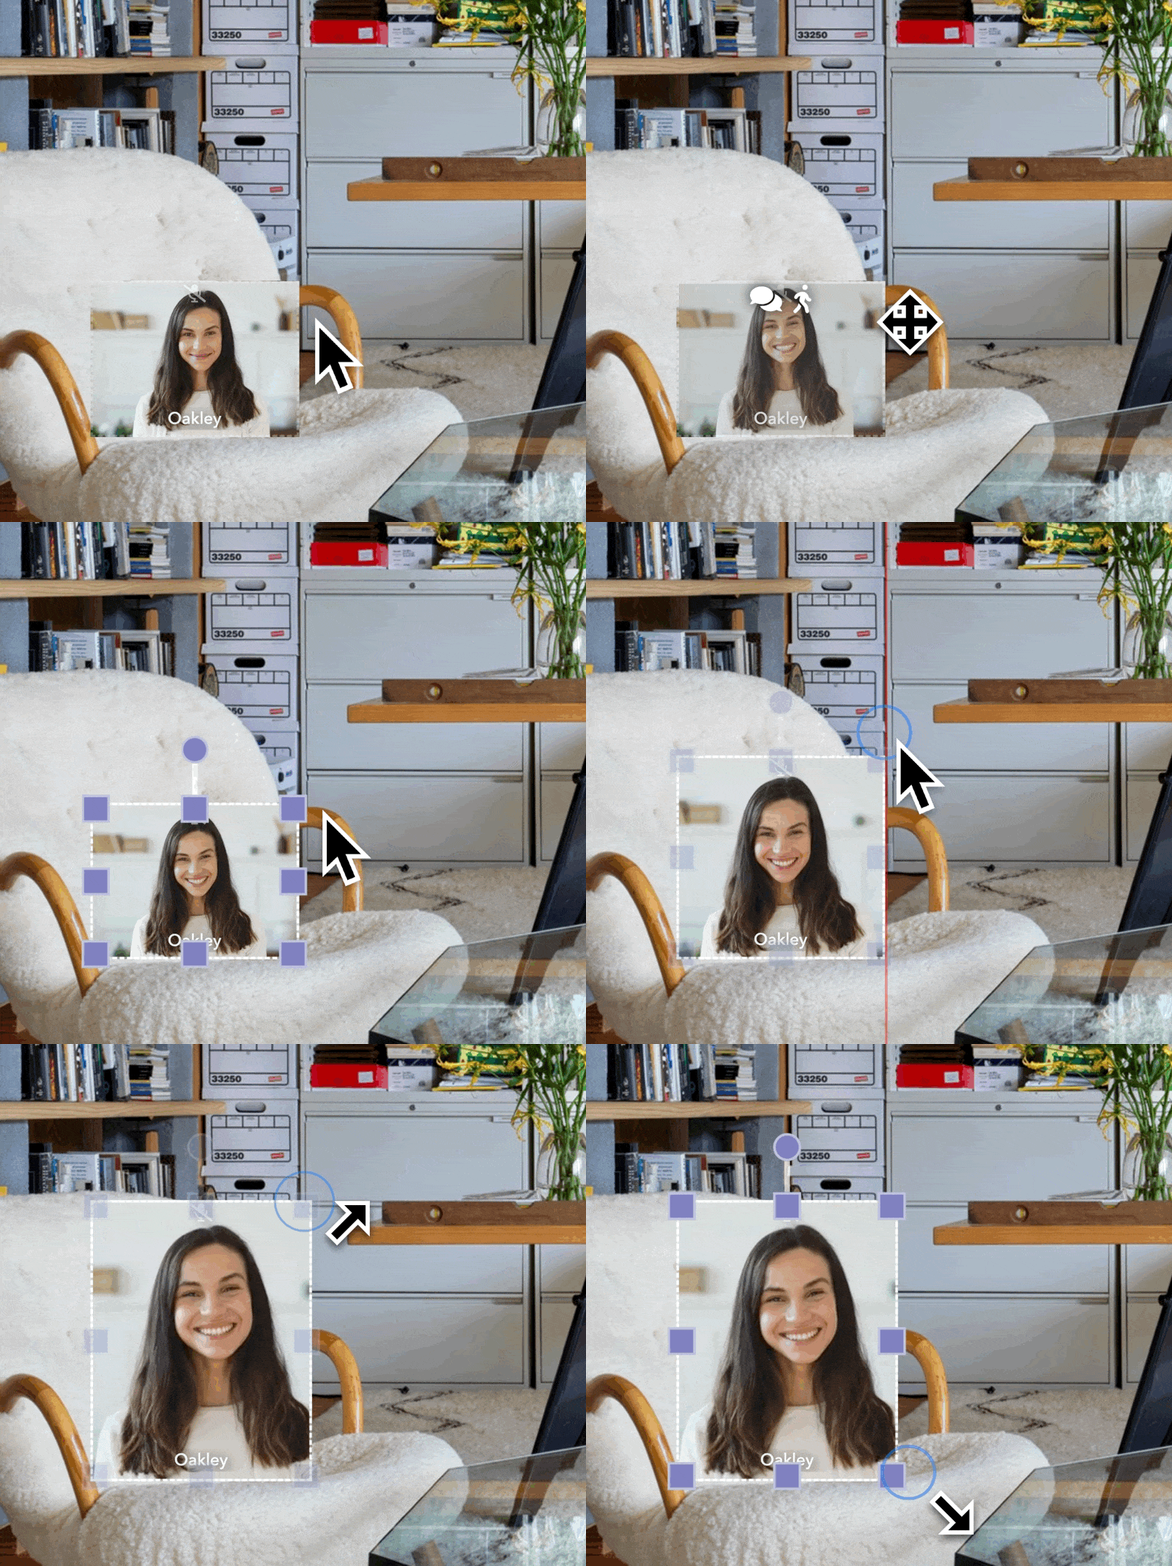
Opacity
Now, let's lower the opacity of your user slot to around 80% by simply clicking on the in the toolbar and dragging the slider. This makes your user slot blend more seamlessly into the background.
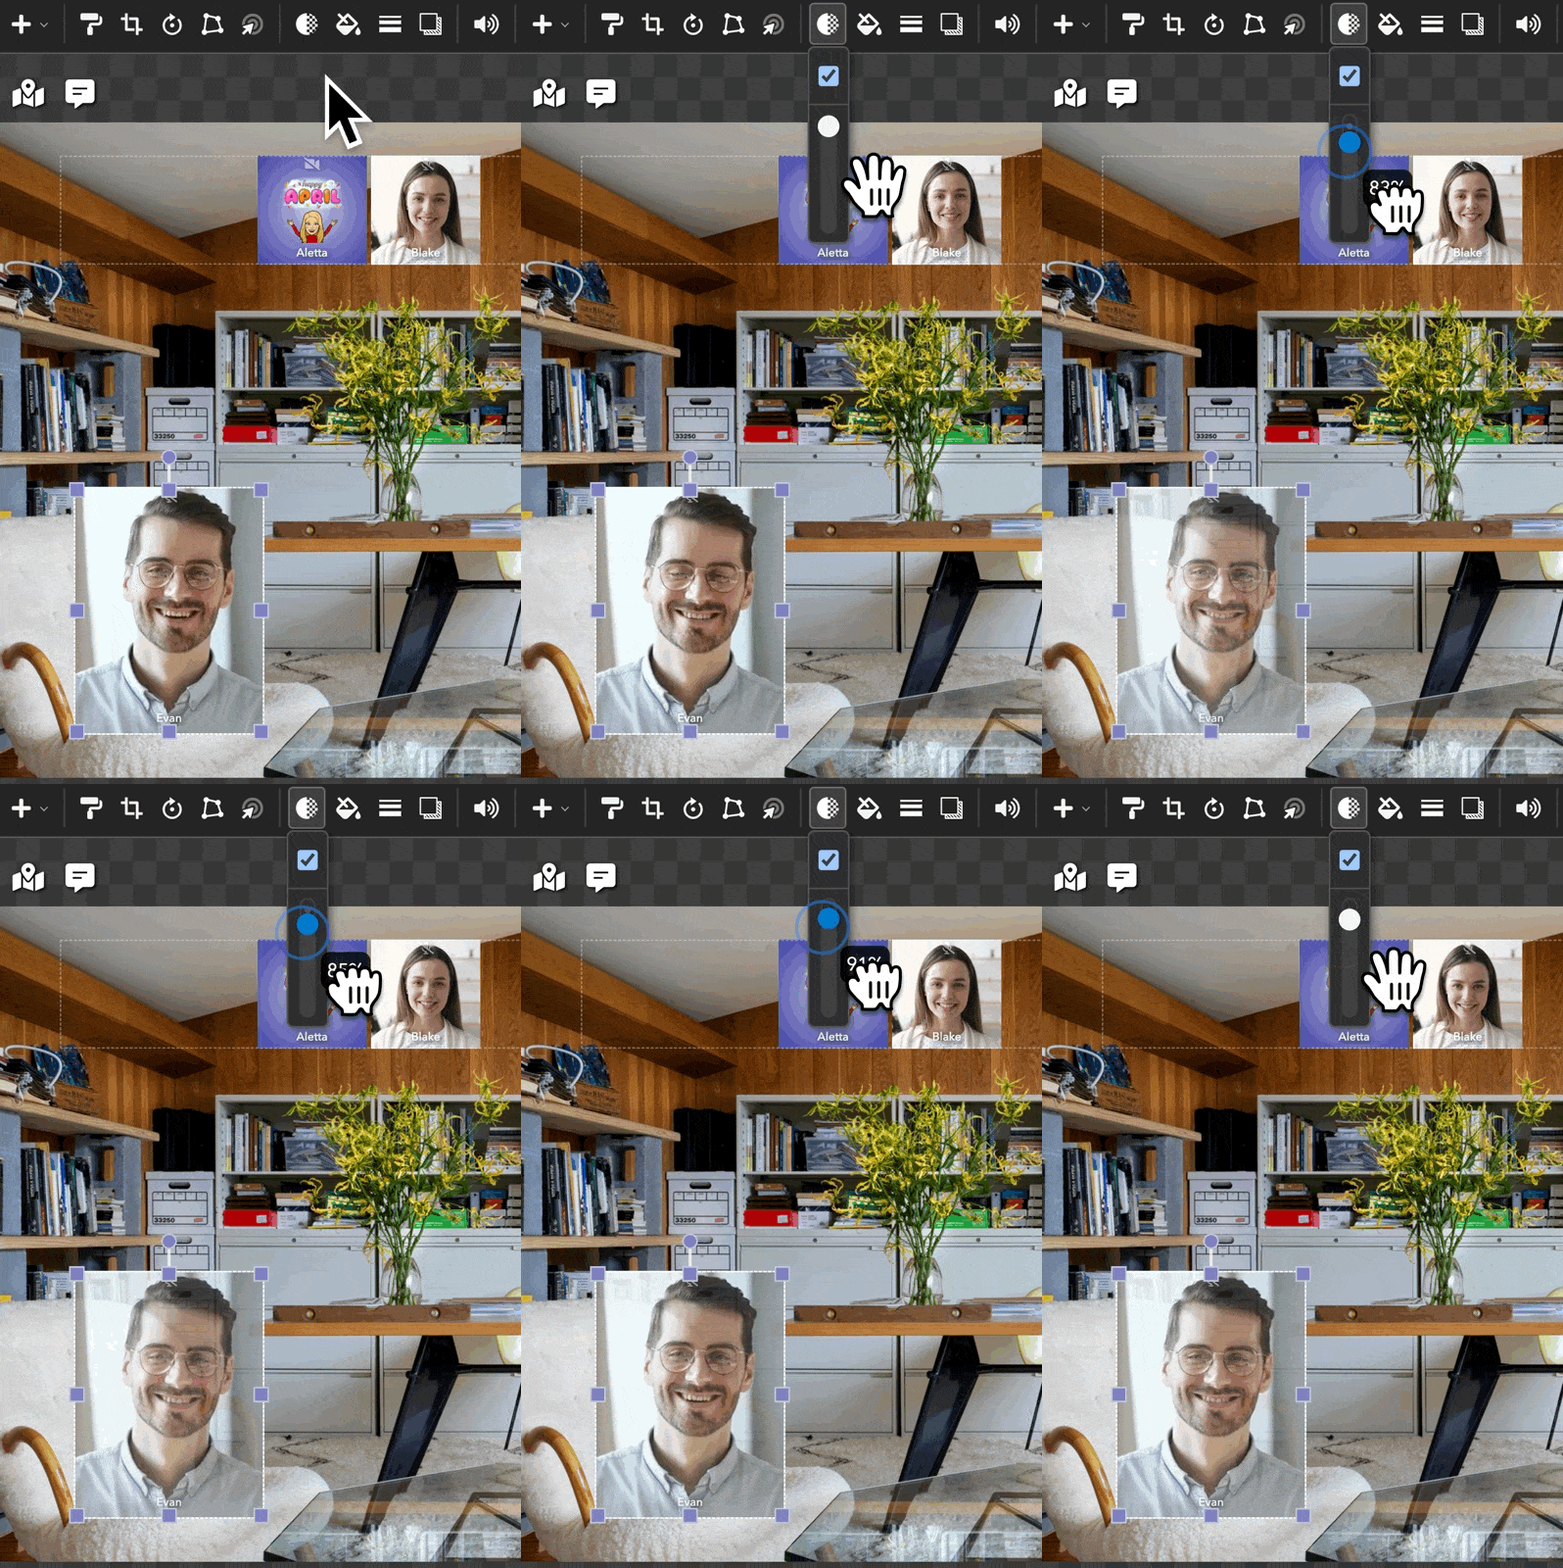
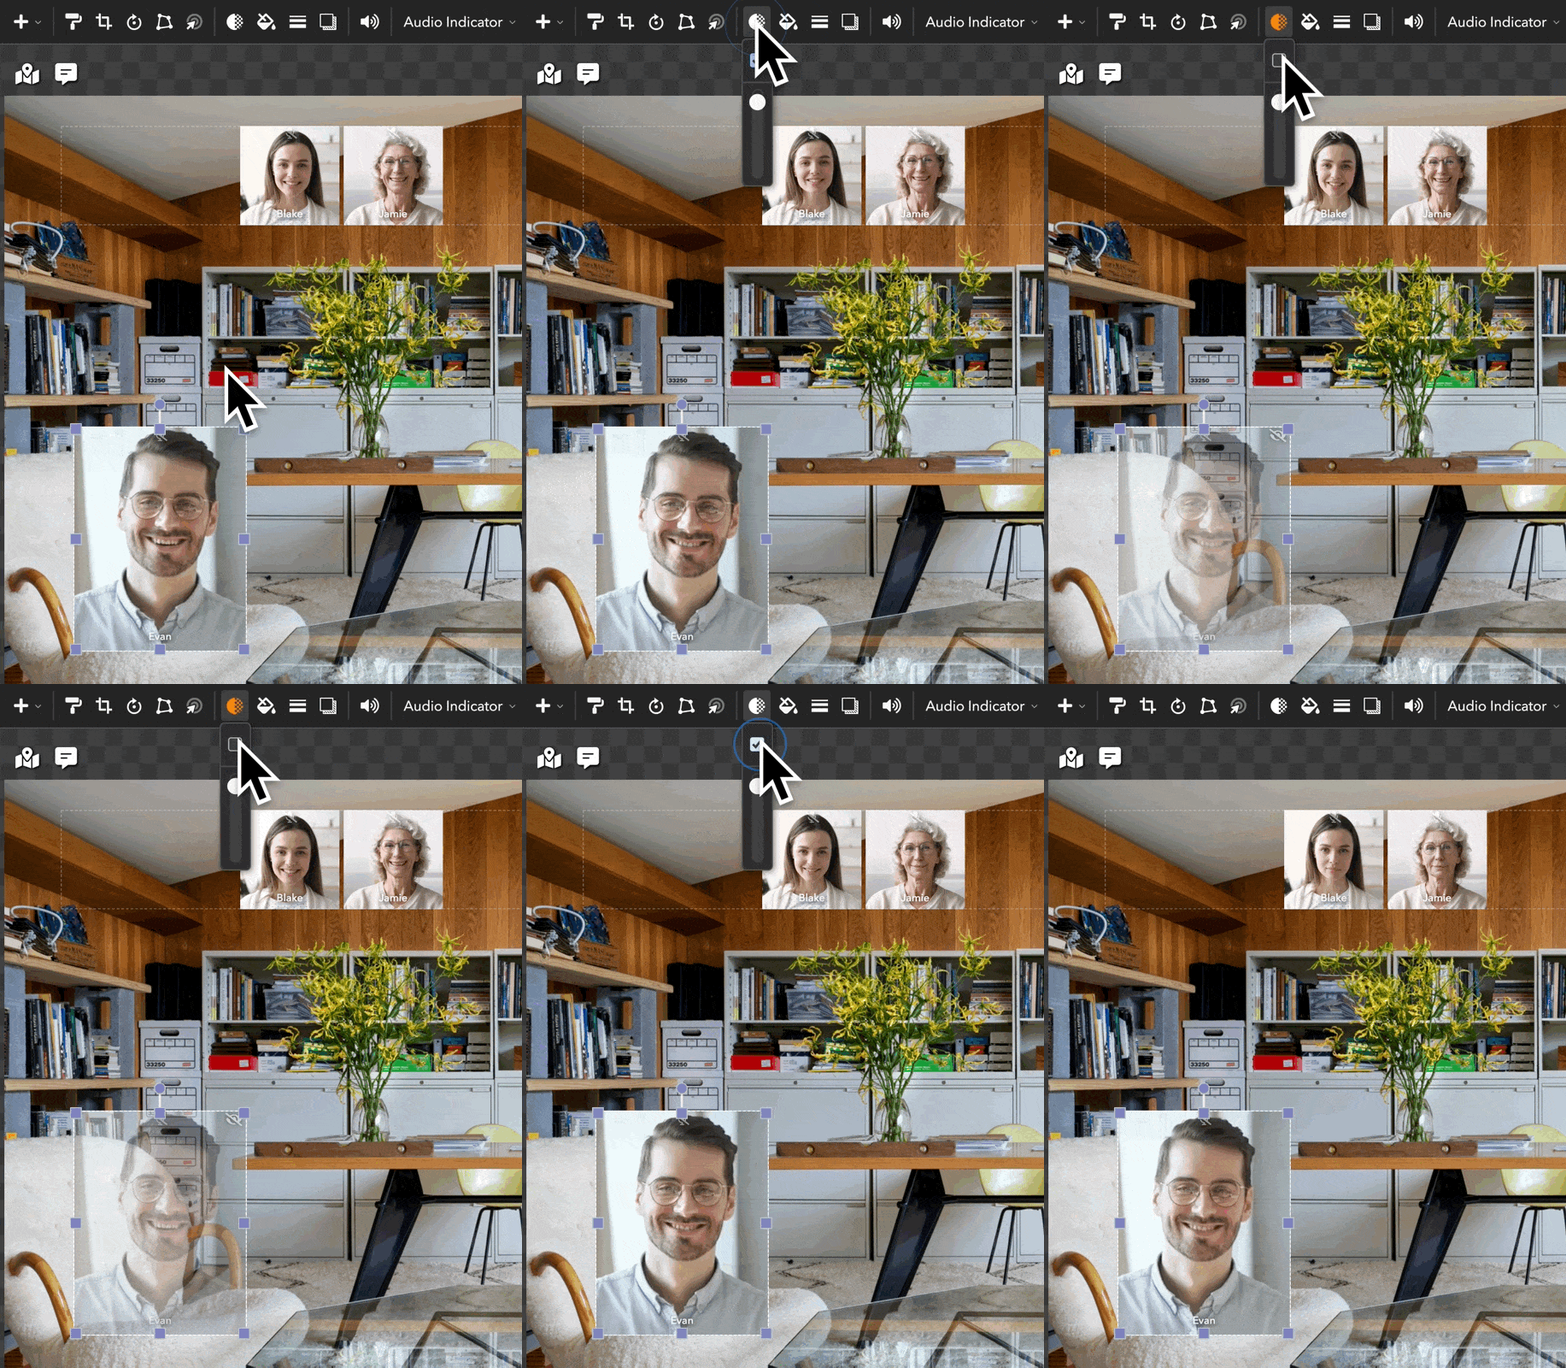
If you’d like to make your user slot completely invisible to your guests, you can uncheck the checkbox above the slider. As an admin, you'll still be able to see it semi-transparent.
Rounded Corners
We usually round the corners of our user slots so that they look less grid-like. You can round your user slot’s corners by following these steps:
-
Click on your user slot.
-
Click on the
icon in the toolbar.

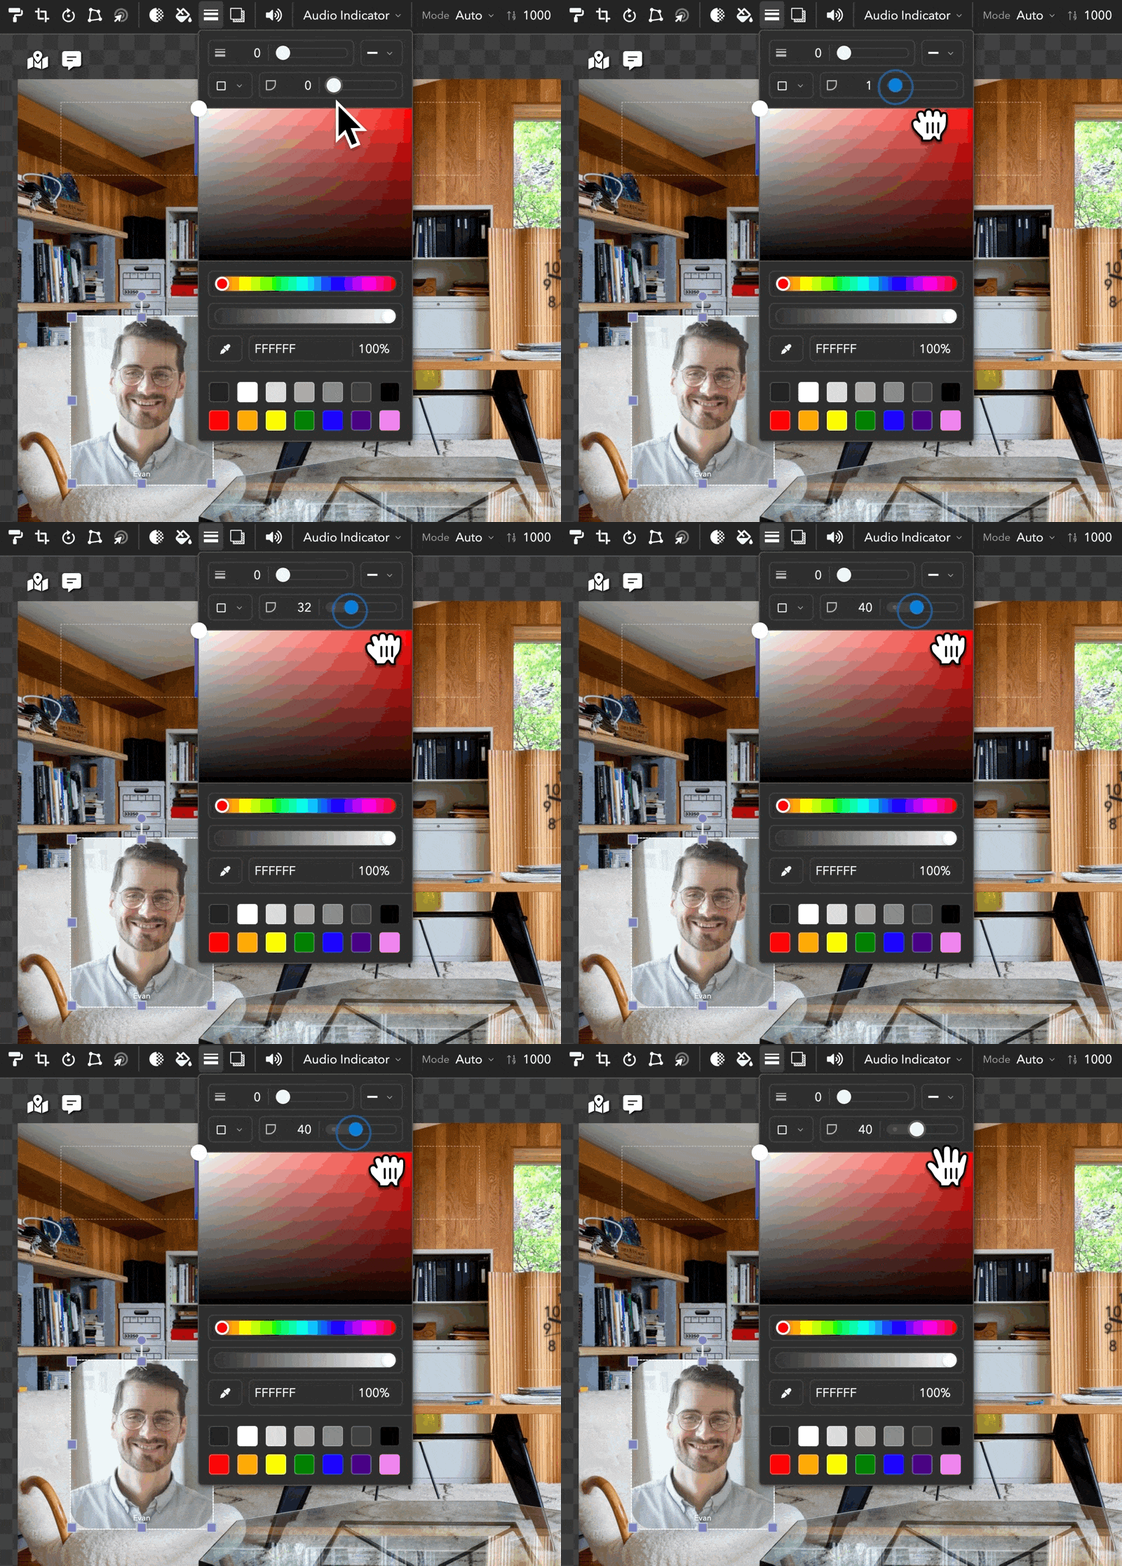
- Move the second slider (for corner radius) in the dialog to 40, and watch the corners of your user slot round.
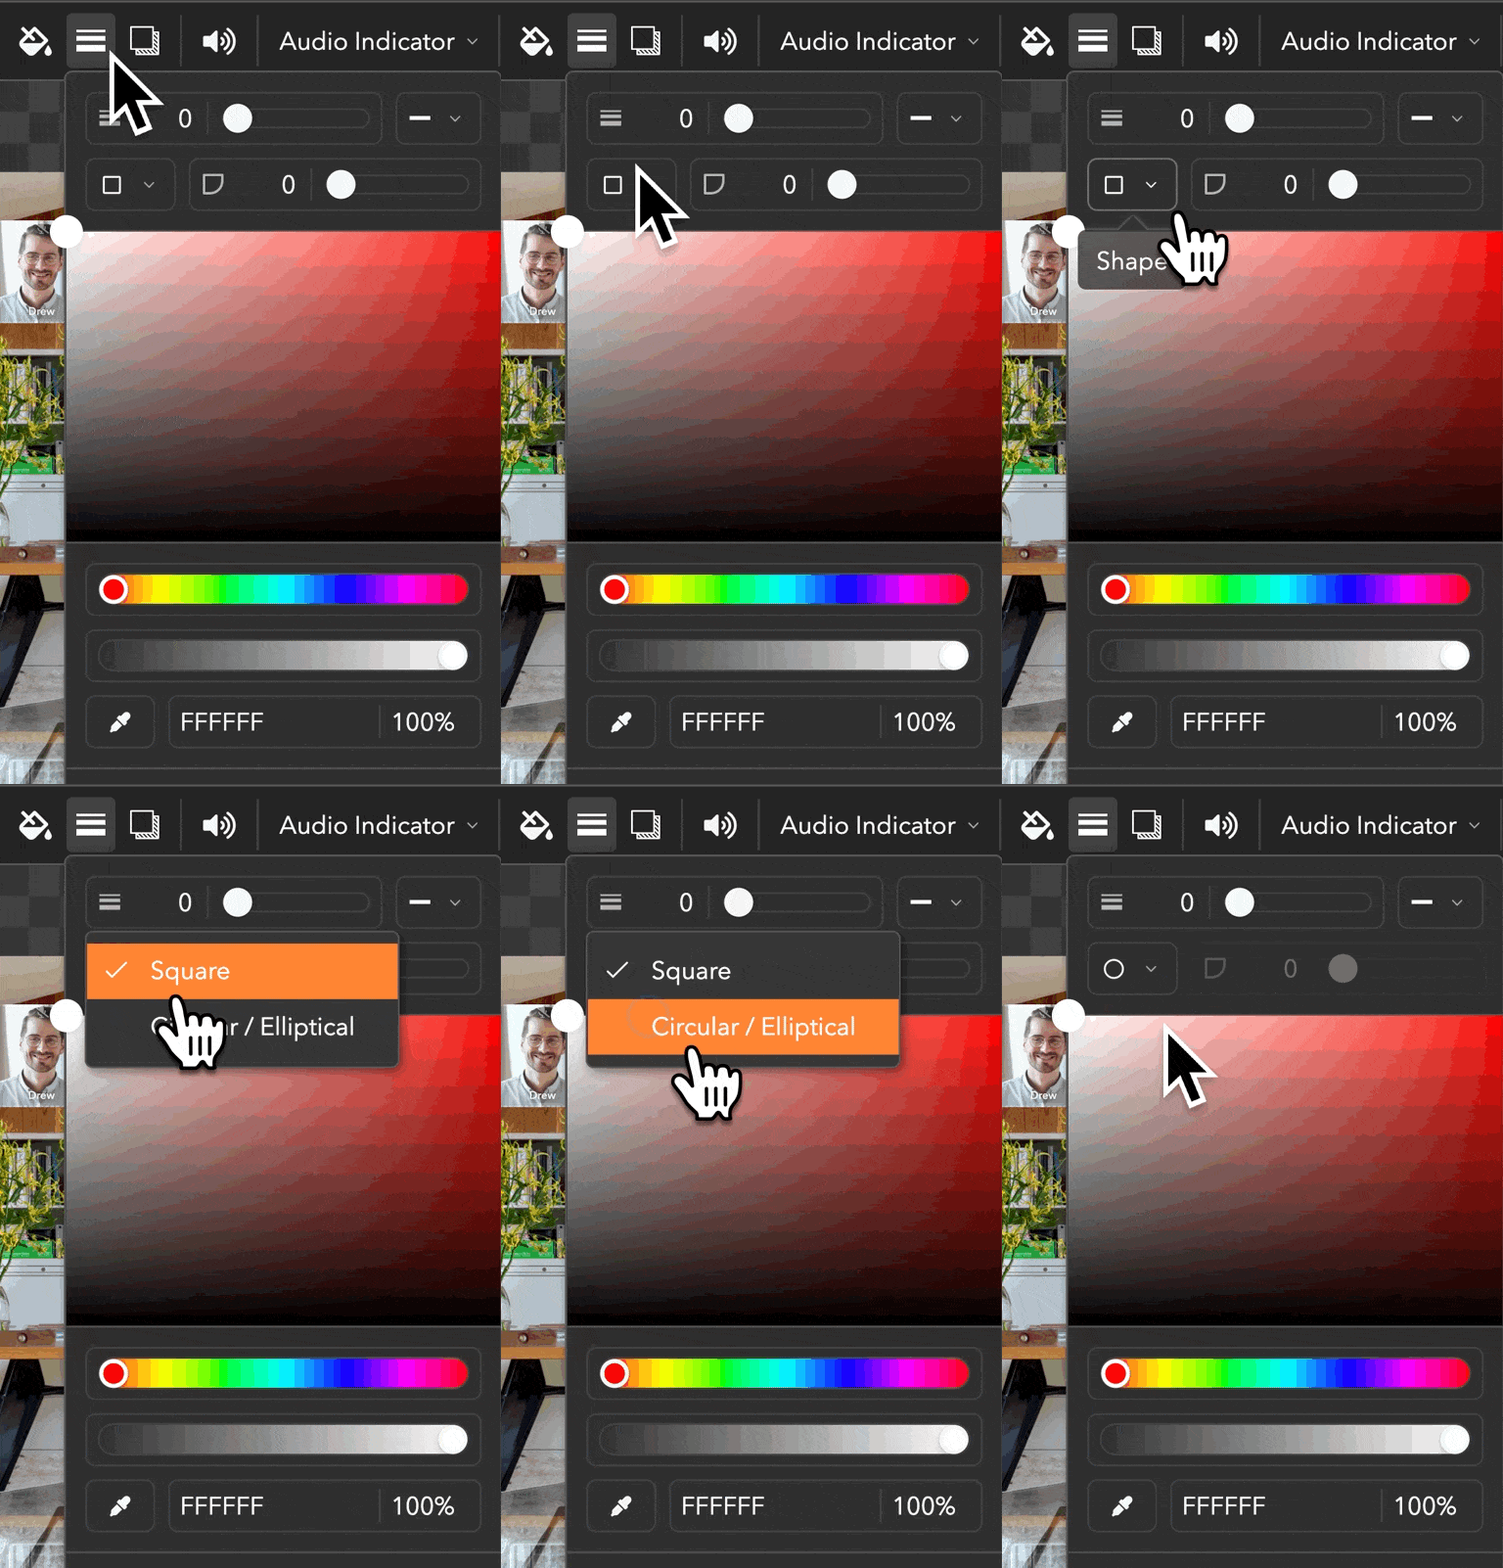
You can also click on the circle icon in the dialog and choose Circular/Elliptical to make your user slot a complete circle.
D Key
Now, let's cover a a helpful styling trick: click on your user slot, hold down the “d” key, and drag your user slot’s corners.
Watch how you can make your user slot look like it’s leaning backwards in the chair.
You can also deform your user slot by clicking on the icon in the toolbar. (If at any time you want to start over, simply click reset.)
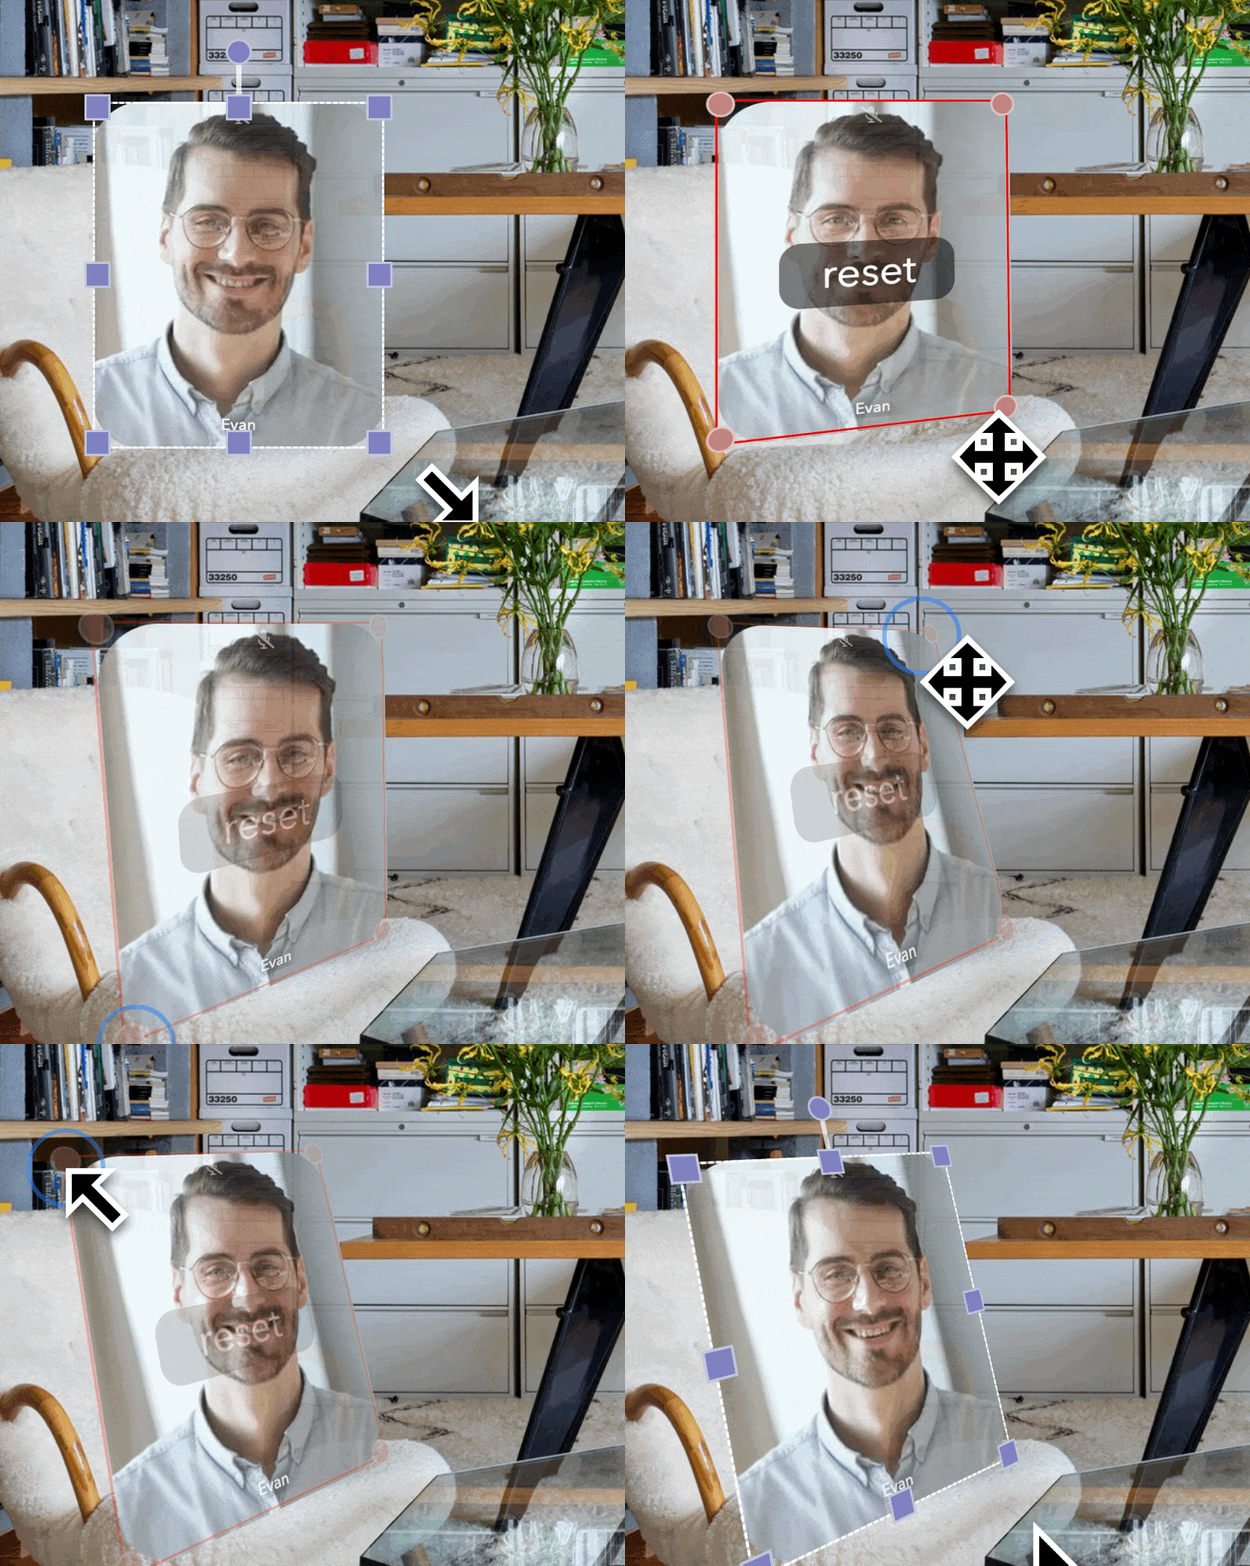
Now, we're going to add a shadow to make it look more 3D. You can either add a drop shadow or a perspective shadow.
Shadows
Finally, let's add perspective shadow by following these steps:
-
Click on your user slot.
-
Click on the
icon.
-
Toggle Perspective Shadow.
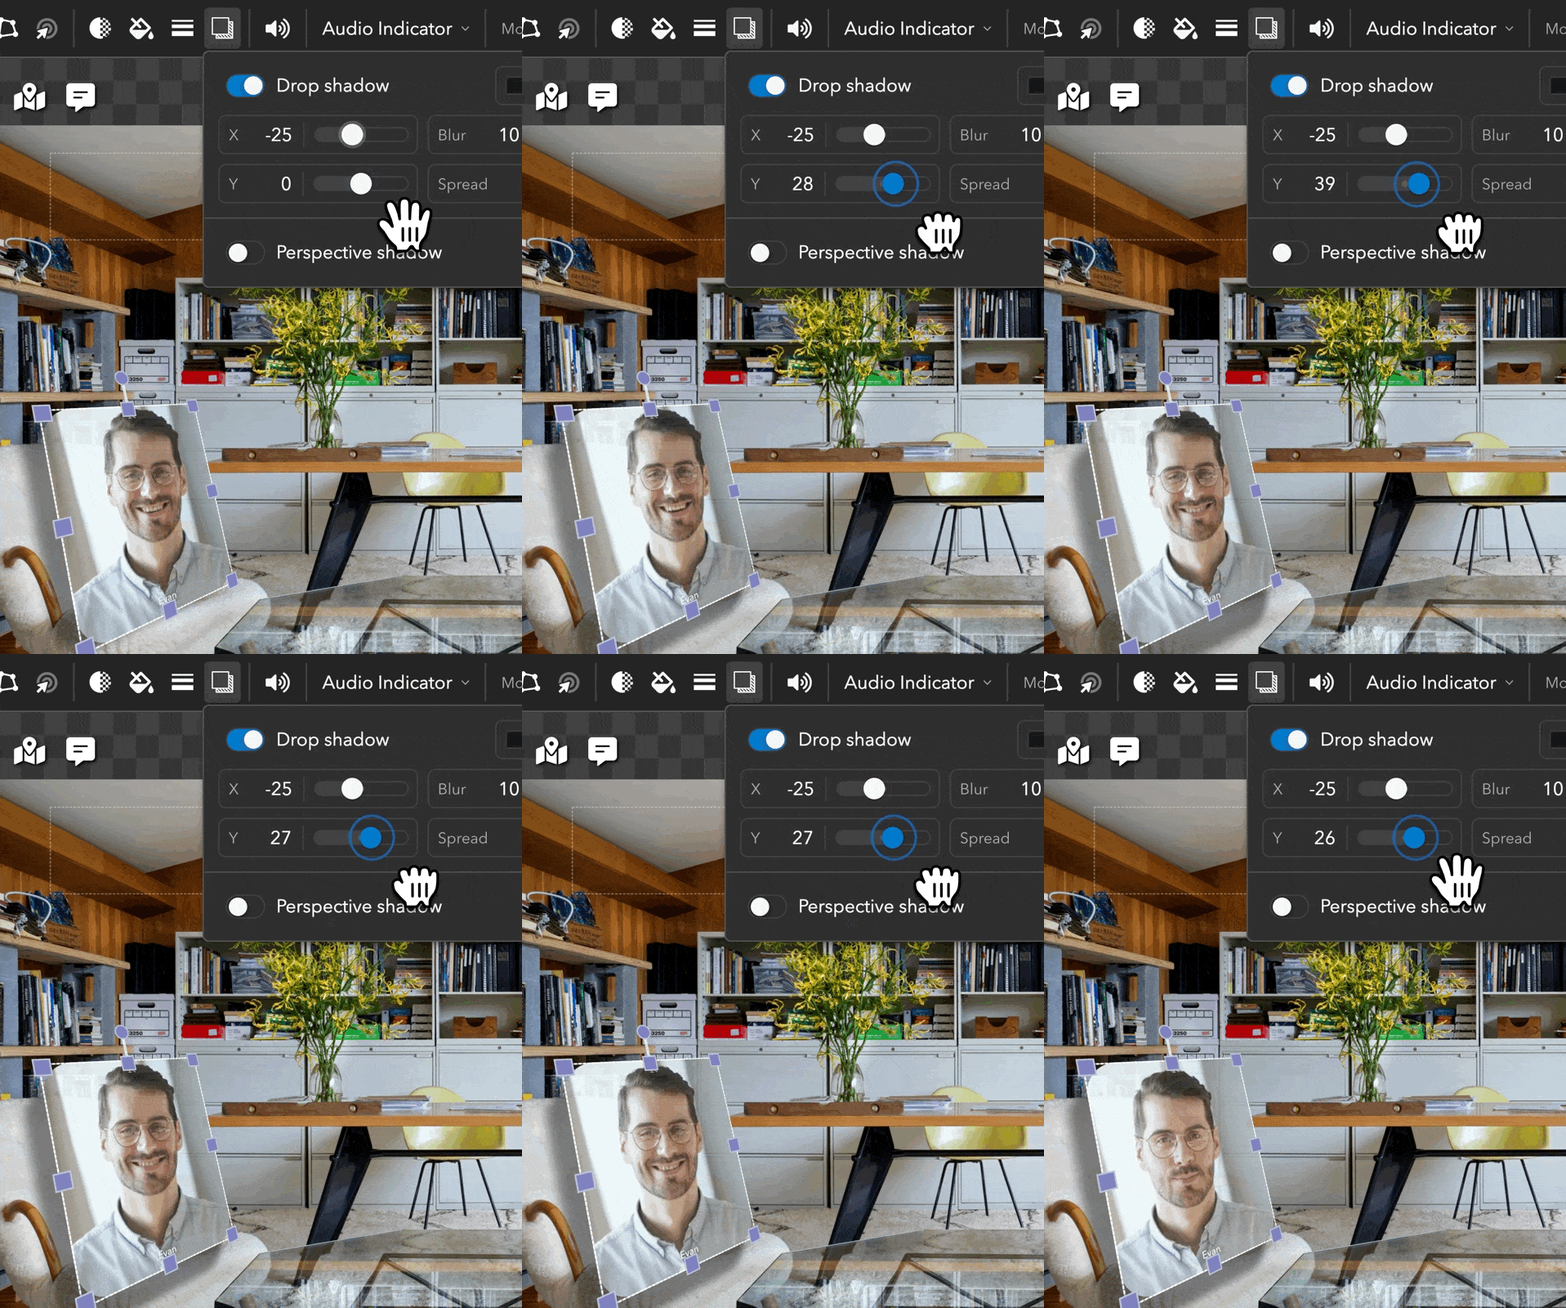
- Play with your user slot’s shadow by adjust X, Y, Blur, and Spread in the dialog.
These are just a few of the many ways you can edit your user slots. Remember that you can use these icons in the toolbar to edit any element in your workspace, whether you’re lowering the opacity of a question board or coloring a triangle shape.
Adding others as admins
One of the most fun parts of ohyay is live editing with others and bringing a workspace to life together.
You can add someone as admin of your workspace by following these steps:
-
Open up your Workspace Settings, which apply to your entire workspace, by clicking on Workspace > Settings from the menu. In the dialog that appears, you can do things like set a capacity limit and region for your workspace. (Make sure your Advanced Properties panel is closed on the right-hand side).
-
Click on the
next to Manage Admins.
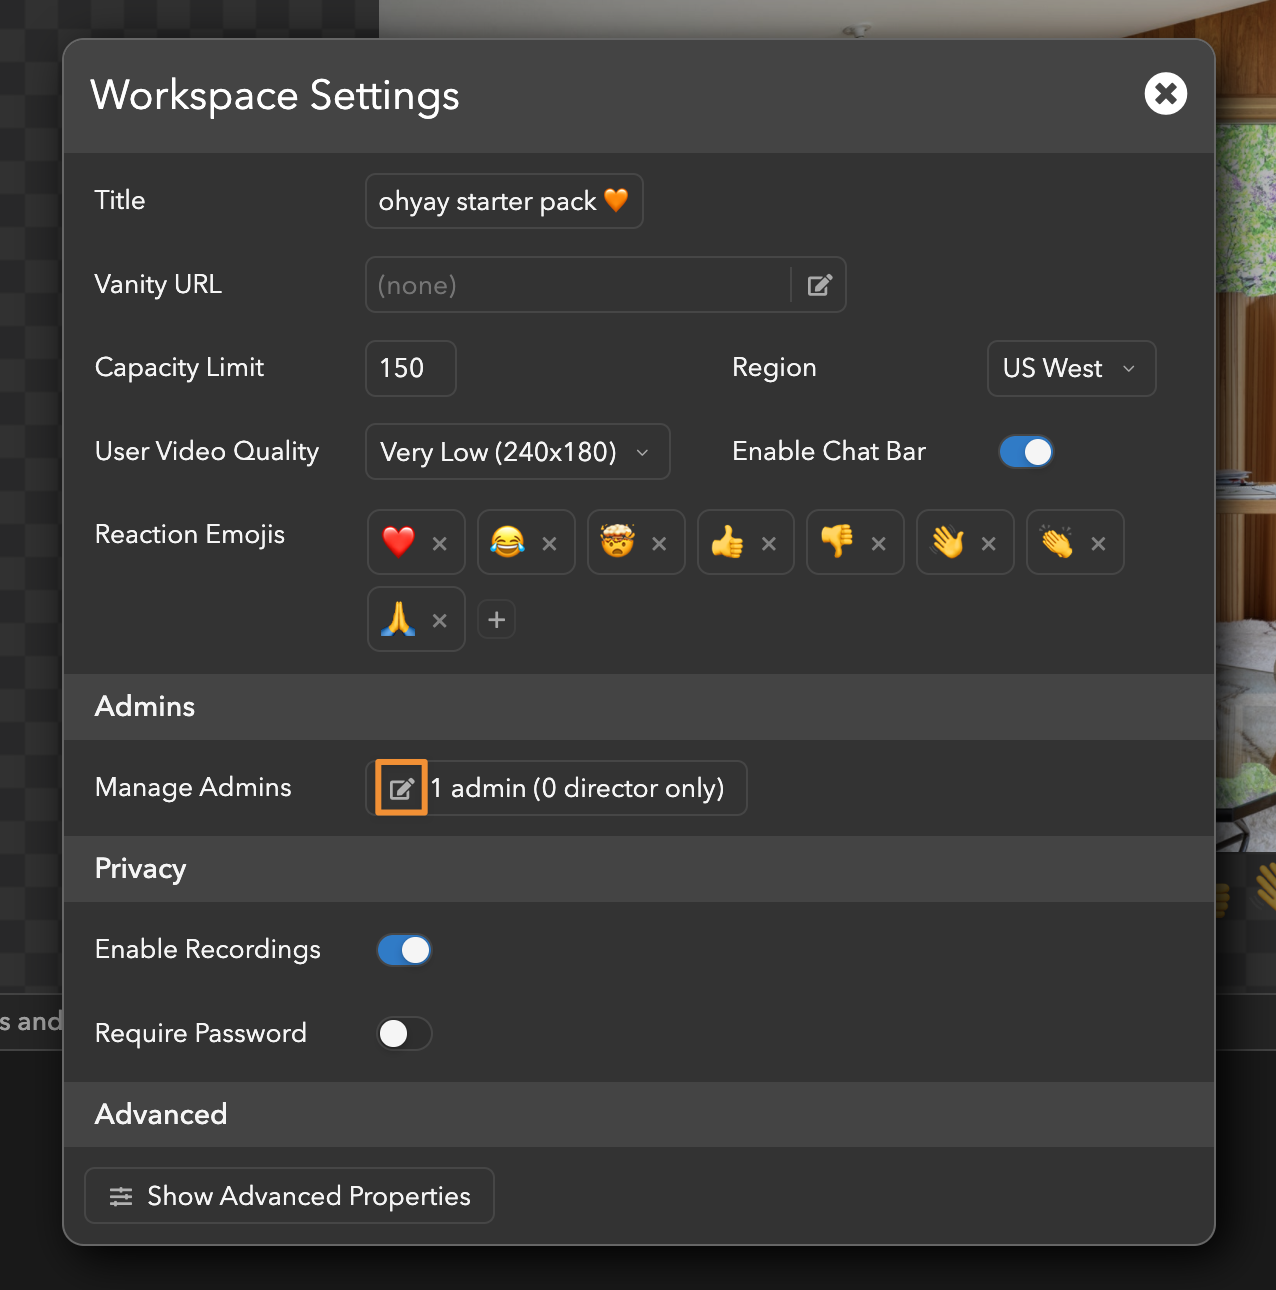
- Add the email of the user you want to add as an admin.

Being an admin comes with great responsibility. Whenever an admin makes a change, everyone in the workspace will see it immediately. If you would like to give a user access to the main controls of your space, but not full edit access, you can add them as Director Only.

Hosting users in your workspace
Before you invite users to join your workspace, you’ll want to test everything out with test bots. They’ll give you a feel for what your room will look like in action. If you haven’t already, select your room and click on the robot icon in the toolbar repeatedly to add a few test bots.
Now, try the following:
- Drag a test bot in and out of rooms by clicking and dragging on its thumbnail in the Admins Rooms List.
- Right-click on a test bot’s video feed to see options to mute their camera, etc.
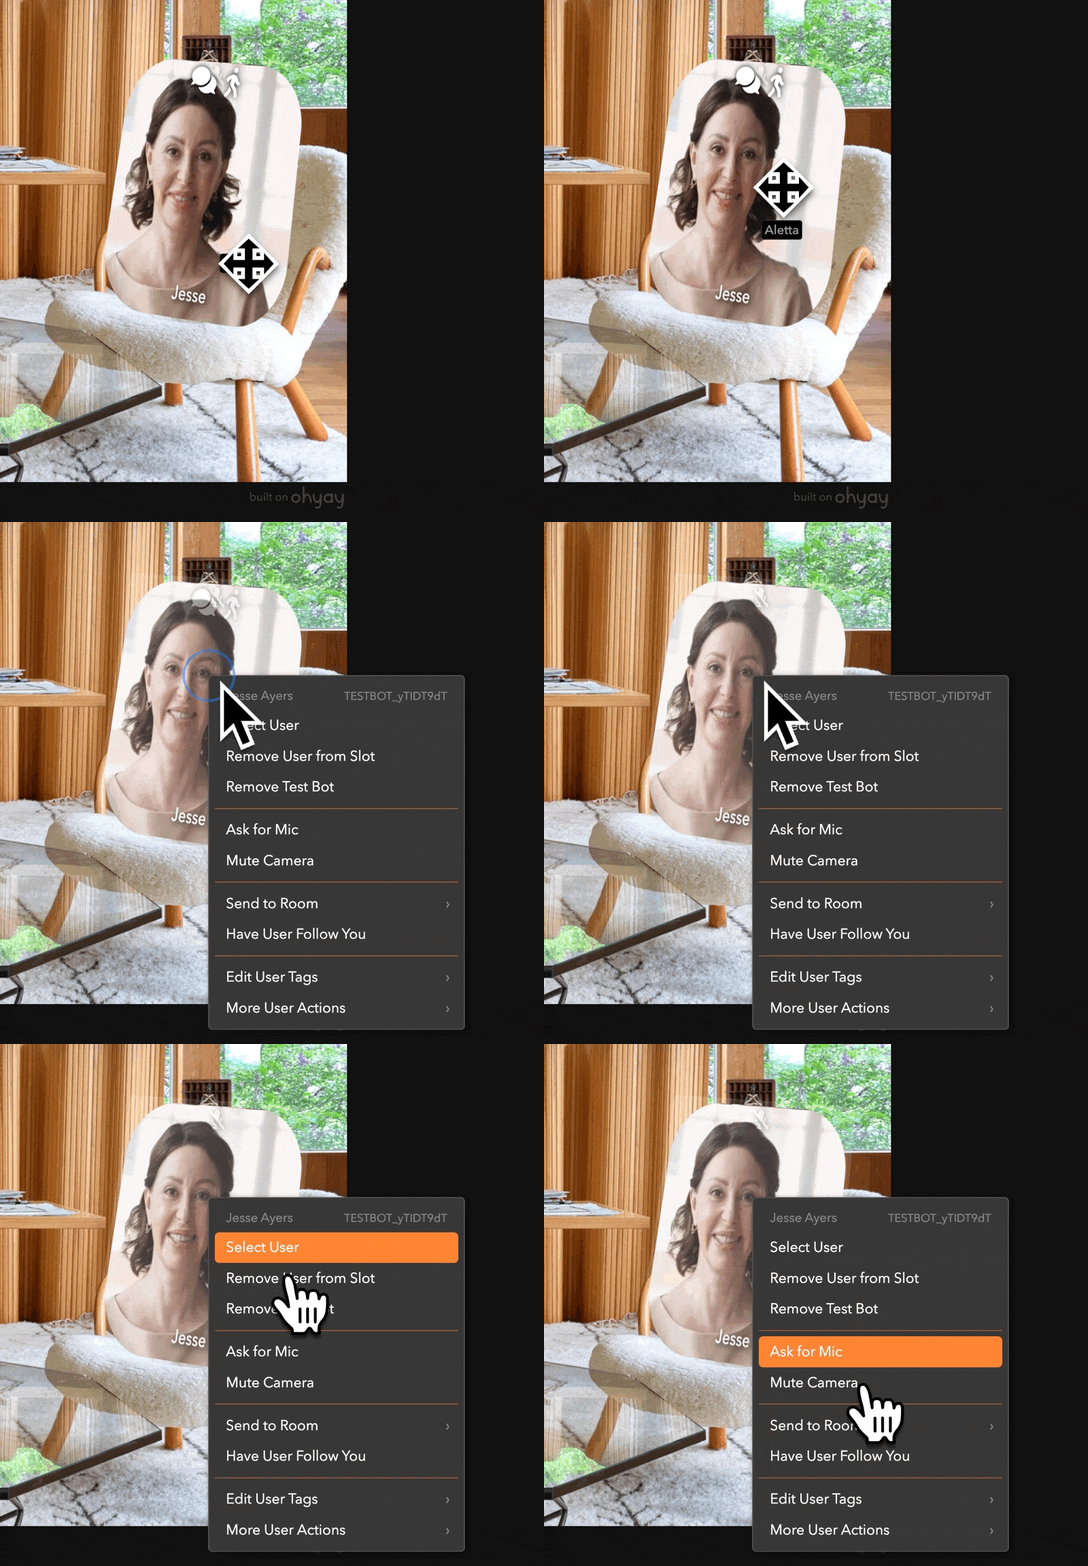
Two other useful features for events are:
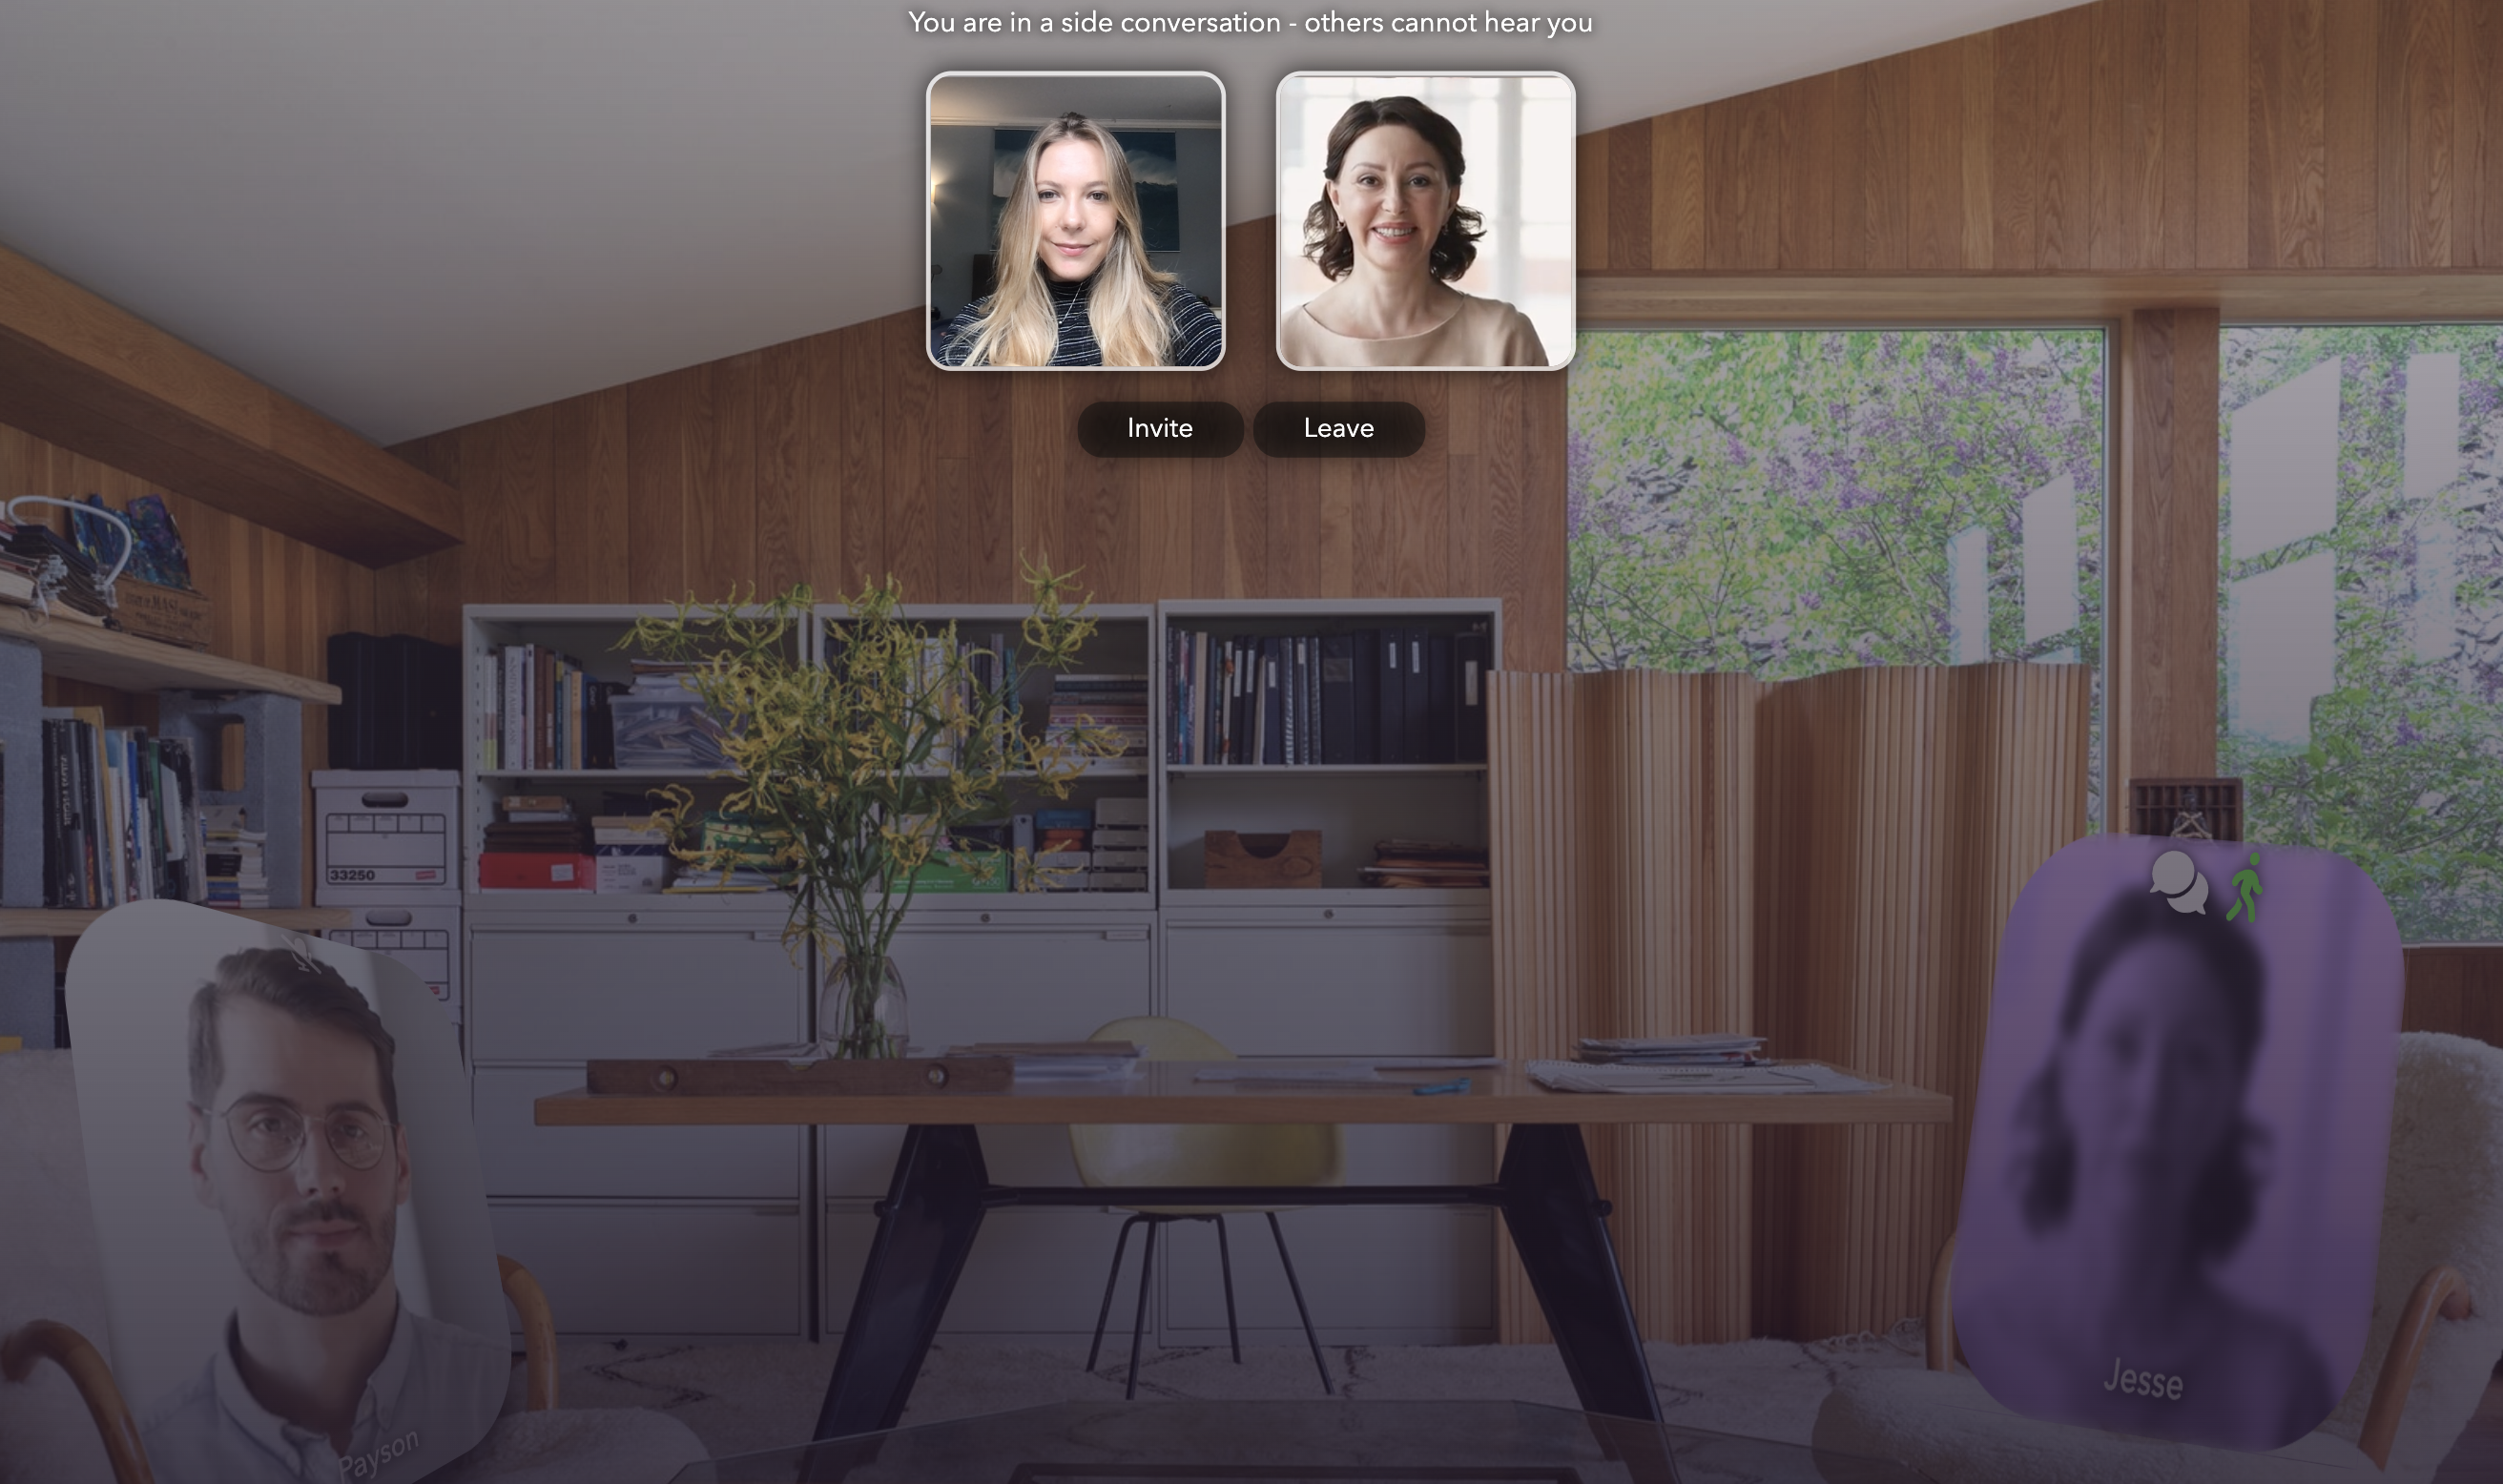
- Side Conversations: Smaller-group conversations in a room where users can hear the rest of the room at a lower volume.
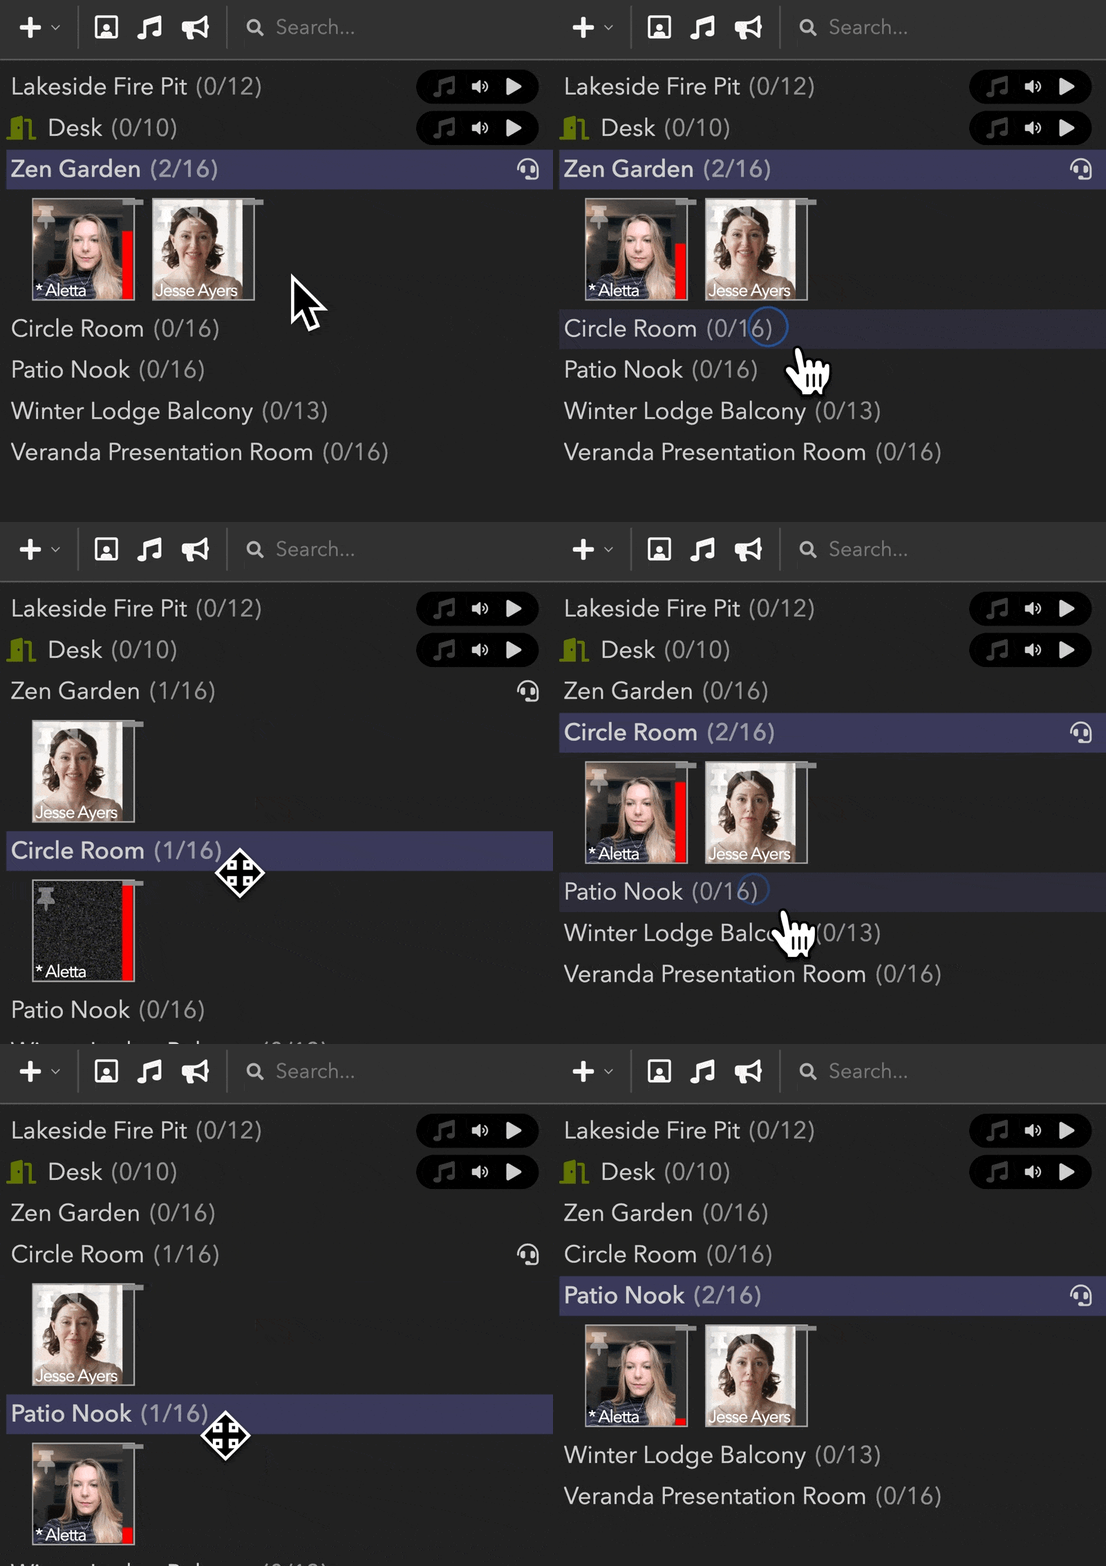
- Following: Enables you to pull a user into rooms with you and give them a “tour” of your workspace.
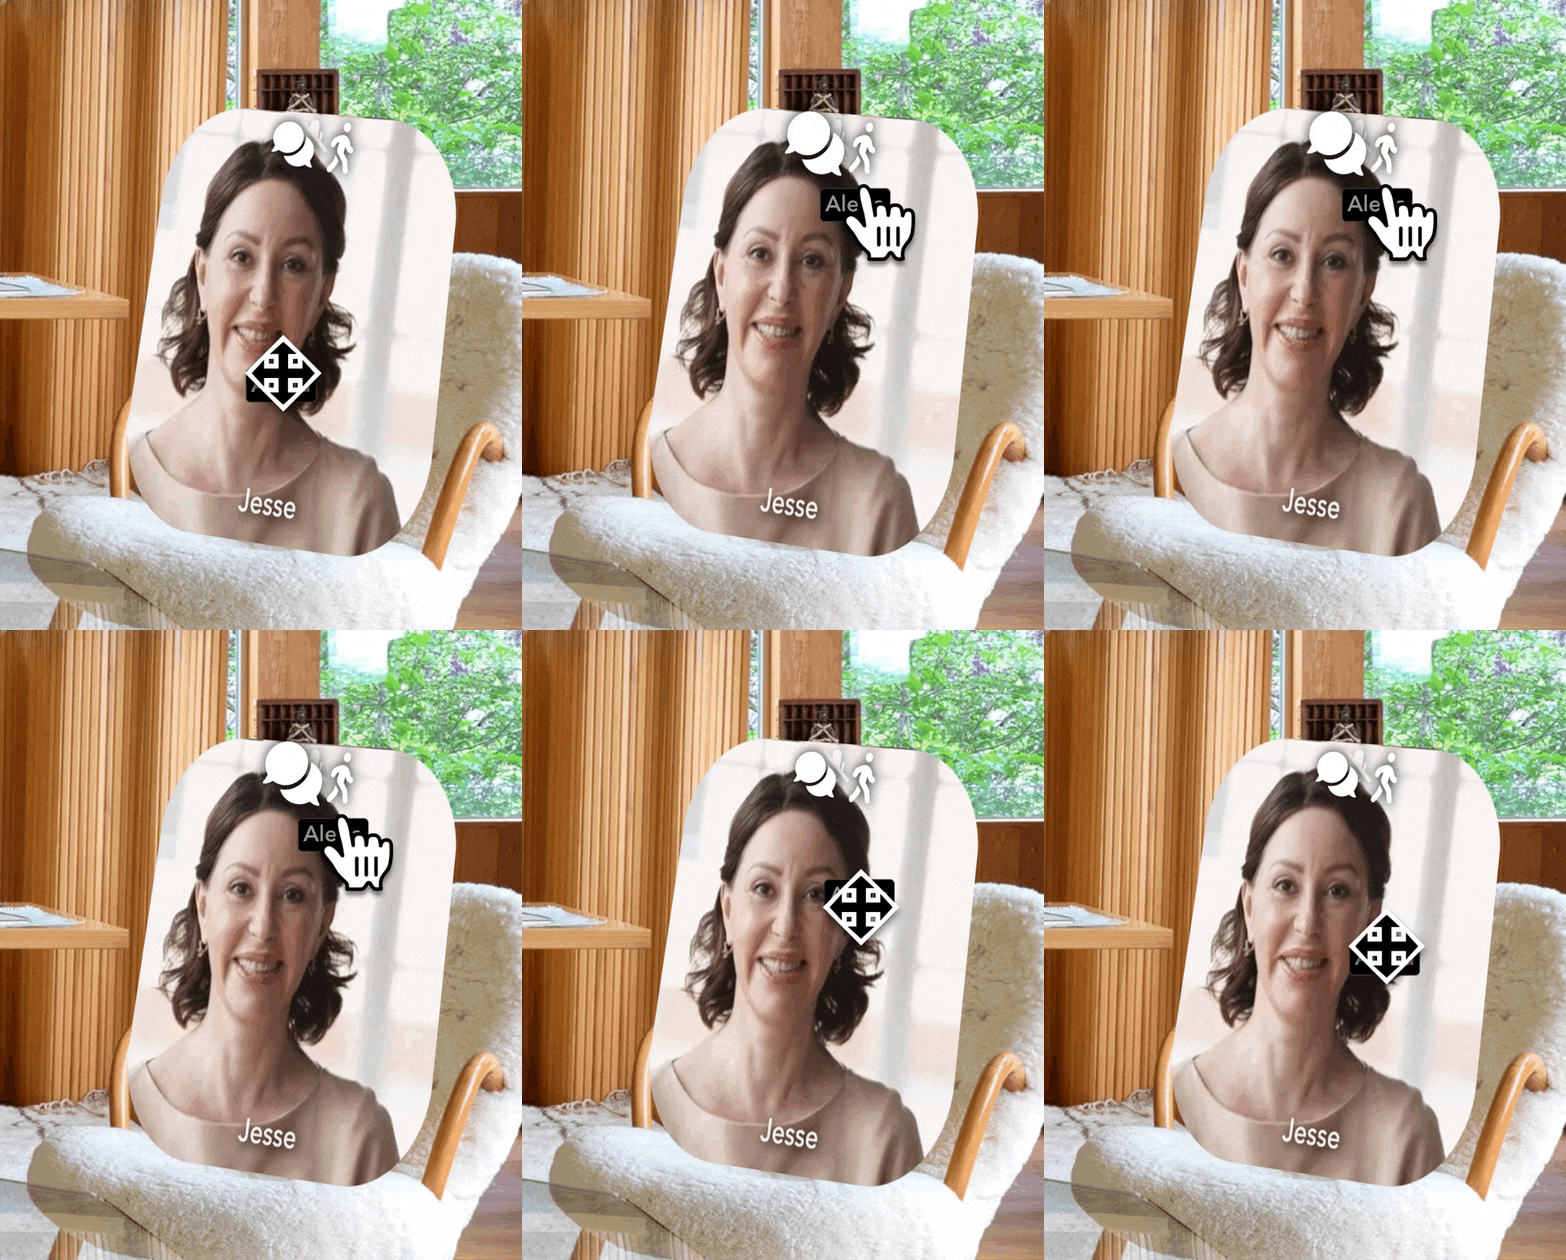
Hover over a test bot and you’ll see two icons appear, a chat icon (for side conversations) and a walking person icon (for following).
- Click on the chat icon to start a side conversation with that user, who will receive a message saying, “[Your Name] is inviting you to a side conversation” and will have the option to either decline or join the conversation.
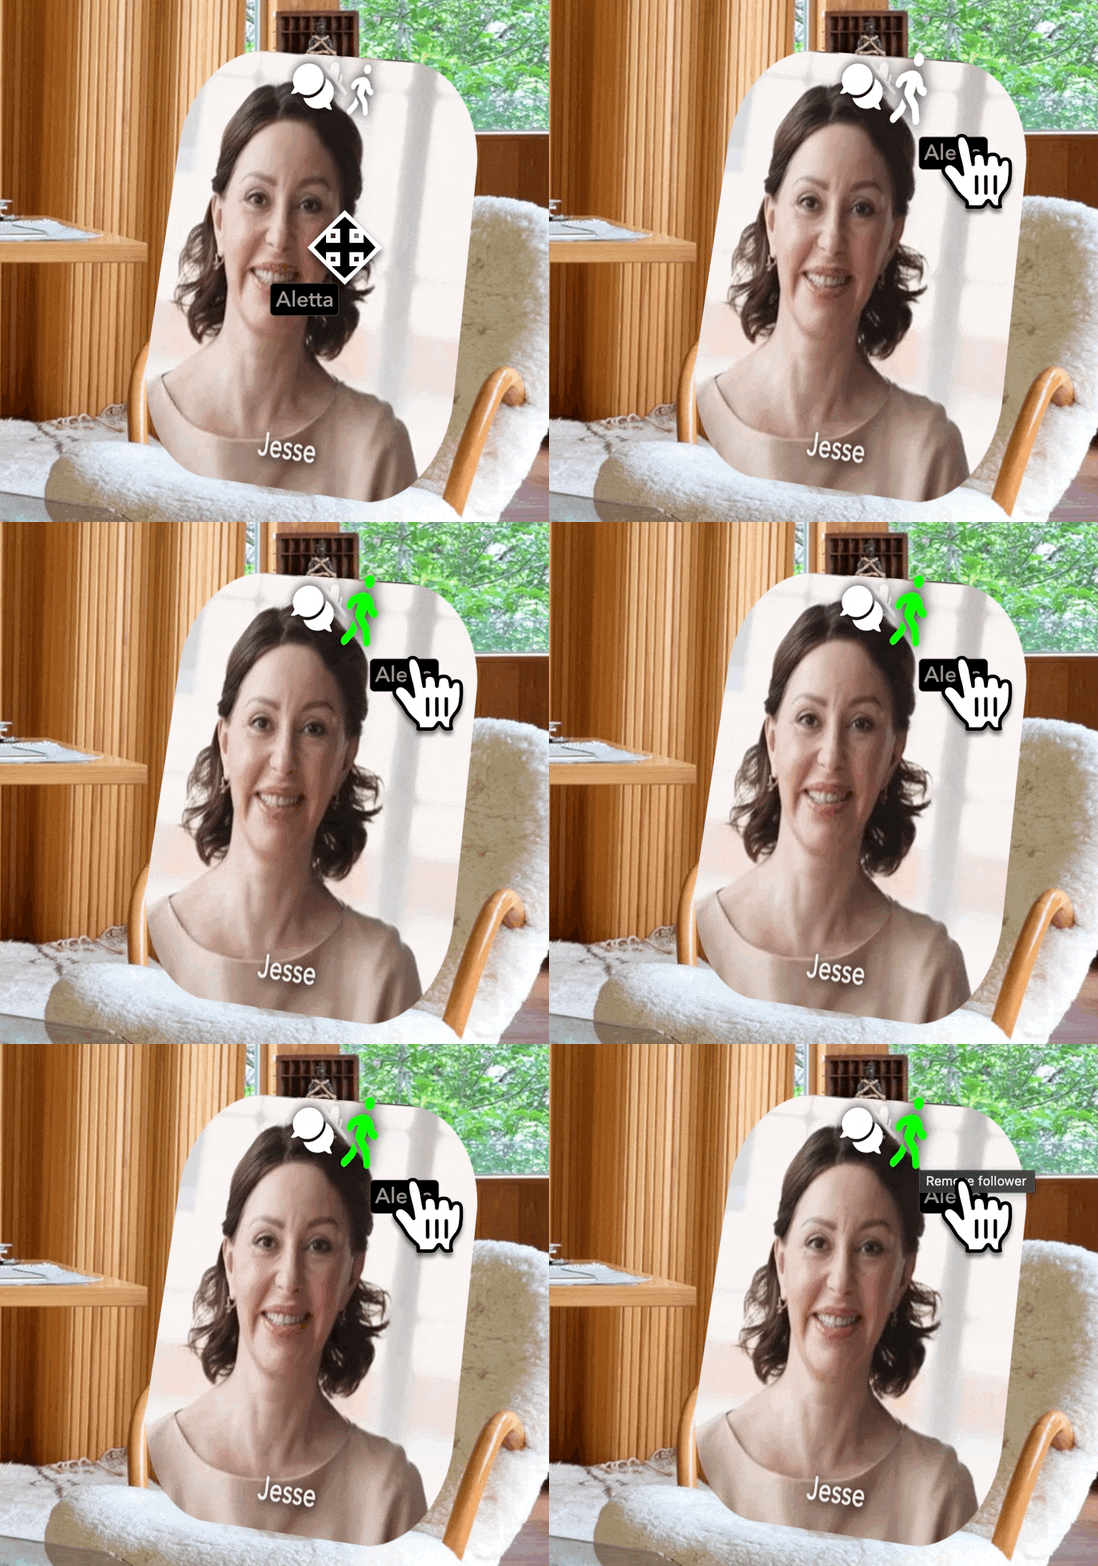
- Click on the walking person icon to ask a user to follow you into other rooms. They will have the option to either accept or deny the request.
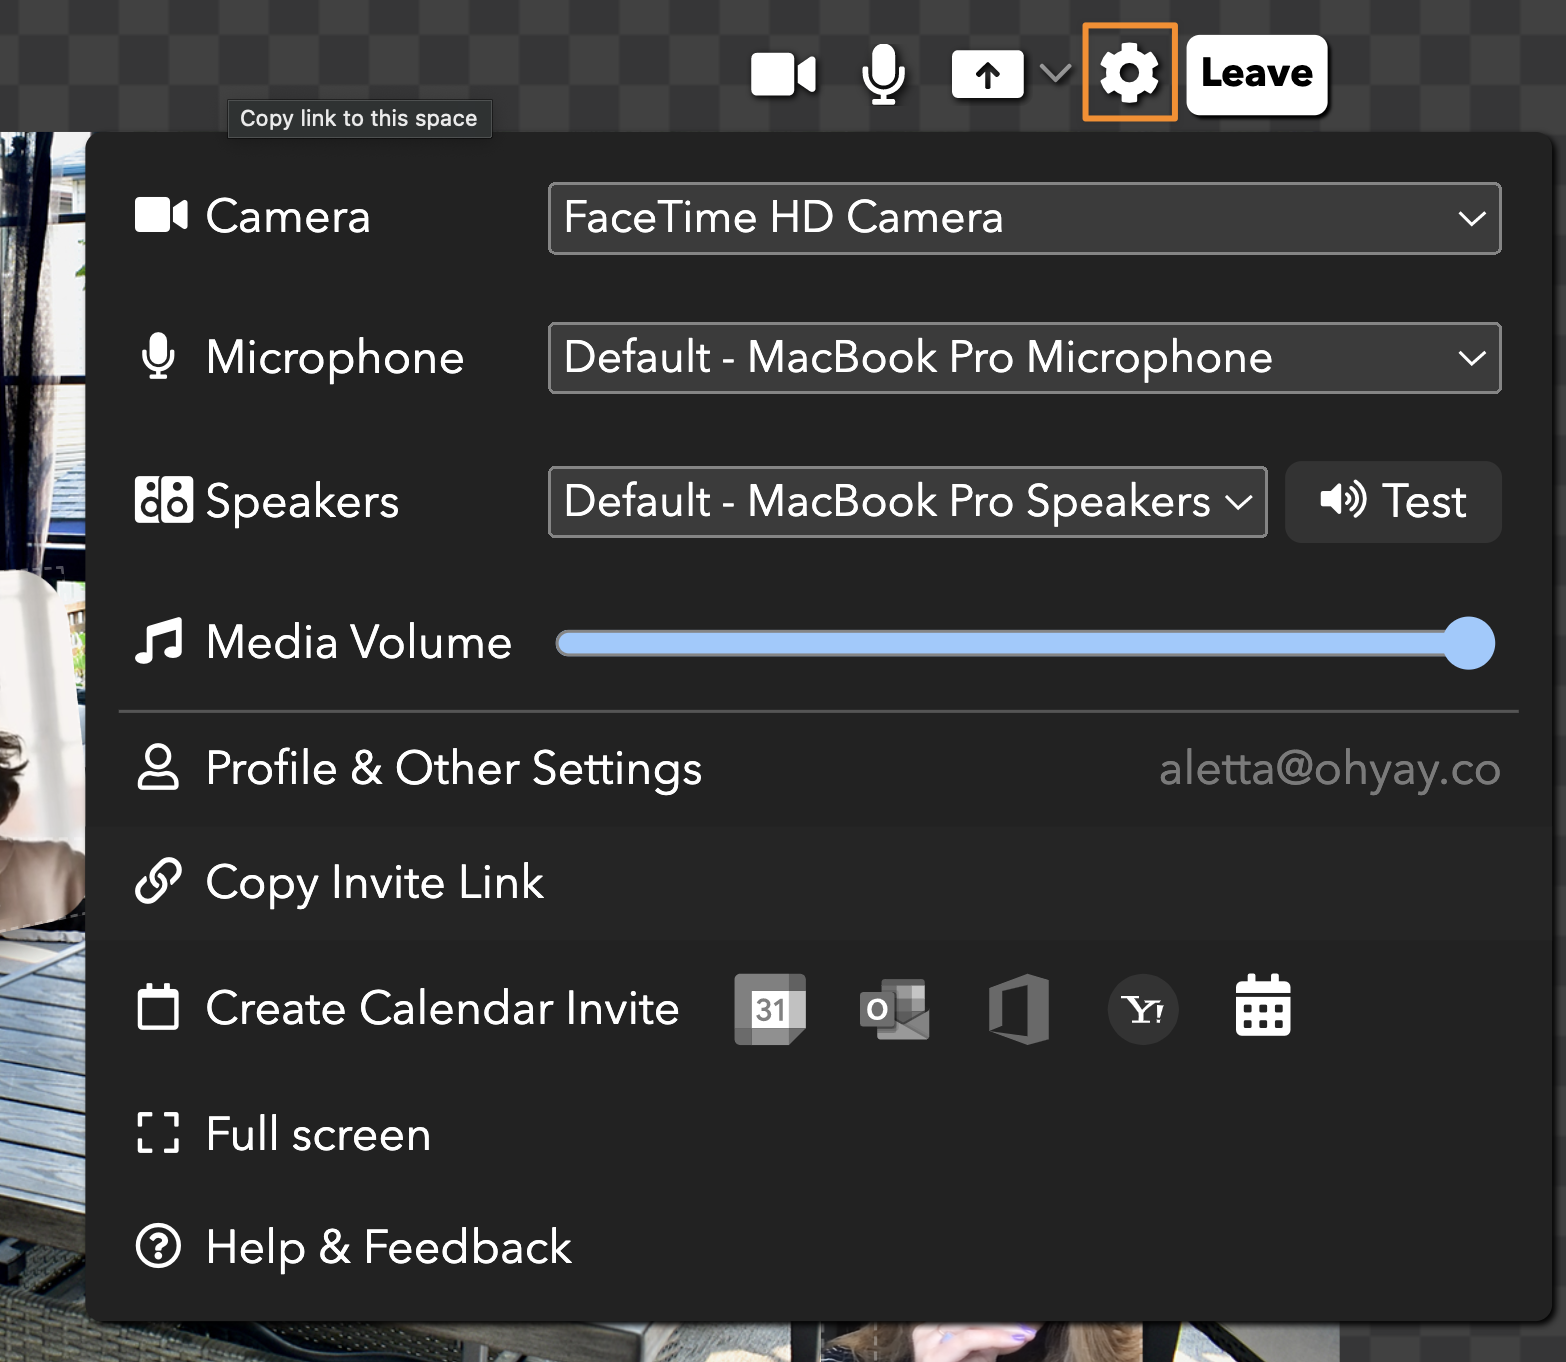
Lastly, click on your settings gear in the top right corner of your screen to adjust the volume of the room, change your profile, etc. During your event, you can point your users to this menu.
Securing your workspace
By default, anyone with a link to your workspace can access it. Before you share your workspace with others, you might want to consider a few of our security options, such as setting a password for your workspace, only allowing in users with a certain email domain, and more.
Today, let’s try setting a password.
To set a password:
- Open up your Workspace Settings by going to Workspace > Settings from the menu.
- Toggle the slider next to Require Password.
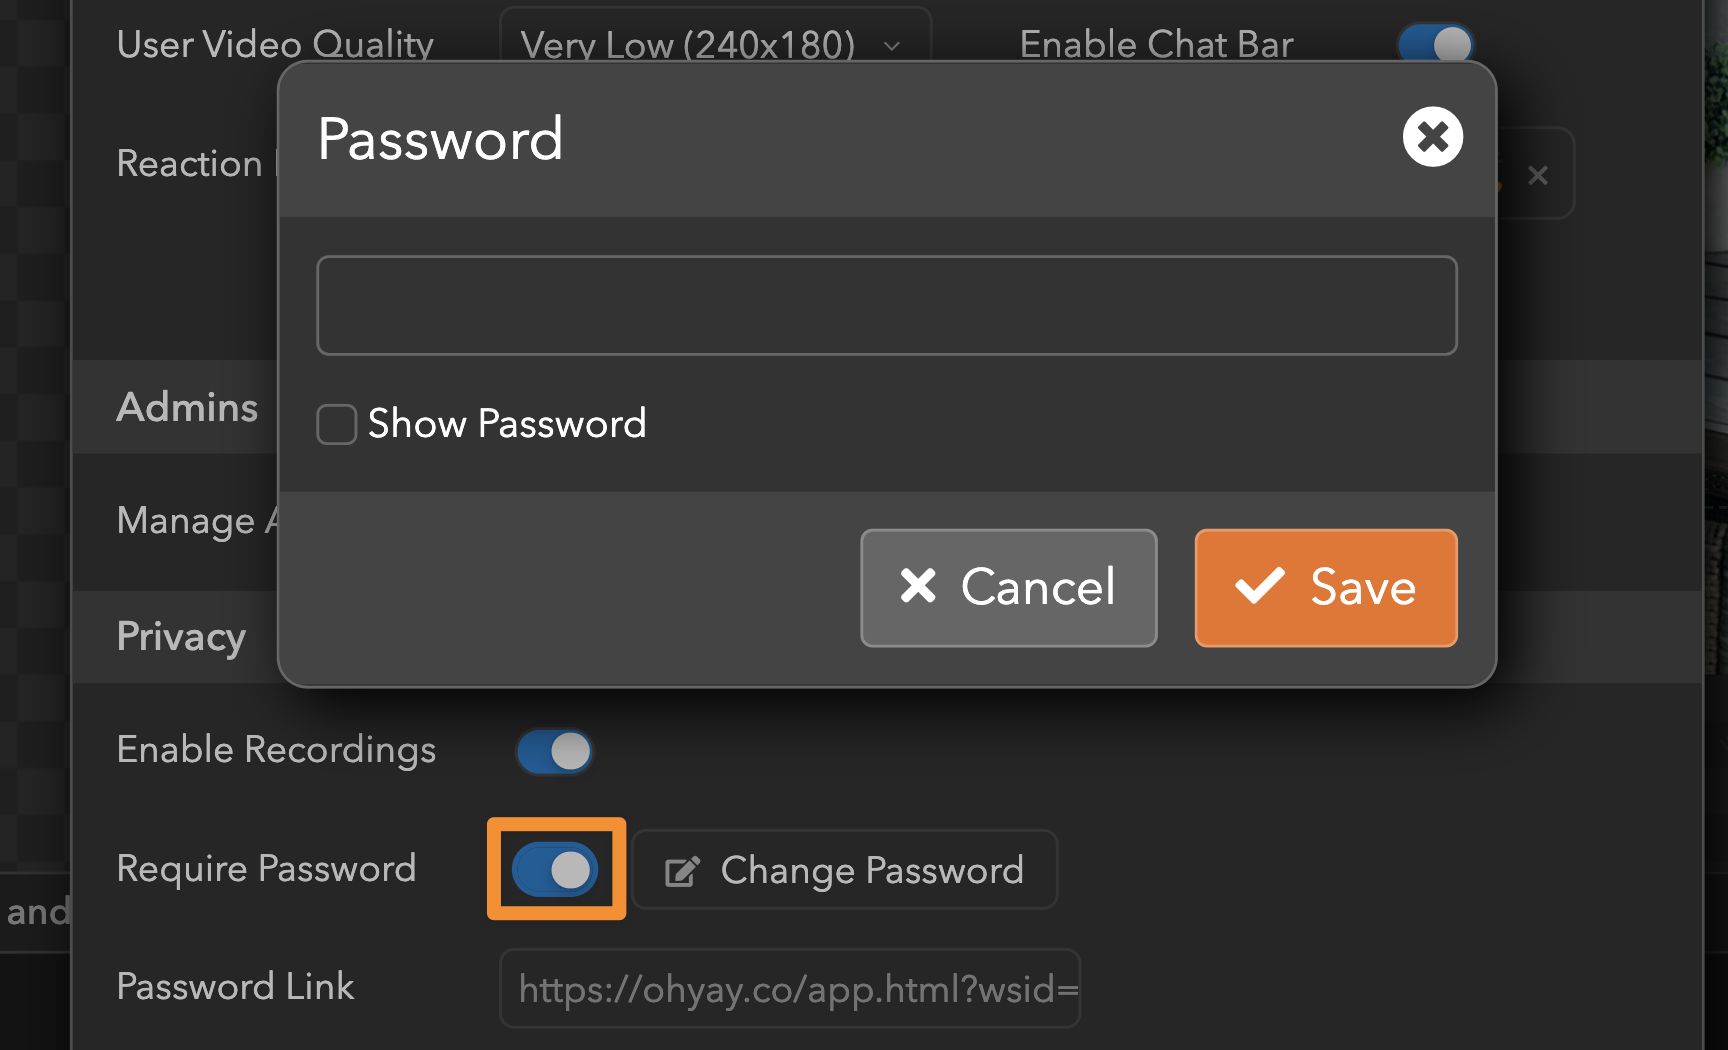
- Type in the password of your choice.
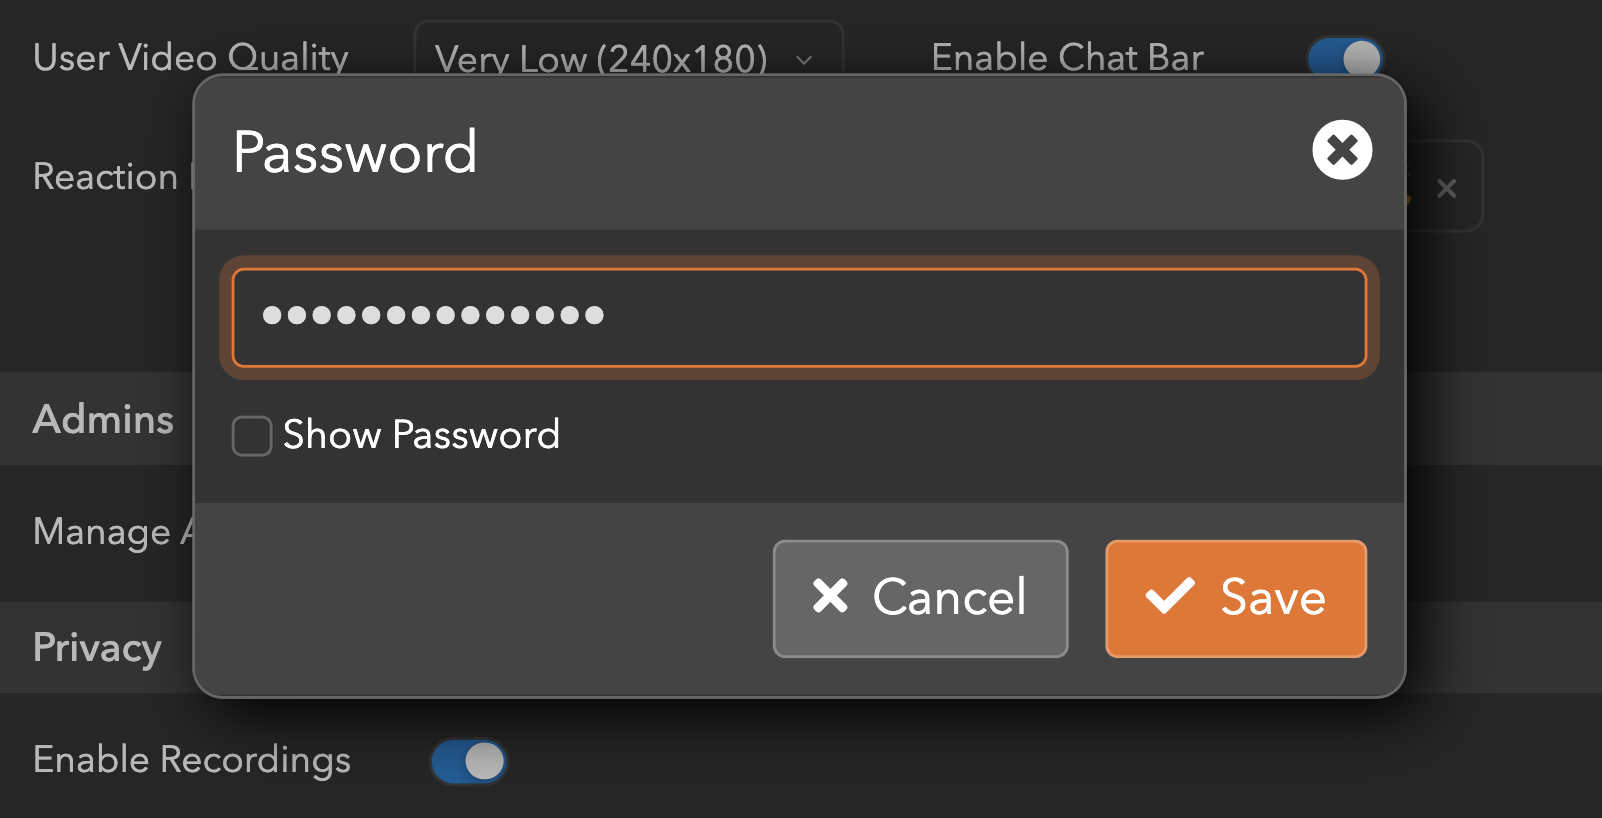
- Click Save.
Now, a user will have to enter the right password before getting into your workspace.
Sharing your workspace
The two main ways to share your workspace are: copying and pasting the URL at the top of your screen or setting a vanity URL.
Copying and pasting the link at the top of your screen
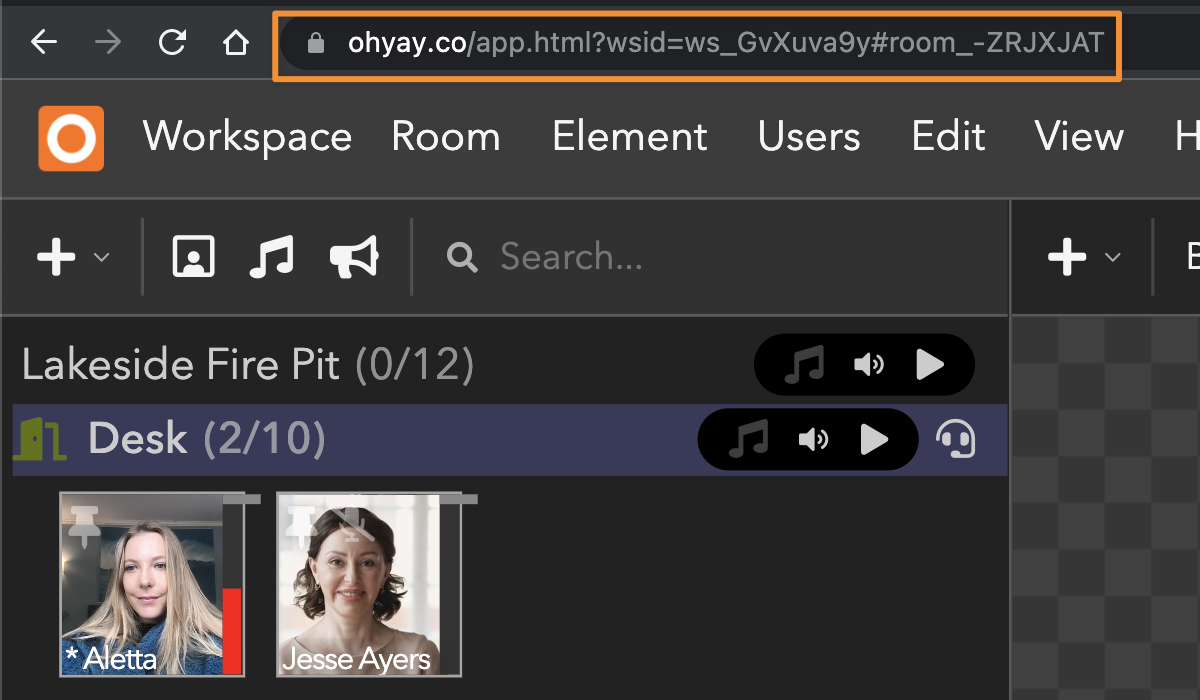
When you’re in the first room in your workspace (aka the first room in your Admins Rooms List), you’ll notice that the link at the top of the screen ends with something like this: ws_UZ2w82Vl. This is your Workspace ID (how your workspace is identified).
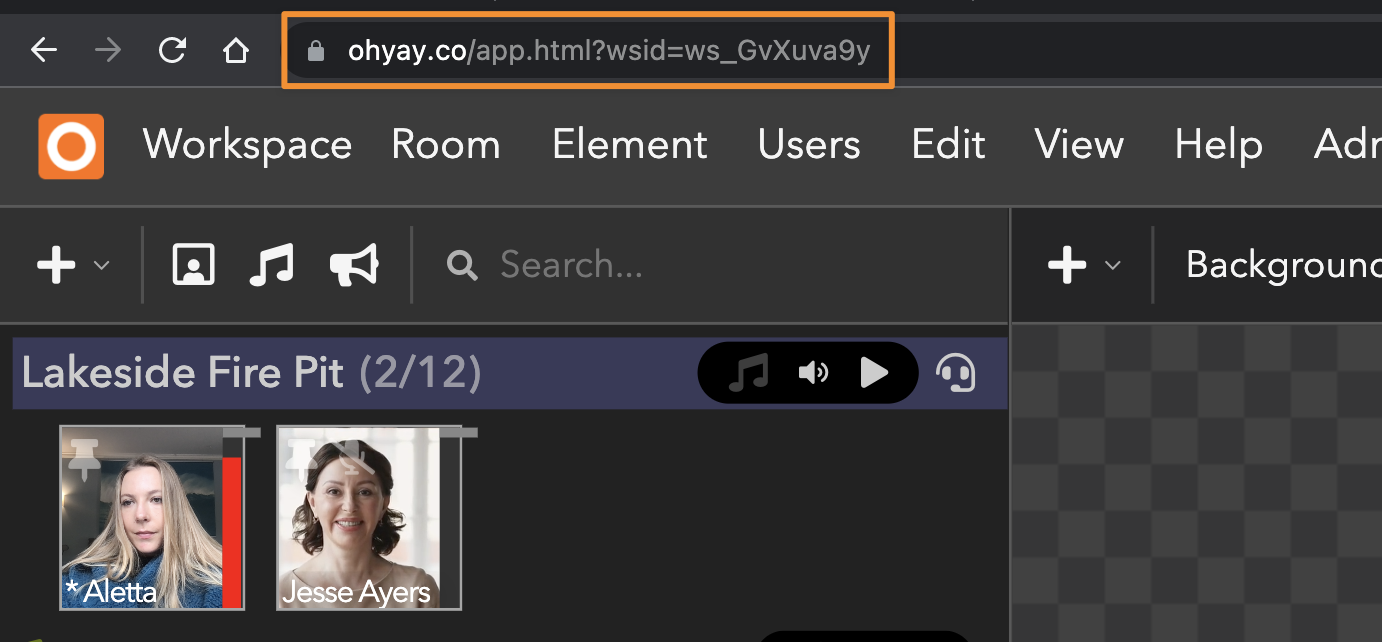
In other rooms, you’ll notice that the link ends with something like this: room_M-n6OFe5. This is your Room ID. When you send someone a link with a specific room ID (e.g. #room_oPJWPLpM), they’ll join that specific room.
Setting a vanity (custom) URL that’s unique to your workspace
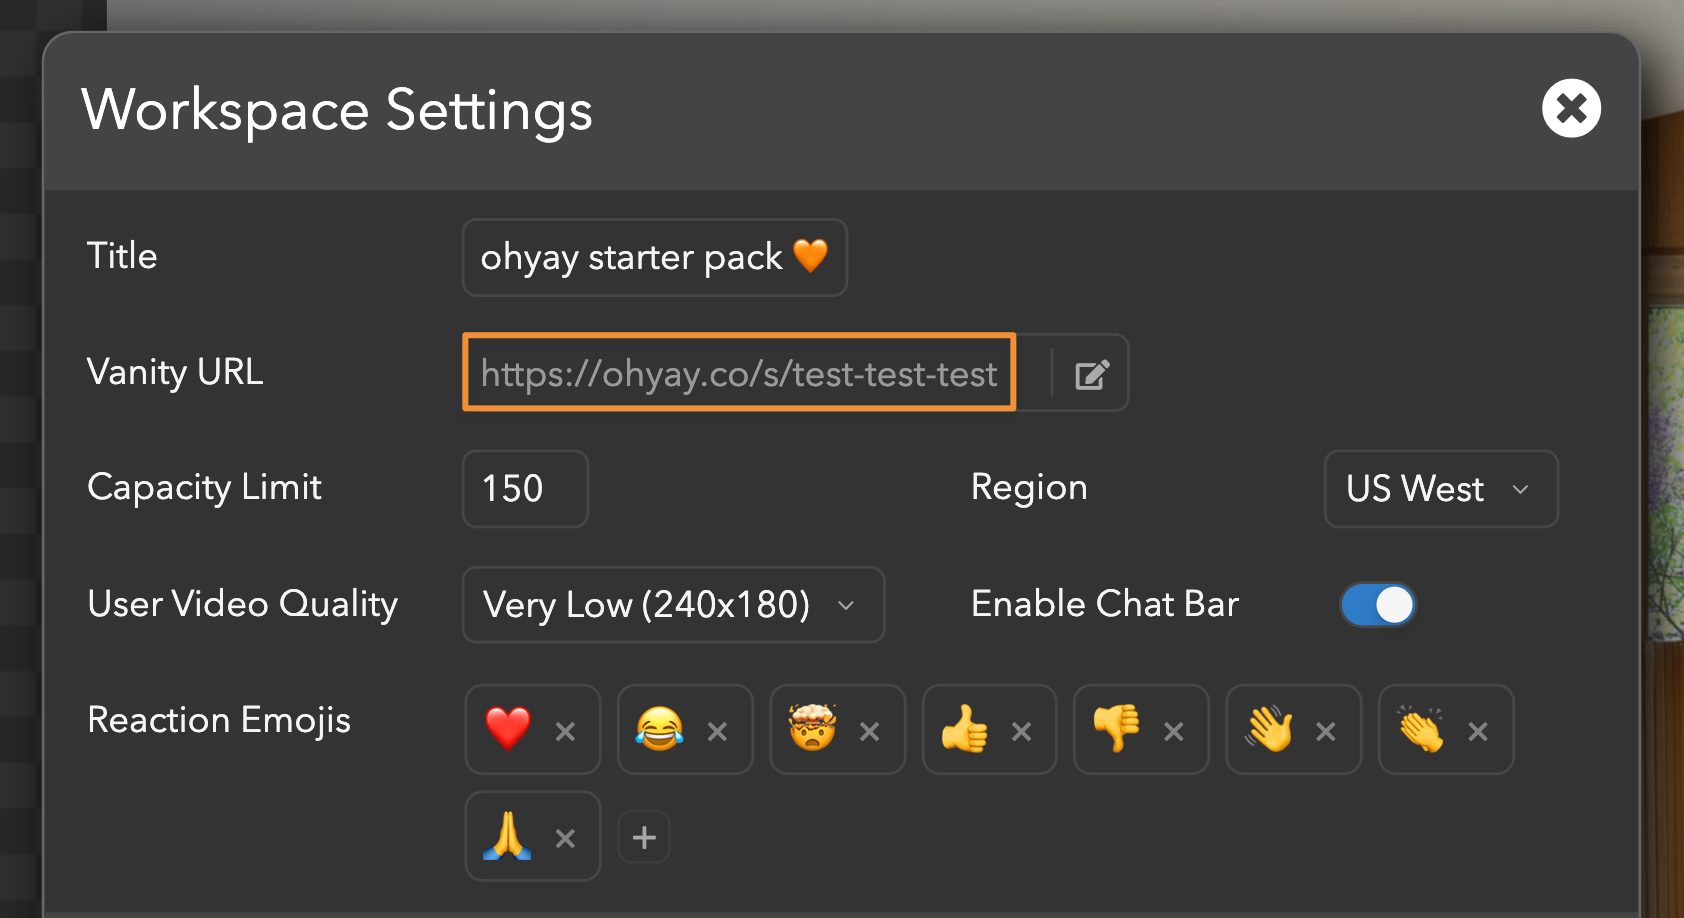
Others will want to set a clean, custom URL (e.g. https://ohyay.co/s/team-happy-hour) that takes users to the first room in their workspace, which is typically a welcome page.
To set a vanity URL:
-
Open up your Workspace Settings by going to Workspace > Settings from the menu.
-
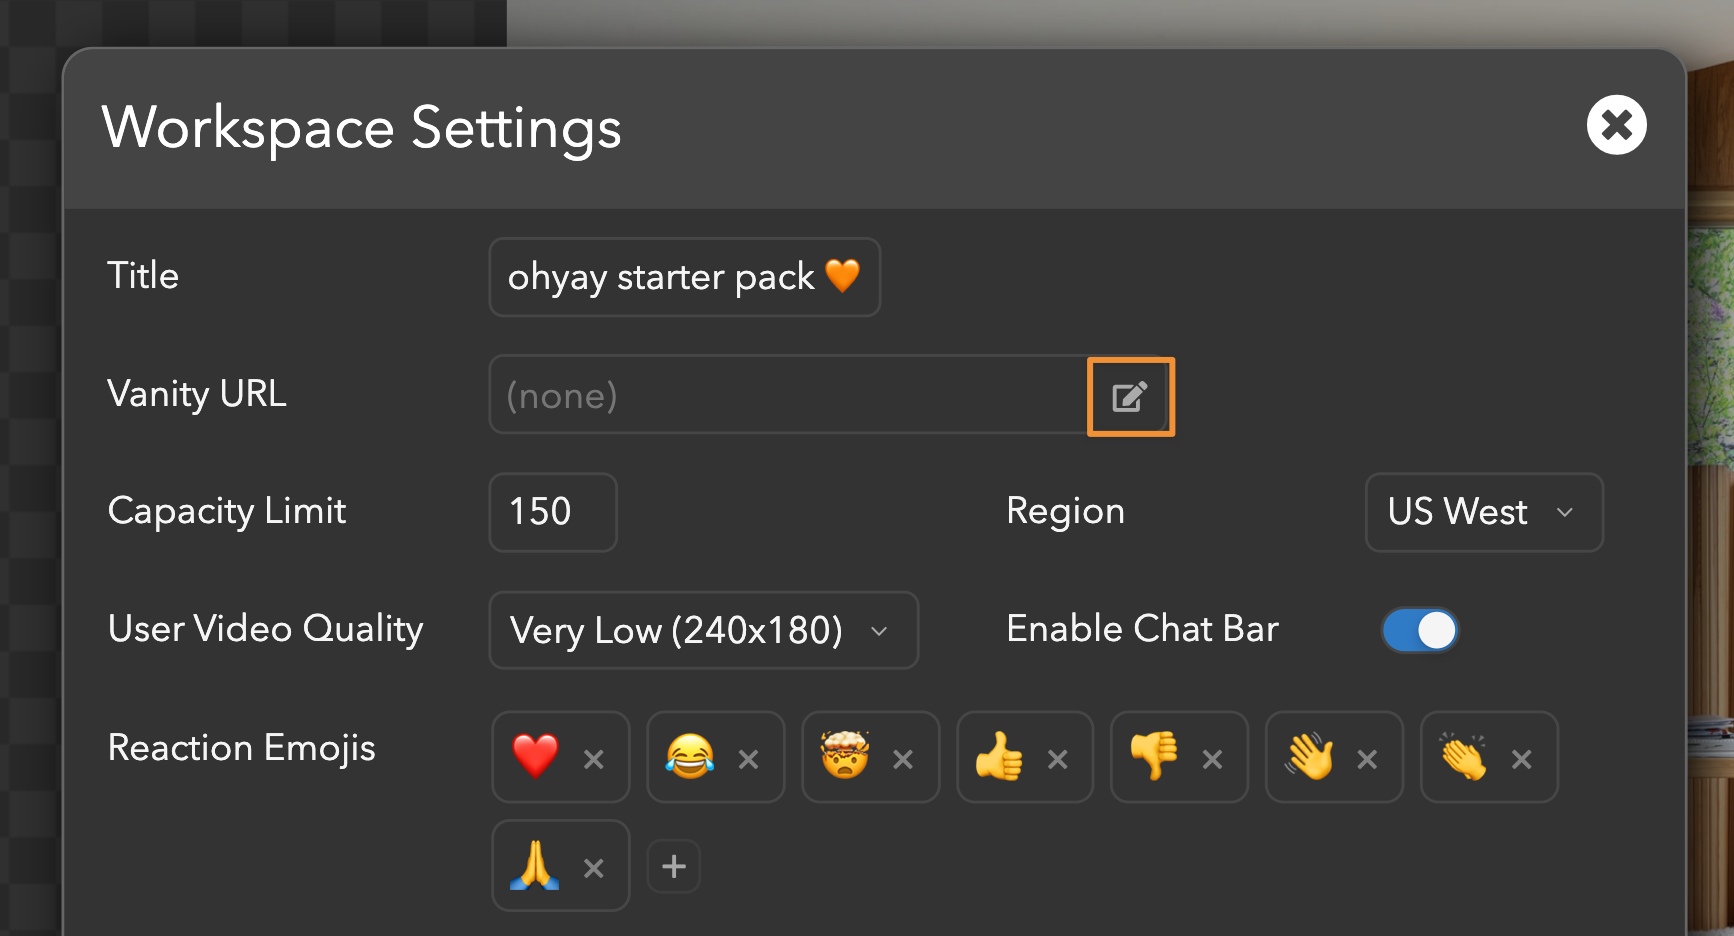
Click on the edit icon next to Vanity URL.
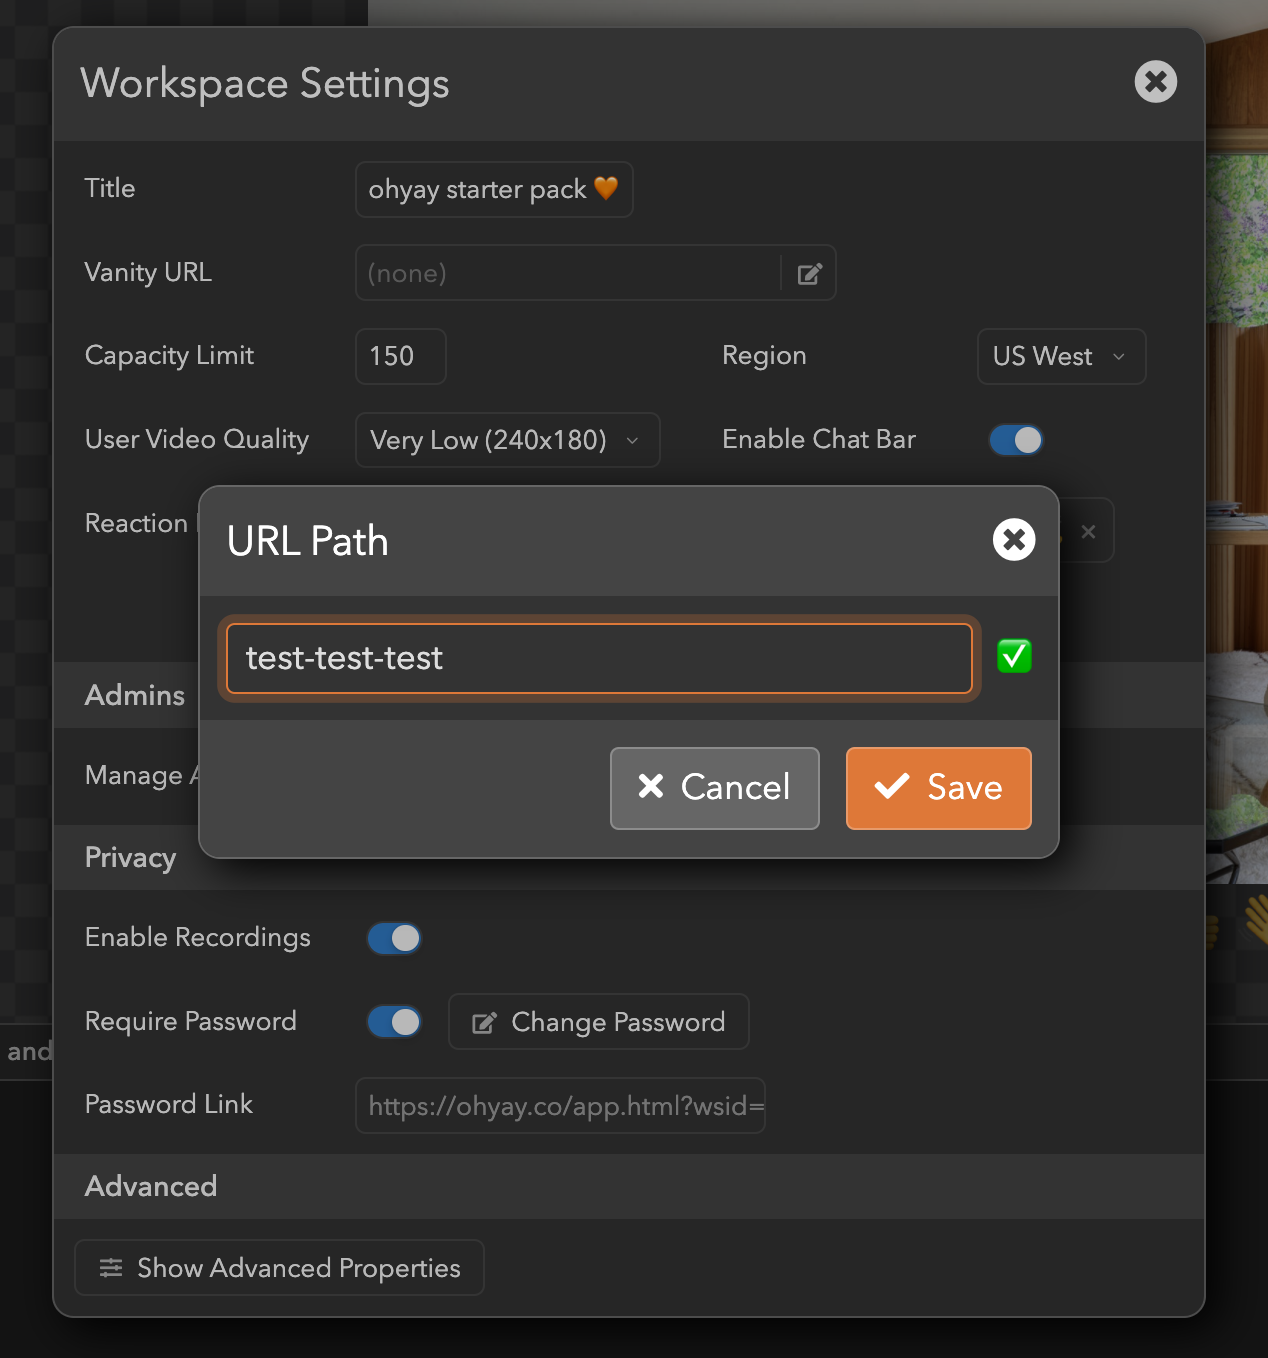
- Enter your custom URL path. If your path isn’t already taken, you’ll see a green check mark appear.
-
Click Save.
-
Copy and paste the Vanity URL in the dialog.
In your invite, you can say something like: Click on this link (https://ohyay.co/s/birthday-party) to join the virtual event.
Congratulations, you now know the basics of importing a workspace, creating rooms, and editing elements within those rooms.
In future guides, we’ll dive into how to make elements interact with each other via action buttons, run breakouts, set up recording and streaming, and more.
Email us at [email protected] or ping us on Discord with feedback and questions.
Updated over 3 years ago
