Breakout Button
A button that moves users throughout a workspace, such as bringing all users to a room or breaking users into a set of rooms.
In ohyay, users typically move themselves via the Rooms List or by clicking on links, but admins can also force users into specific rooms via breakouts. In many virtual events, breakouts are an important part of facilitating connection and creating stronger bonds among guests.
Breakouts are initiated by creating a Breakout Button. This button will hold the logic for the desired form of breakout and clicking this button during an event will cause the logic to run.
A basic breakout in ohyay is similar to what you might have seen on Zoom: an admin hits a button to send people into smaller groups across different rooms, and brings them back into the main room after a specified period of time. The difference from other virtual platforms is that breakout buttons in ohyay are typically pre-configured.
There are three pieces of core functionality to a breakout:
- Creating temporary rooms
- Moving users into rooms
- Moving users into slots
It is very common to not only send users into rooms, but also to move a user into a singular slot (e.g. during a presentation).
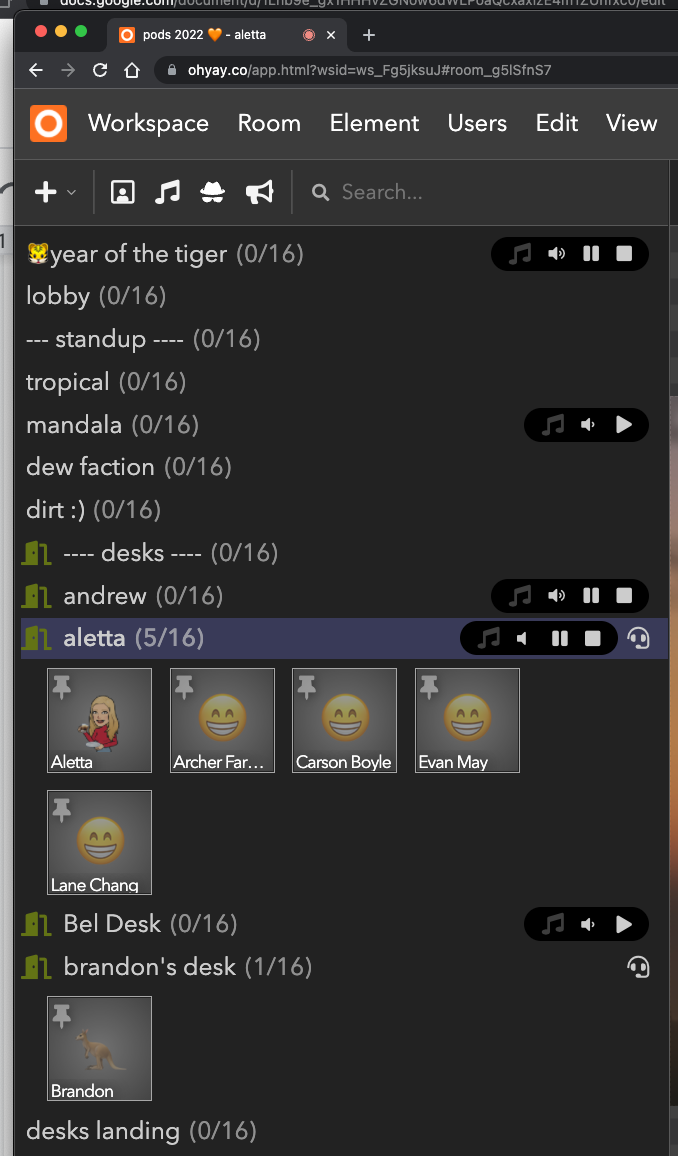
When you run a breakout, you’ll want to keep a close eye on the Admin Rooms List on the left-hand side of your screen. The Admin Rooms List is a list of the rooms in your workspace where admins (not guests) can see user thumbnails populate, indicating that a user is in a room.
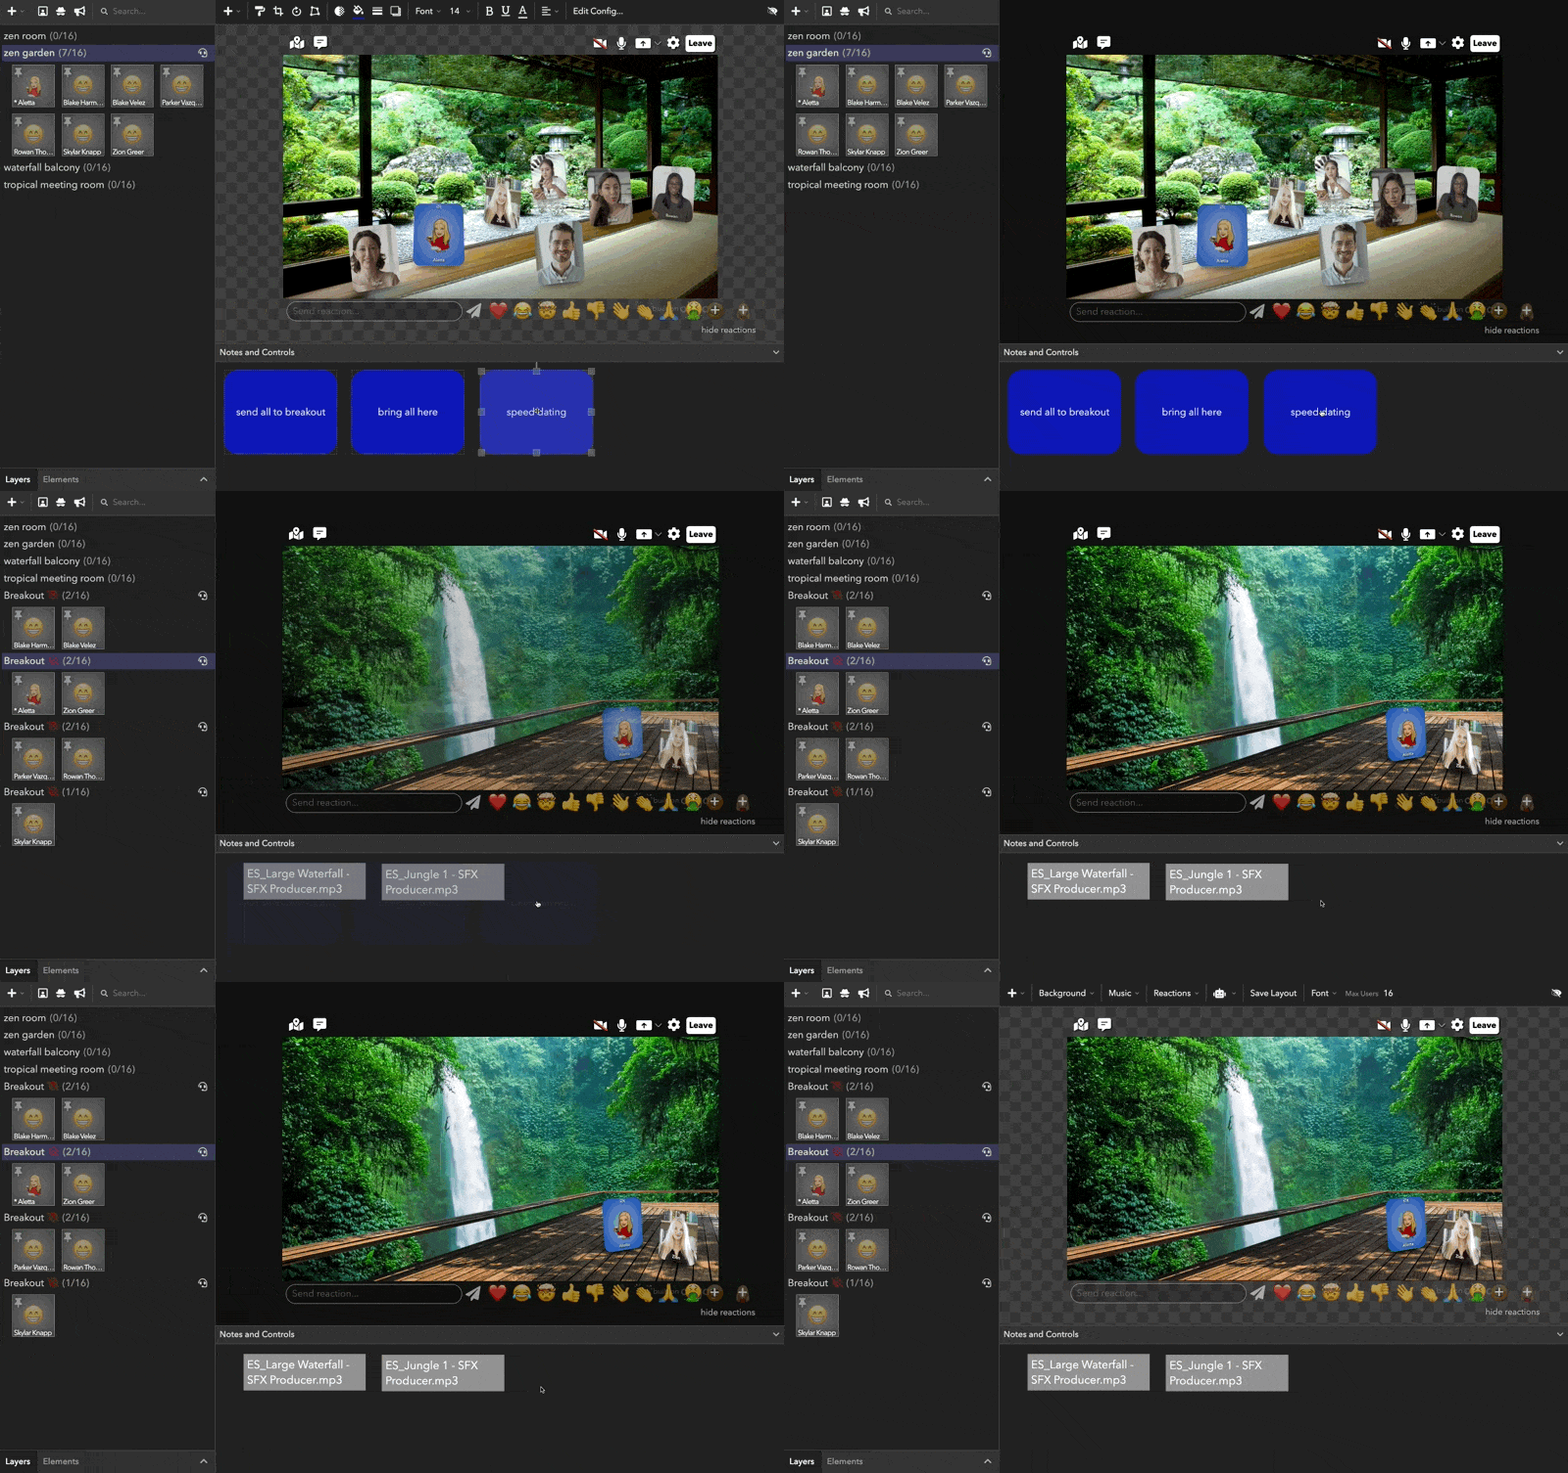
Breakout buttons are used to move users across workspaces in a variety of ways, and can be as simple or as complex as you want them to be. They give you the power to send users to specific existing rooms in your workspace or to new, temporary rooms. We will walk through some of the scenarios in which you might use breakouts.
Examples
Speed Dating: Users are mixed up with new partners every few minutes
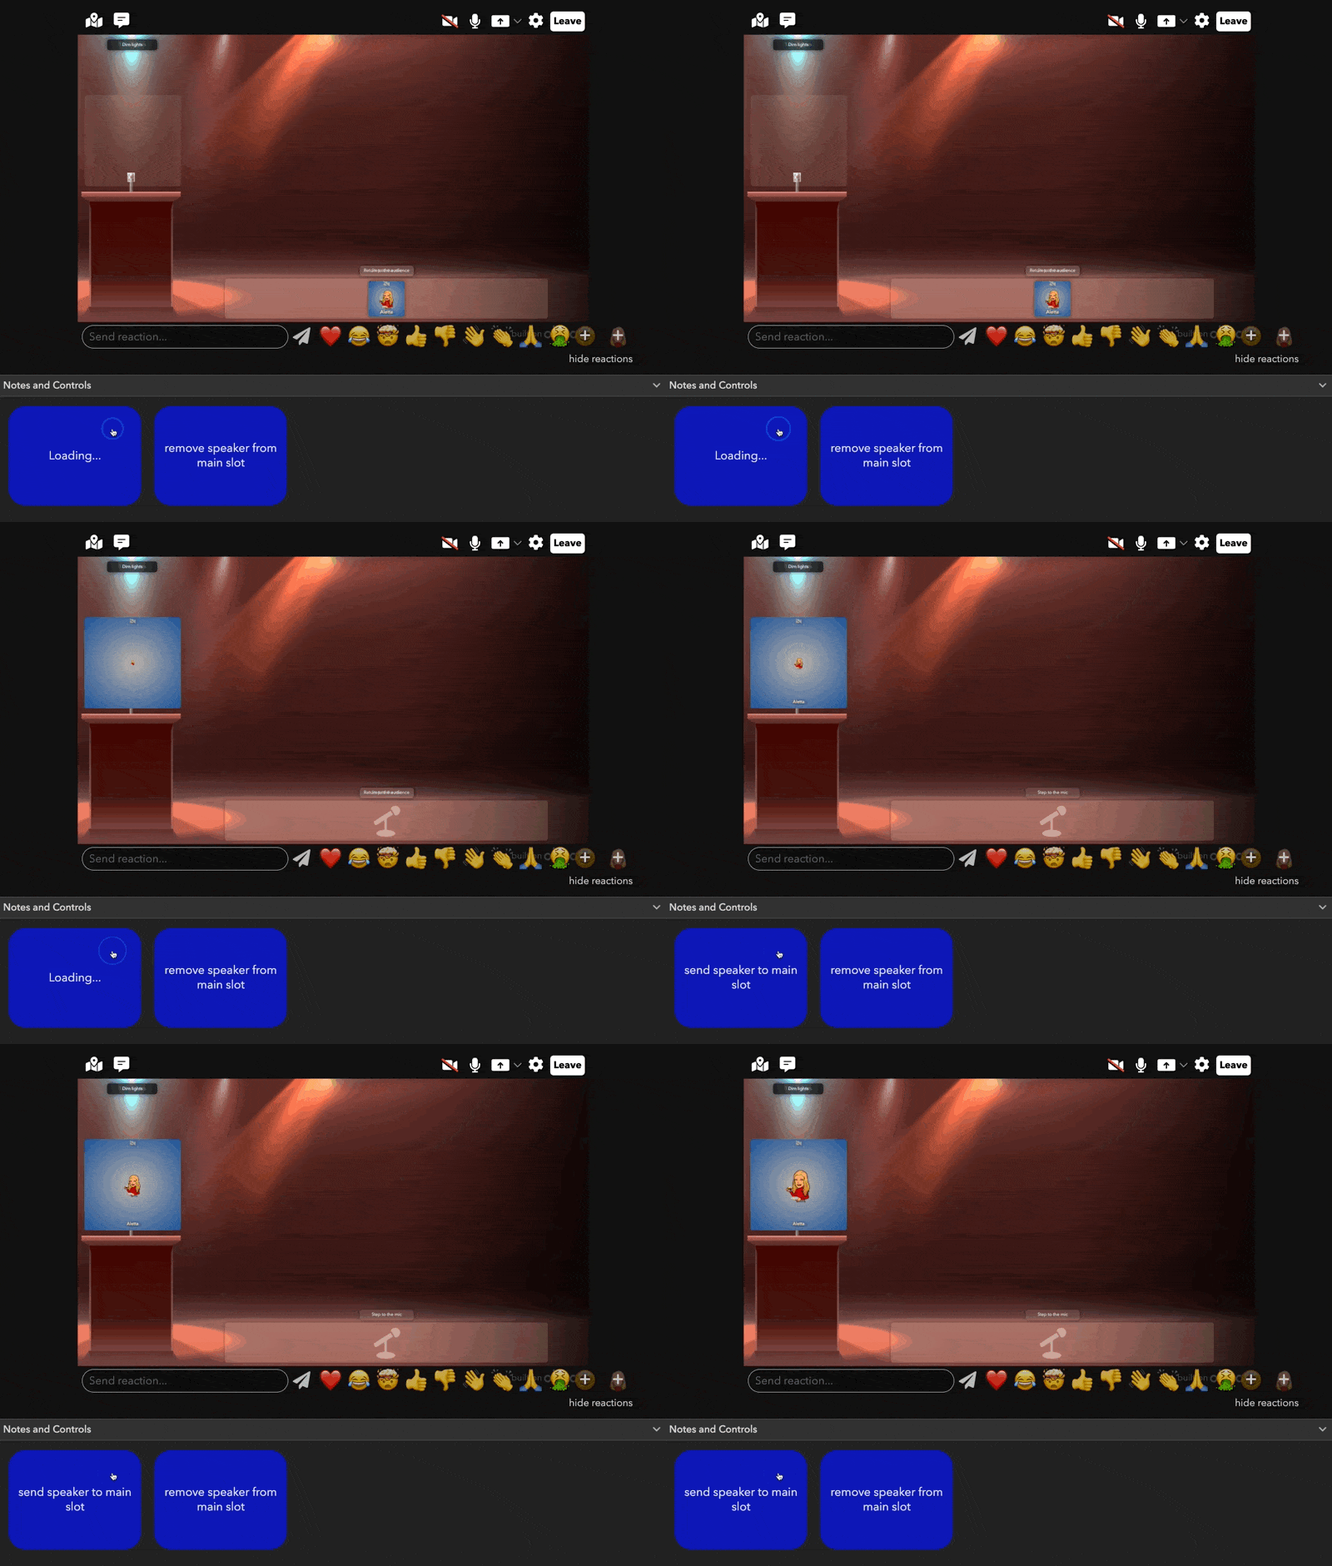
Presentation: A speaker is brought up to a specific slot in the room
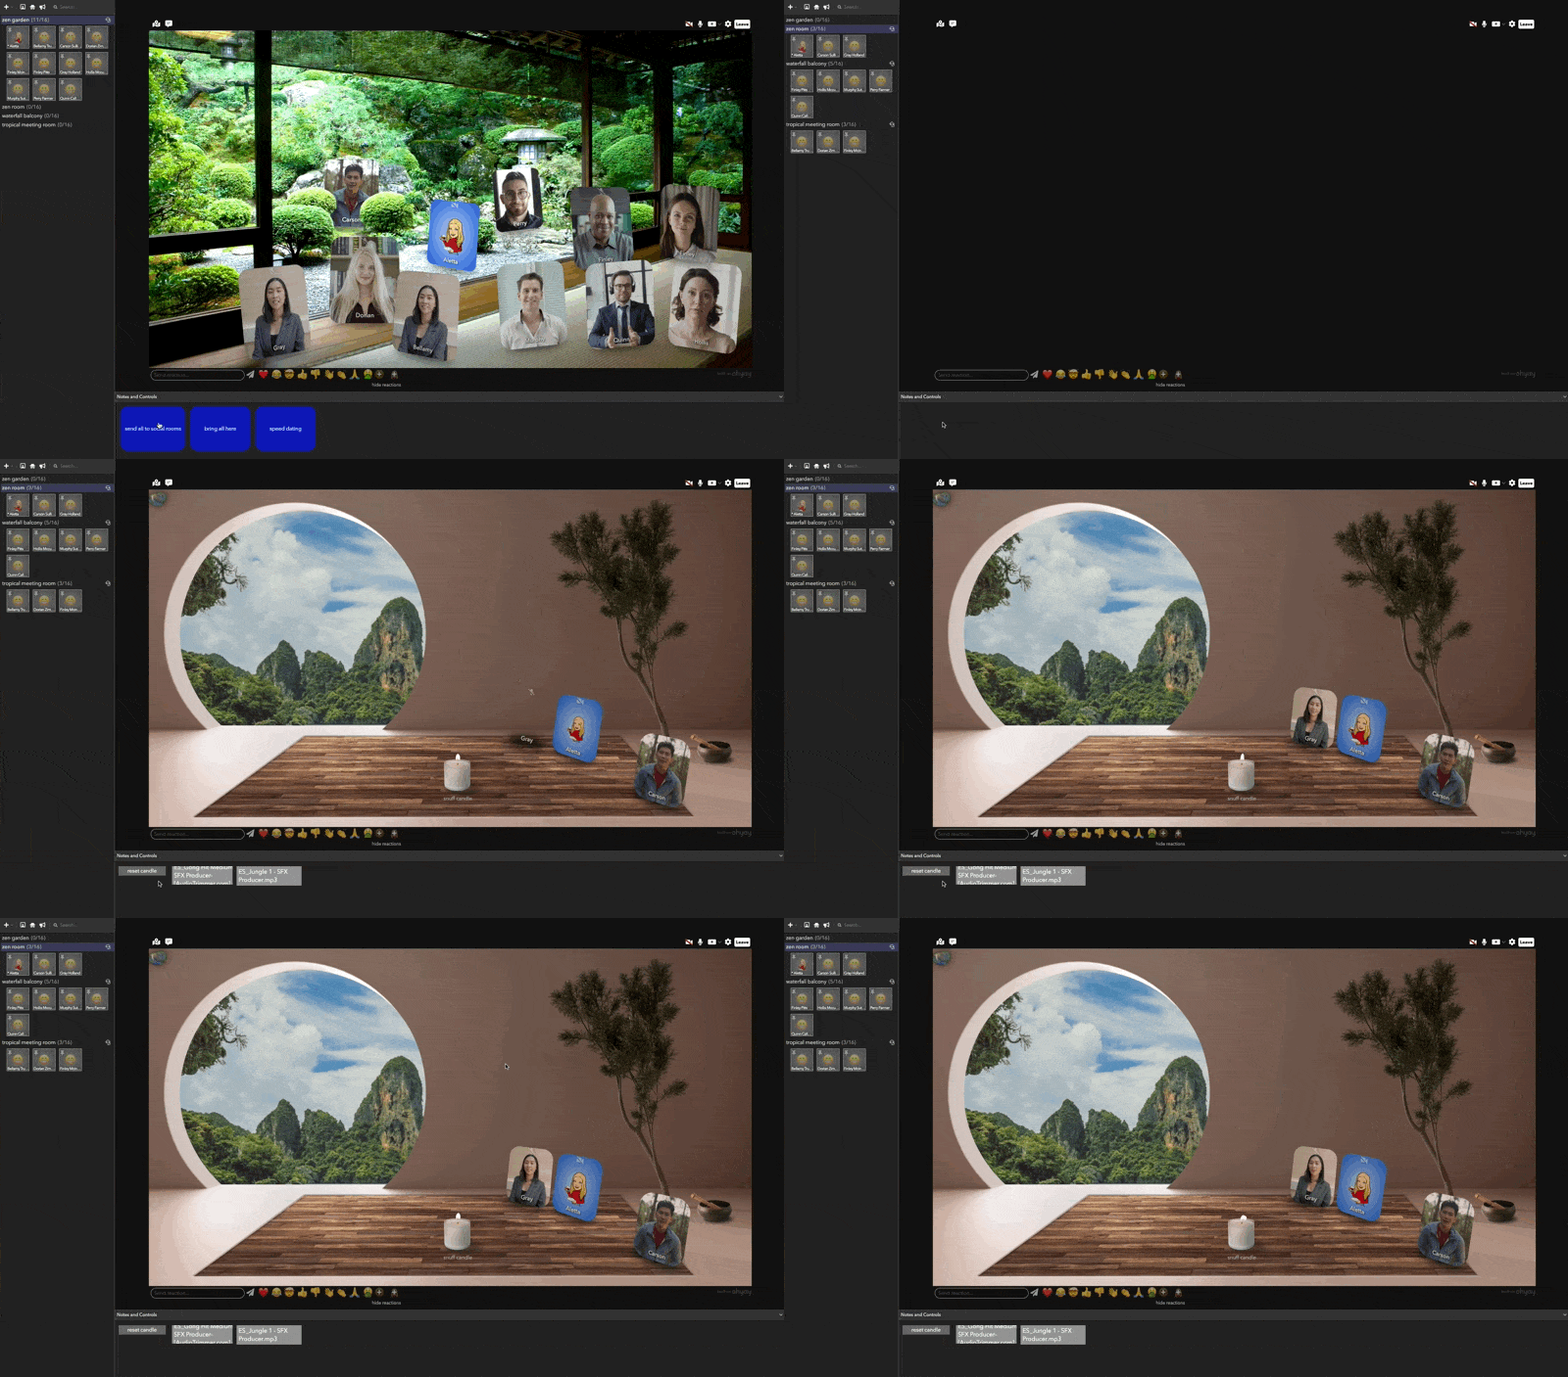
Social Rooms: Users are randomly distributed into social rooms (e.g. after a keynote at a conference)
Bring All Here: All users are brought to a single room in a workspace (e.g. to an auditorium from a lobby room)
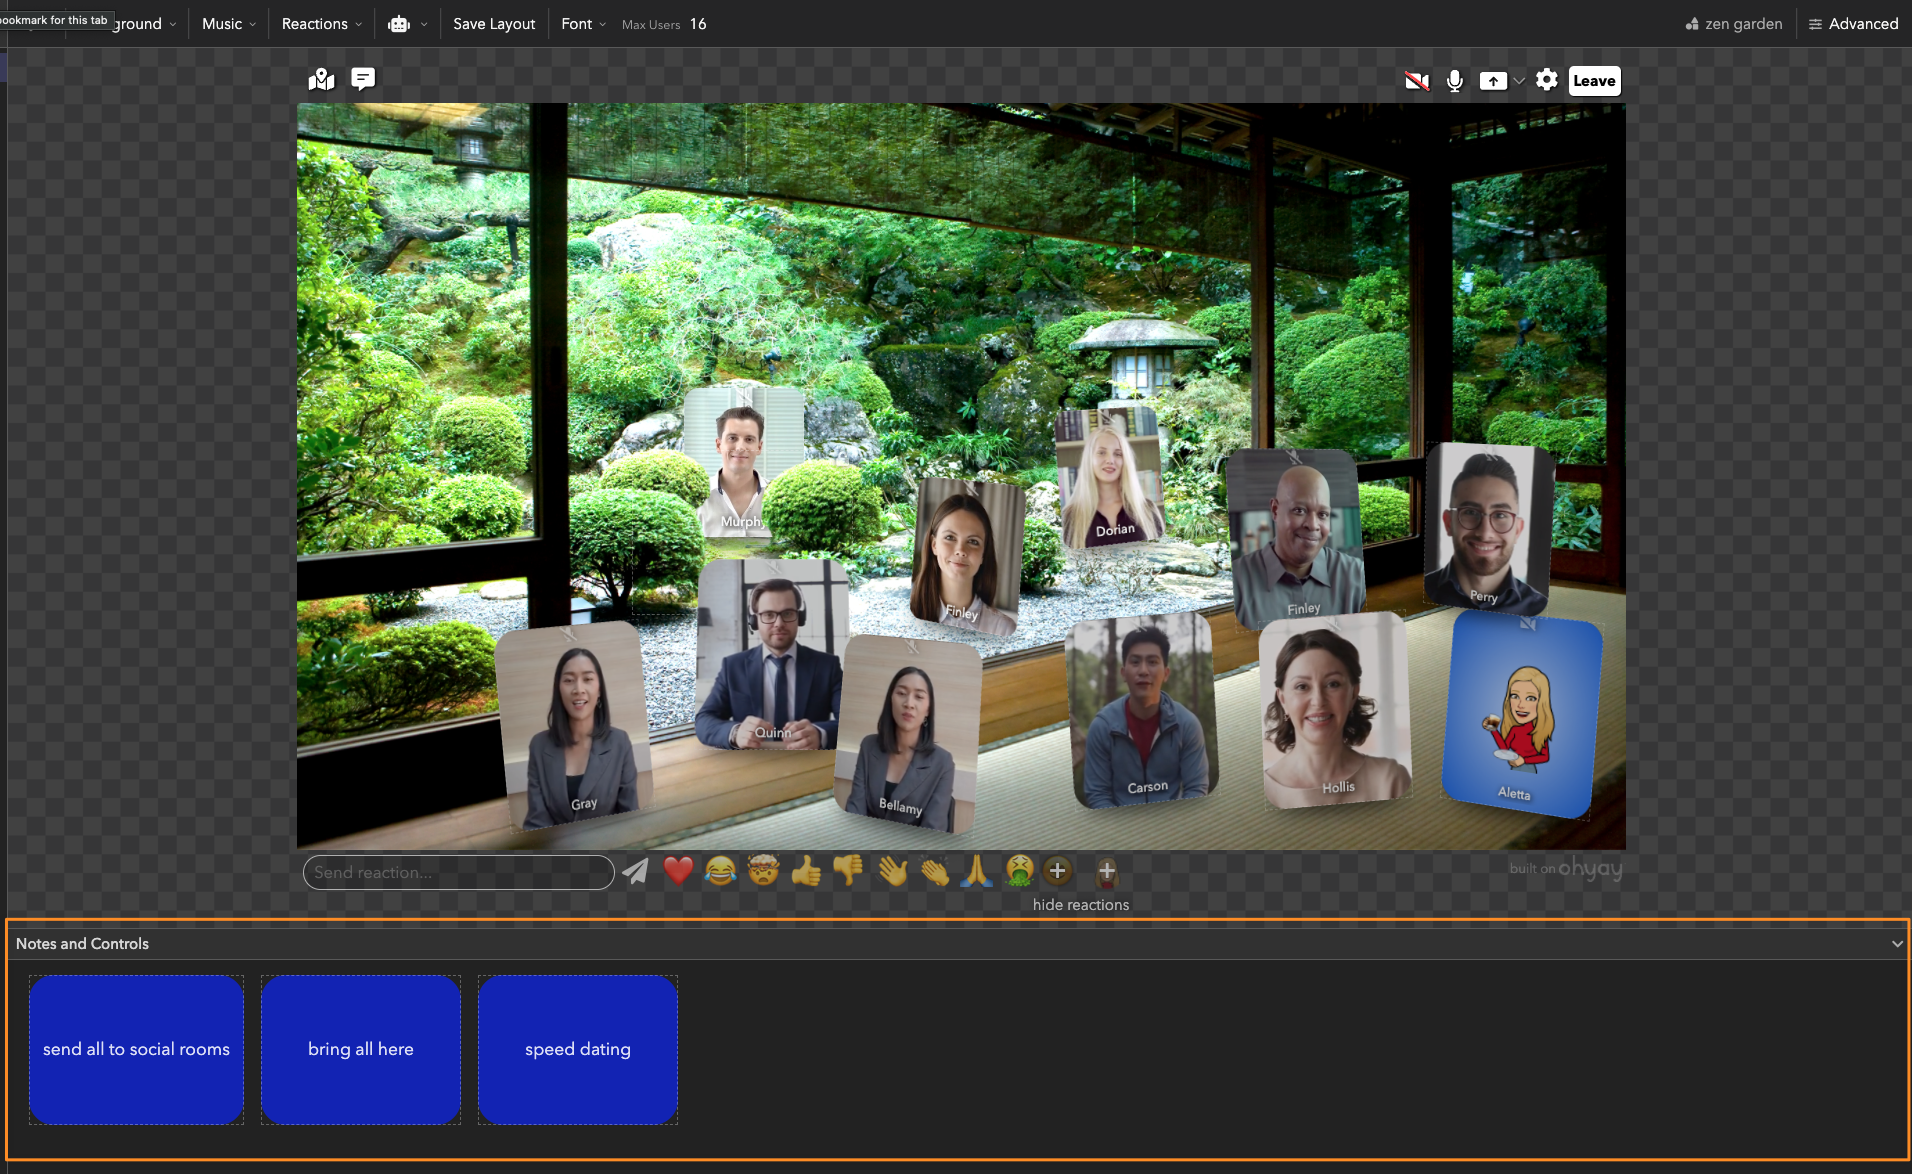
You’ll typically want to drag your breakout button into the Notes and Controls panel at the bottom of the screen, so that it is only visible to admins and directors. (You can think of the Notes and Controls panel like the notes section of a Powerpoint slide). However, you can also drag a breakout button into the canvas to allow any user to push it themselves.
Creating a Breakout
Creating a breakout involves the following steps, which we will outline below:
-
Add & name your breakout button
-
Configure your breakout button
- Determine who will be moved
- Determine where they will be moved to
- Bring users back
Adding a breakout button
To add your breakout button, click on the “+” dropdown at the far left of the toolbar at the top of your screen and select the icon.
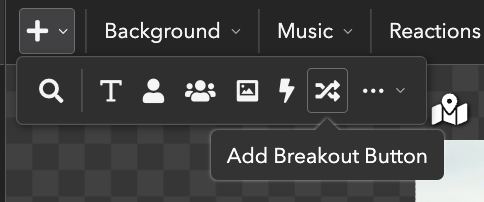
You’ll see a gray button (that says “breakout”) appear on your screen. As discussed above, you can drag the button into your Notes and Controls panel so it is visible to only admins.
Naming your breakout button
It is best practice in ohyay to name your elements, especially breakout and action buttons, so that you can keep them organized.
To name your breakout button:
- Click on the breakout button and highlight (Breakout Button) next to the
icon on the top right of your screen.
- Type in “Breakout Button Test.”
Now, in the layers panel on the lower left of your screen, you’ll see that the button is labeled as “Breakout Button Test.”
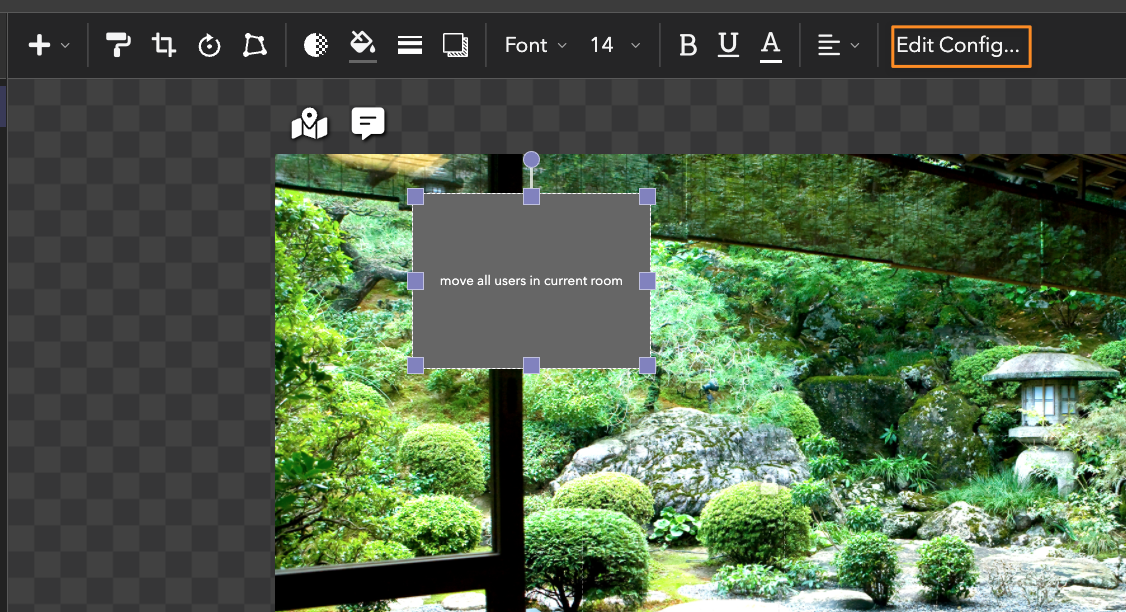
You’ll also want to edit the text on the breakout button so that you’ll remember what it does. In this tutorial, click on the button to get a cursor and type in "move all users in current room".
Configuring your breakout button
The first step to configuring any breakout button is opening it up. To do so, follow these steps:
- Click on the breakout button to pull up its settings.
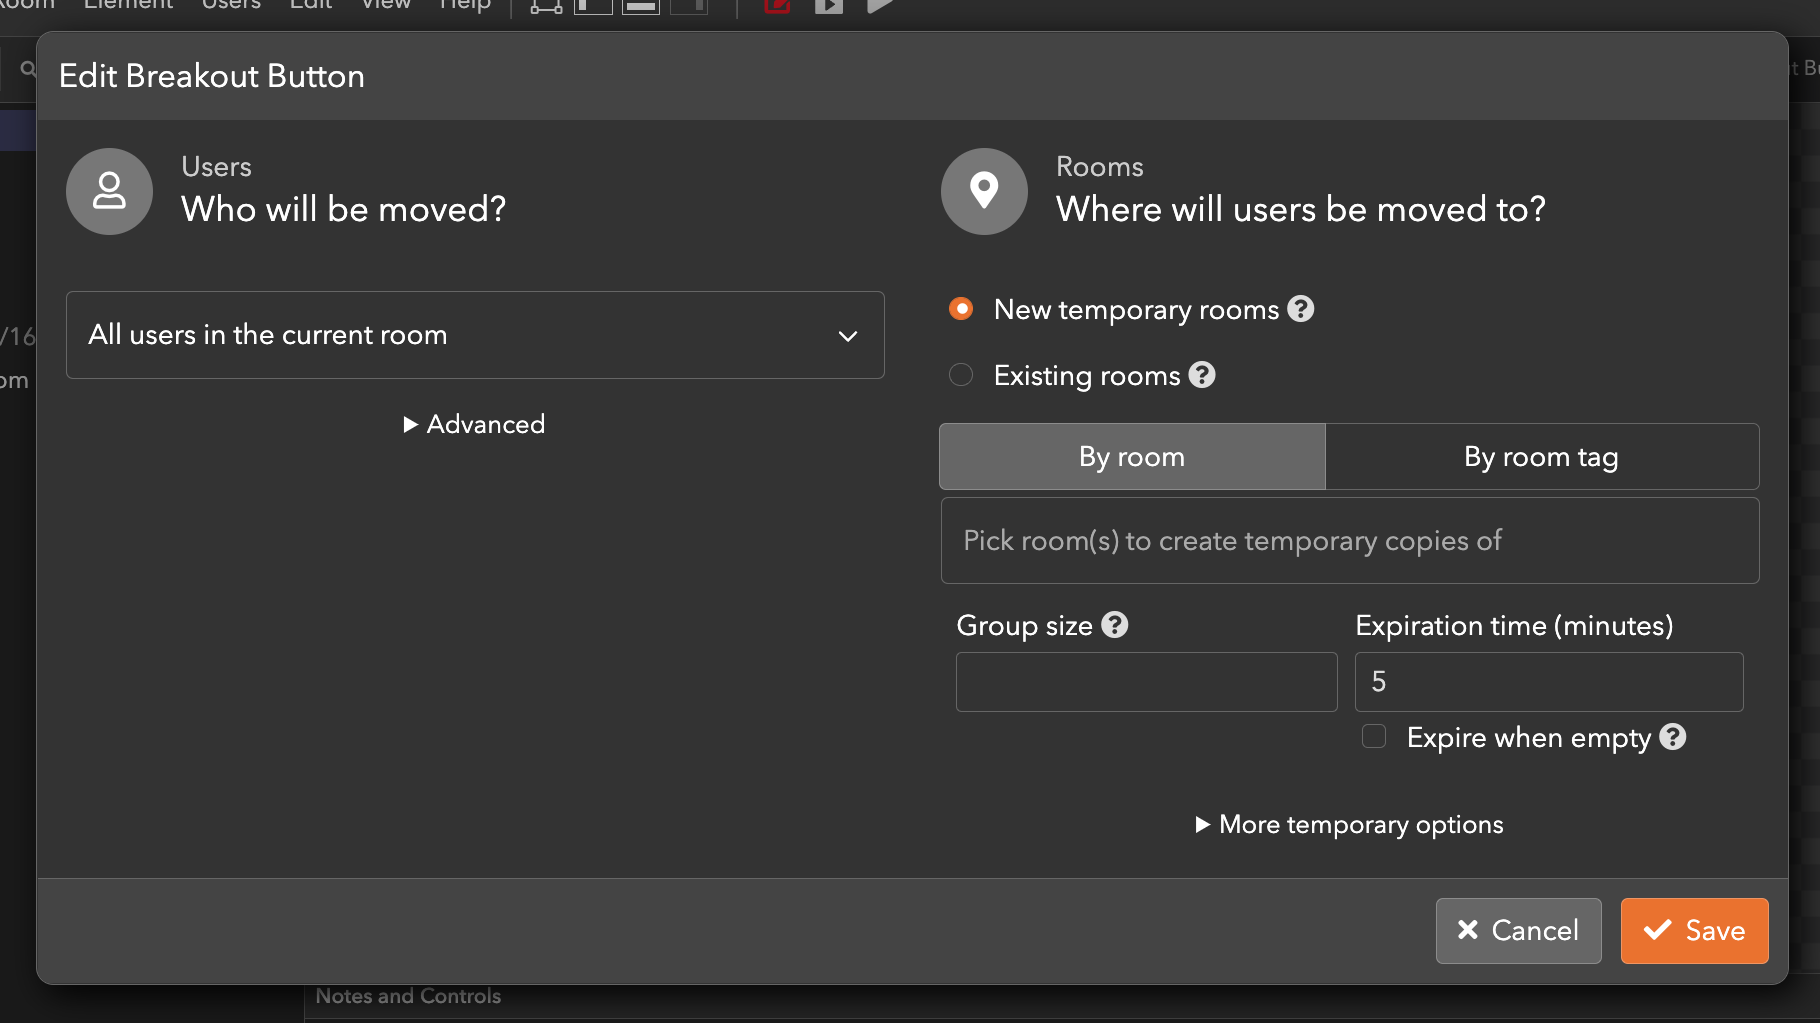
- Click on Edit Config… at the far right of the Toolbar. You’ll see a dialog pop up with a few different options for your breakout button, allowing you to specify 1. who you want to move and 2. where you want to move them to.
Who will be moved?
The first section in the breakout button configuration deals with the users that you want to move. You’ll likely want to figure out who you’re moving before you decide where to move them.
For the purpose of this tutorial, select all users in the current room from the dropdown.
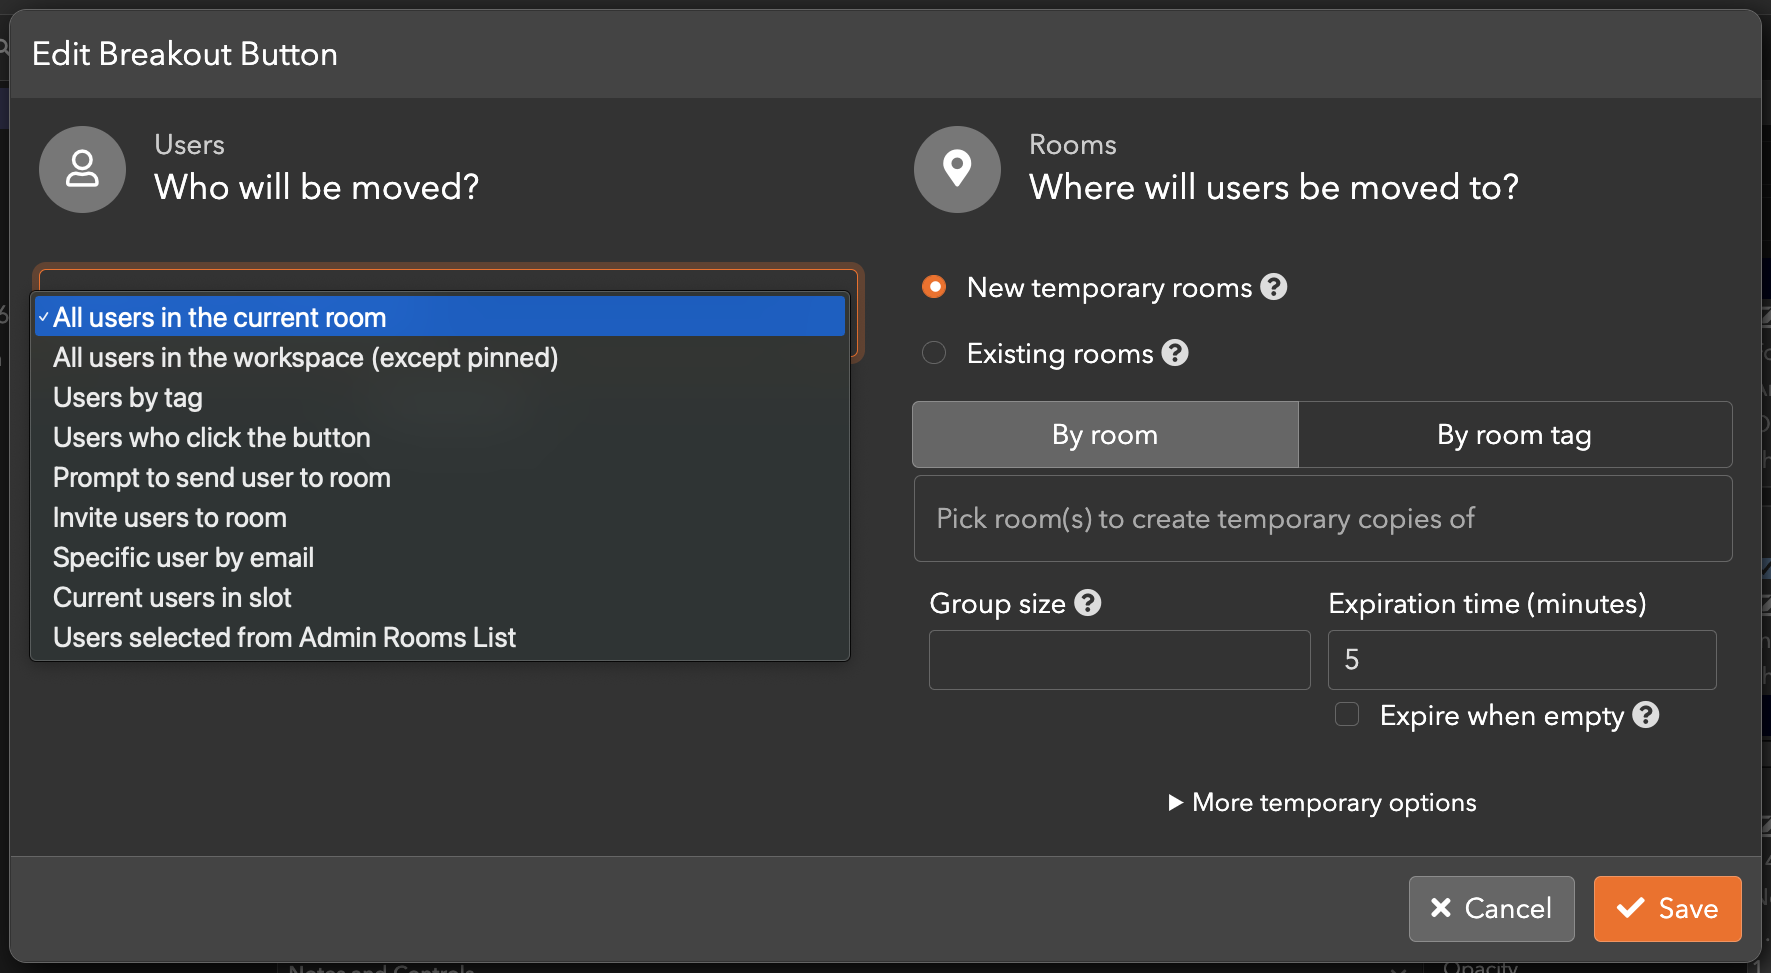
Here are all of the options in the dropdown, explained:
-
All users in the current room: Move all of the users in the room that the breakout button is currently in.
-
All users in the workspace (except pinned): Move all of the users in the workspace, except those that are pinned to a room. (You can pin a user to a room by clicking on the pushpin icon on the top left of their thumbnail in the Admin Rooms List). This is commonly used to move everyone back from breakout sessions into a main room.
-
Users by tag: Specify which users you want to move based on their specific tag (or lack of a tag). For example, you can move all users tagged with “staff” into a green room.
-
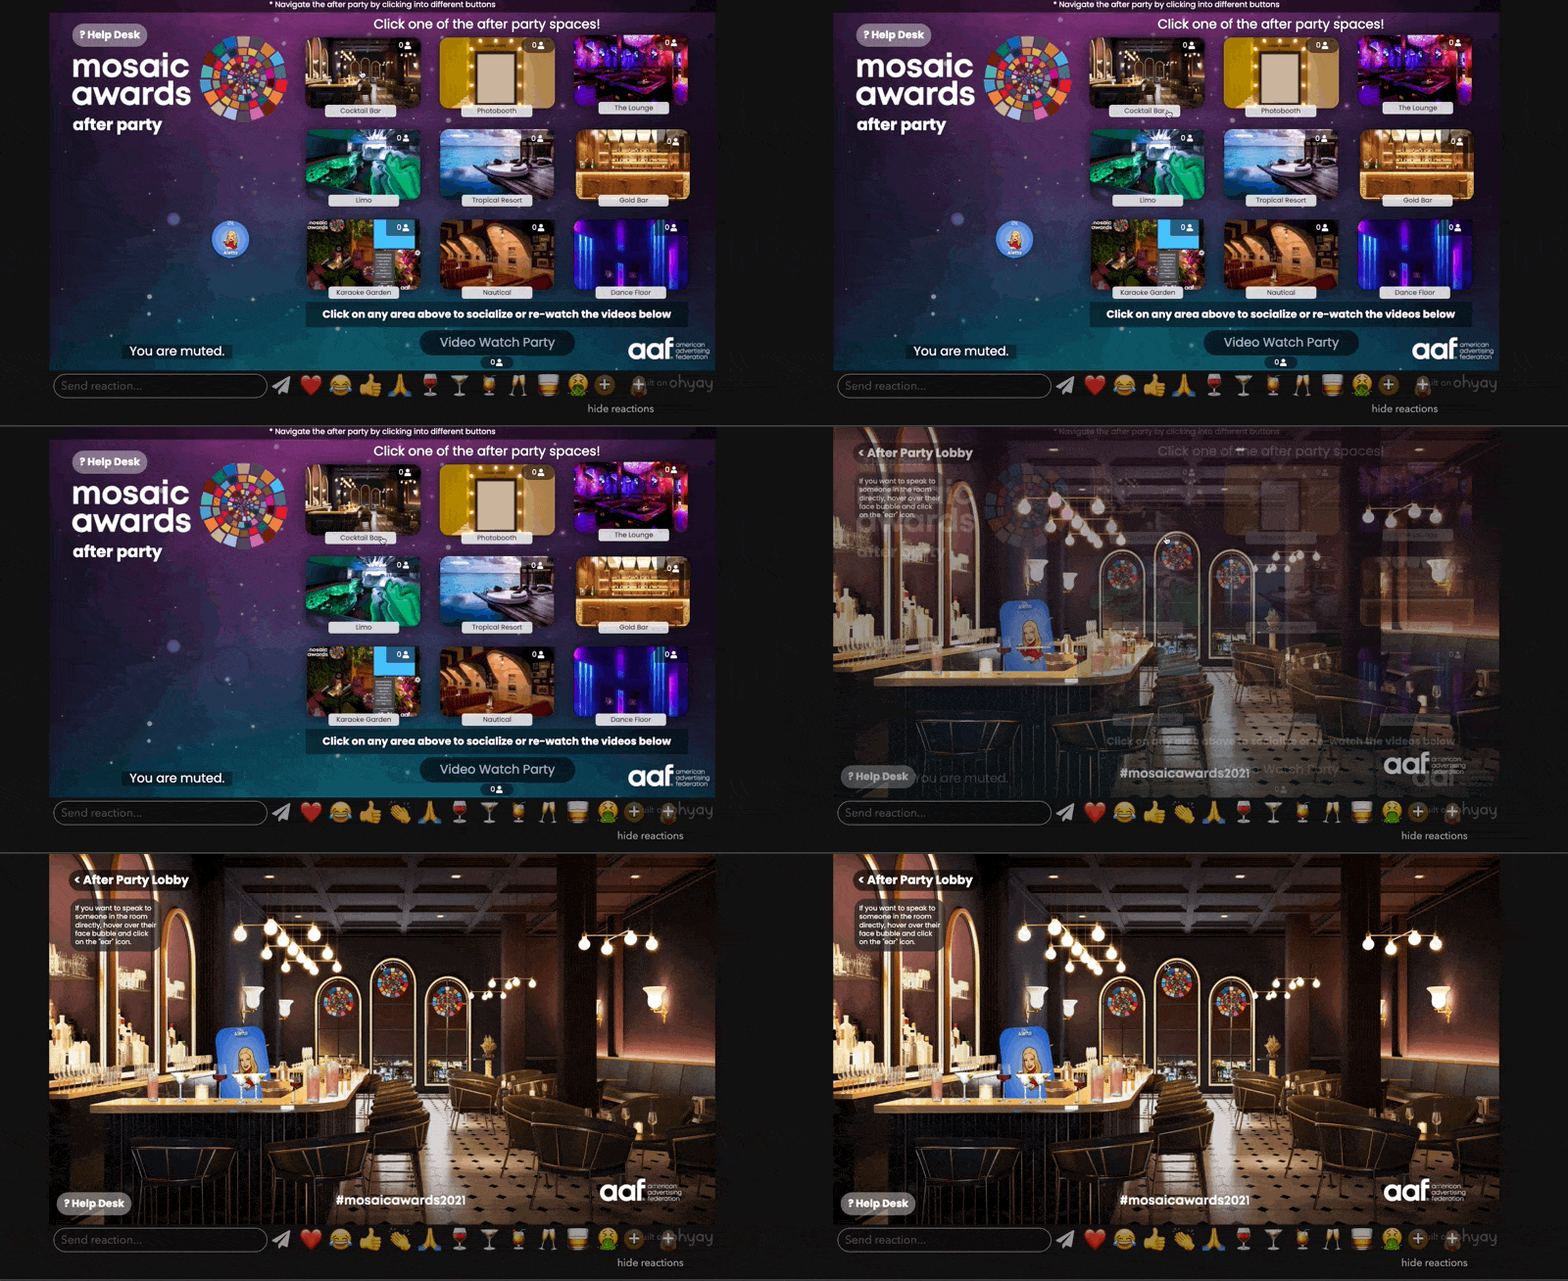
Users who click the button: Only move the user who clicks on the button. Typically used for people to break themselves into rooms. You’ll want to leave it on the canvas so that users can press it.
-
Prompt to send user to room: Upon clicking on the breakout button, you’ll get a prompt to send a specific user to a room.
-
Invite users to room: When clicked, this button prompts the user to invite other users to a room. It is typically on the main canvas/pushed by guests at an event and is a great way for users to invite their friends into a room without having to track them down.
-
Specific user by email: Send a specific user, via the email they’ve come into ohyay with, to a slot or room. Typically used to send speakers into specific slots in an auditorium. (Note that they must come into ohyay with the specified email in order for the breakout button to work. You can check a user’s email by clicking on their thumbnail and seeing their email in the second line of the Advanced Properties Panel).
-
Current users in slot: Move the current user(s) in a specific slot out of that slot. Helpful for when you need to move a user in a speaker slot to an audience slot, for example, but don’t want to tie the movement to a specific email.
-
Users selected from Admin Rooms List: Send a user selected from the Admin Rooms List into a specific room or slot. (You can select multiple users in the Admin Rooms List by hitting Command-Click on Mac).
Where will users be moved to?
Now that you’ve chosen who you’re going to move (All users in the current room), it’s time to select where people will be moved to. For the sake of this tutorial, select Existing Rooms, click on Pick room(s) to move users into, and select any room in your workspace. (If you don’t yet have a room, you can add one by clicking on Room > New Room from the menu).
You’ll see two main options in this dialog: to move users to new, temporary rooms or to move them to existing rooms in your workspace.
New temporary rooms
The new temporary rooms option allows you to create temporary copies of selected rooms in your workspace that eventually expire. This option is usually preferred if you have a large, unspecified number of guests, as rooms will be created based on how many people show up and based on your specified target group size.
To send your guests to new, temporary rooms, click on the “Pick room(s) to create temporary copies of” text box and select rooms from the dropdown, one by one. For example, if you’re running a speed dating session, you might choose to send users into copies of three existing rooms.
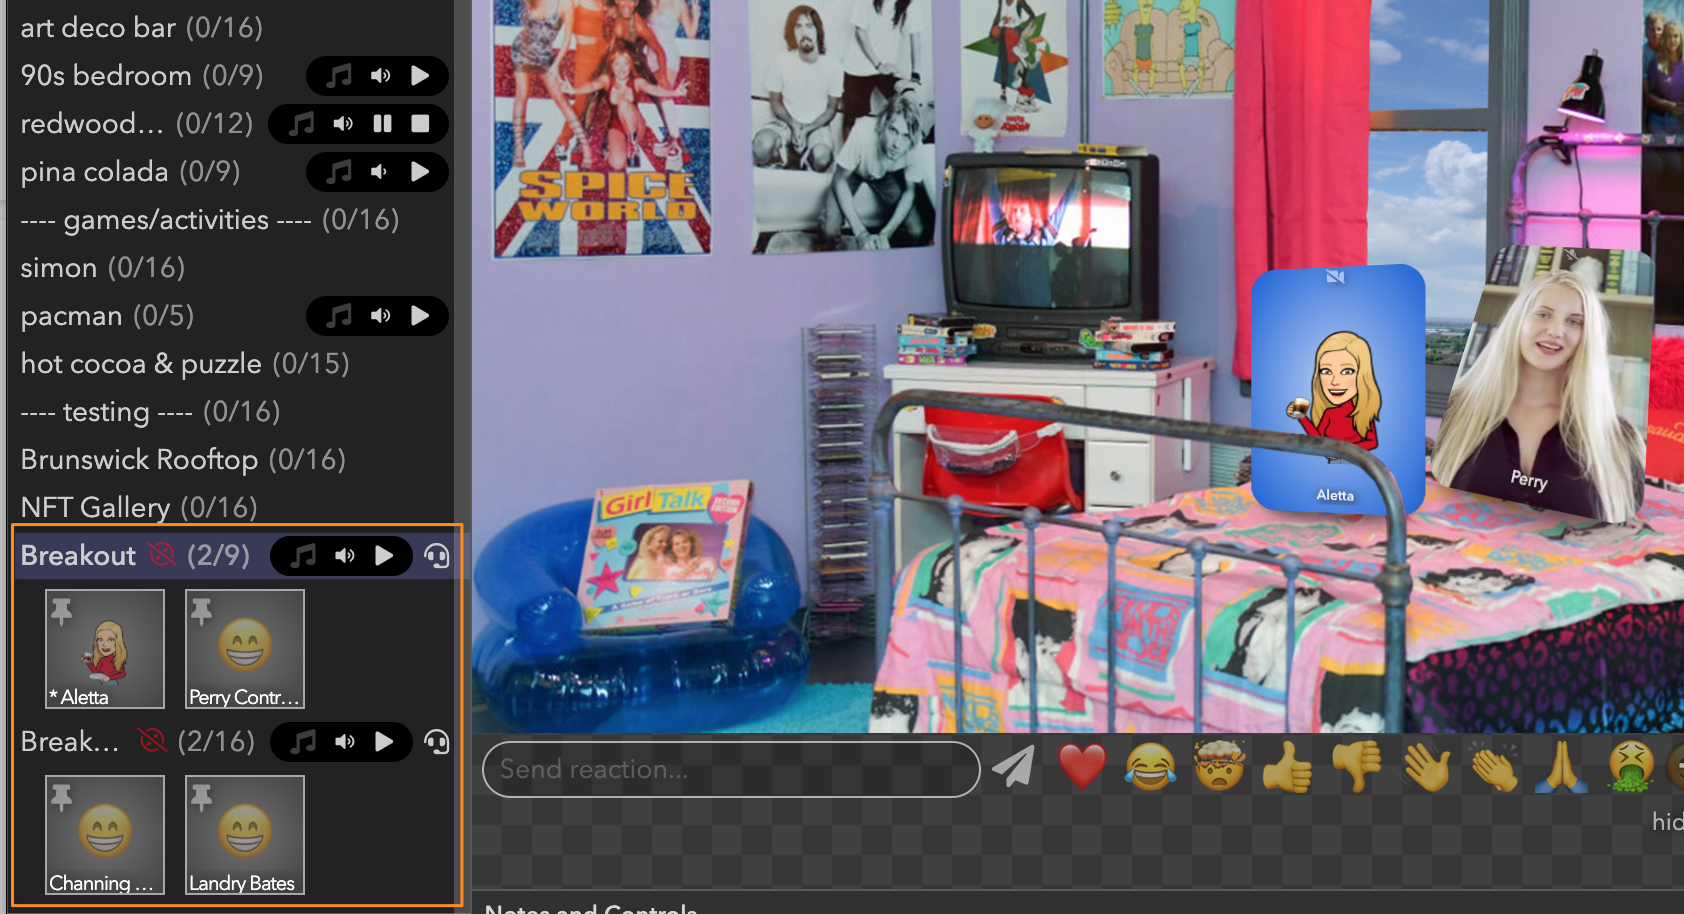
When you run the breakout, you’ll see the temporary rooms appear at the bottom of the Admin Rooms List on the left-hand side of your screen. Eventually, they’ll disappear from the Admin Rooms List.
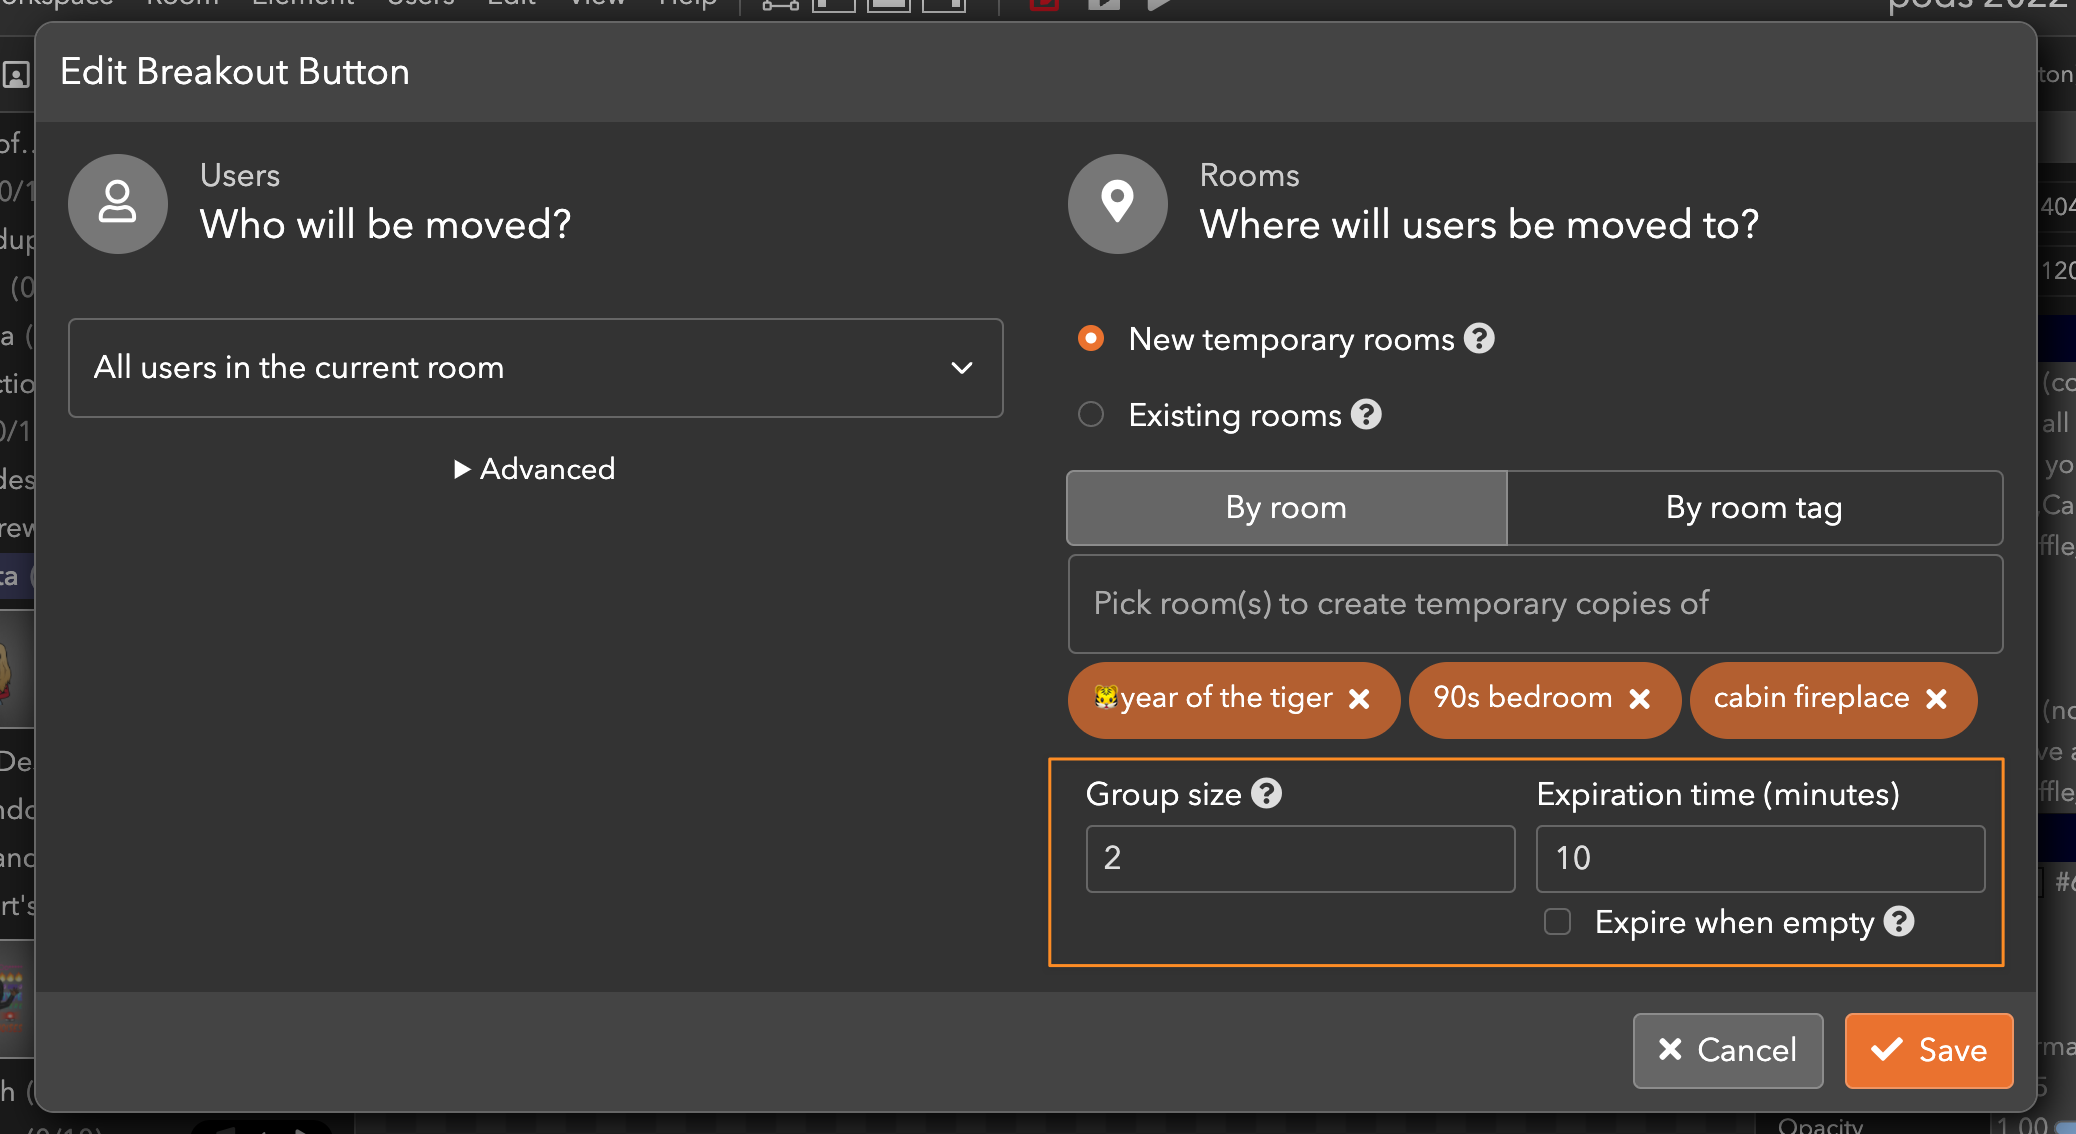
For new, temporary rooms, you can also specify the group size (the average number of people placed in each room) and the expiration time (in minutes). If you check the box next to expire when empty, the temporary copy will expire when all users leave the room.

In the below example, an average number of 2 users will be placed into each room, and each room will last for 10 minutes. Expire when empty is not checked, so rooms will stay in the Rooms List when all users leave.
If you click on the more temporary options under group size and expiration time, you’ll see a few more ways to customize your breakout:
Temporary room title: The name of the room that will appear in your Rooms List (if show breakout rooms in Rooms List is checked).
Fallback room: The room where users will go when the breakout expires.
Reuse previous breakout rooms: If there are existing temporary breakout rooms that are not full to the group size, then put people into them. For example, if you have a speed dating session where everyone opts in by clicking a button, you would want to have this checked — so that users would join previous breakout rooms rather than getting their own breakout rooms.
Show breakout rooms in the Rooms List: By default, temporary rooms are only visible to admins via the Admins Room List. You can choose to show the temporary rooms in the Rooms List, so that guests can see and navigate into each other’s rooms. The temporary rooms will be marked by an hourglass icon in the Rooms List. (To see your Rooms List as if you’re a guest, switch into Director Mode by hitting the Alt or Option key and click on the icon on the top left of your screen).

Existing rooms
The existing rooms option allows you to move users into existing rooms or slots in your workspace. You can also move users into rooms based on room tags, which you can edit in a room’s advanced properties.
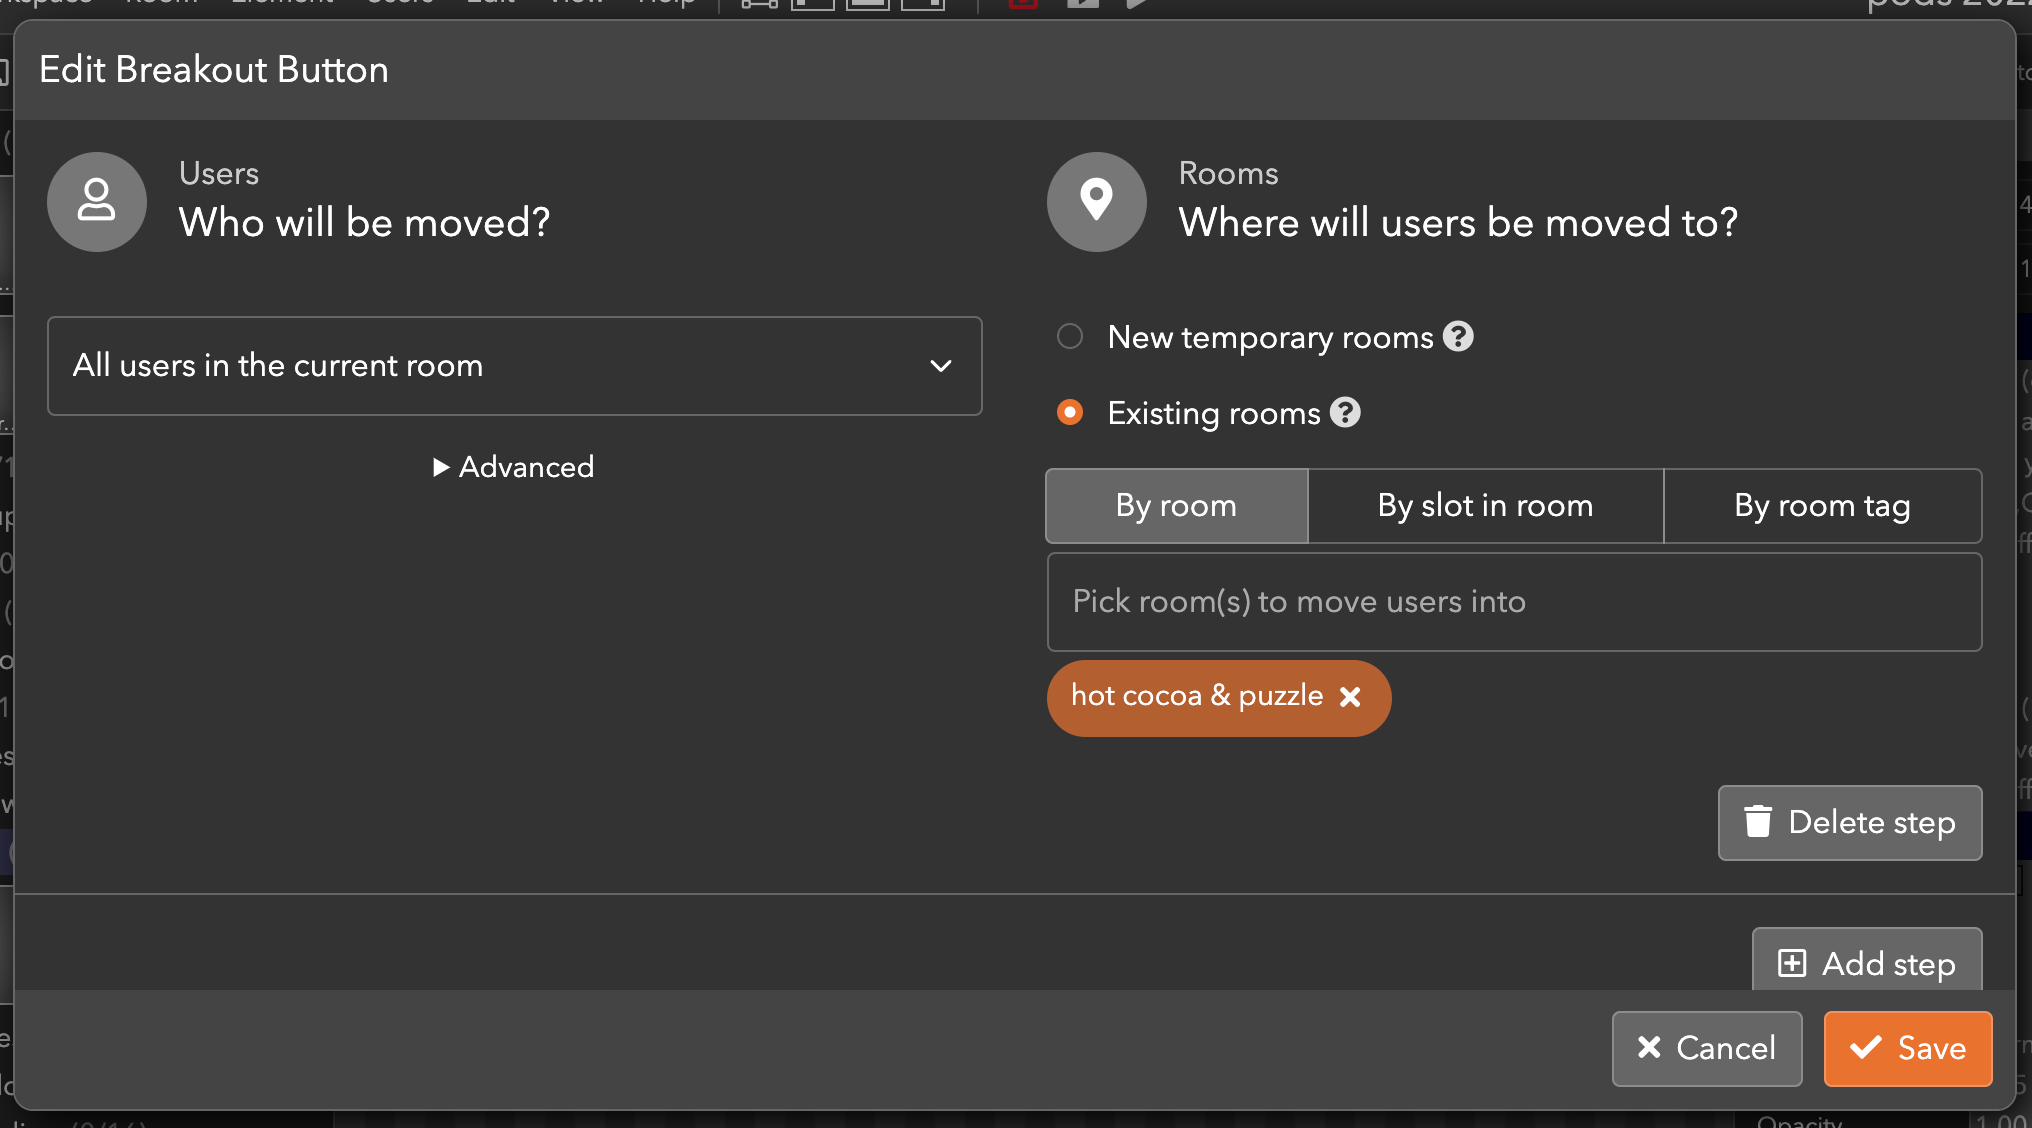
This option is preferred if you have a small, specified number of people heading into a breakout. It can be cleaner and easier to manage, as new rooms will not be created in the Rooms List and will not expire. As an event producer, you’ll simply see the thumbnails of your guests move into the existing rooms that you’ve specified.
Advanced
In the Advanced panel, which you can expand by clicking on the down arrow next to Advanced, you’ll see a few more options for your breakout.
Target group size: If multiple rooms or tags are selected, users are divided into groups and distributed across them. Each room will end up having this rough number of people. For example, if you want an average of six people in each room, you can mark 6 as your target group size.
Match mode: Match mode is the way that users are split into groups. You can select among three different match modes:
- Random: Users are randomly distributed into groups, without preference for new or previous partners.
- New partners: New partners are prioritized. Makes it unlikely that the same users will match with each other twice, depending on the number of users involved in the breakout. Usually preferred for speed dating.
- Previous Partners: Previous partners are prioritized. Makes it likely that users will match with each other multiple times.
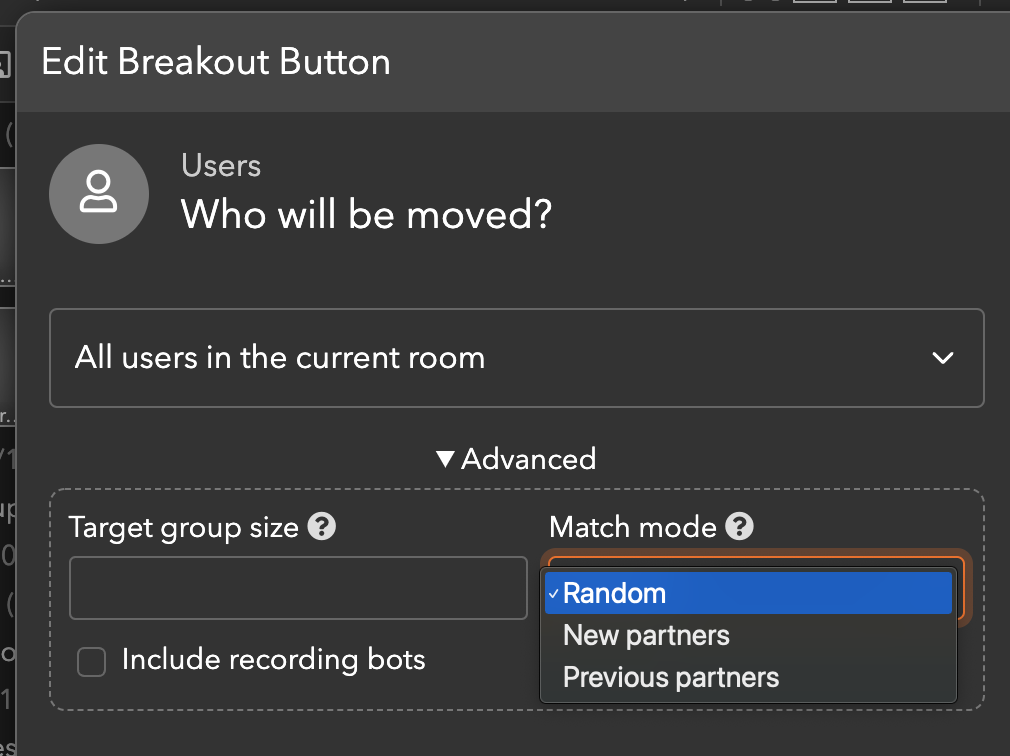
Include recording bots: Move an existing recording bot into your breakout. (If there is an existing recording bot in your room, it will be moved into the rooms that you specify).
Adding and deleting steps
The complexity of your breakout button is in part determined by how many steps you add. To add a step to your breakout, click on Add Step in the bottom right corner of the dialog.
To delete a step, click on Delete step under each step.
Testing and executing the breakout
Now comes the exciting part: executing your breakout and moving users into different rooms or slots.
To test your breakout, you’re going to want to add test bots to your workspace. Test bots are fake users that can do everything that real users do. To add test bots, click on the icon that looks like a robot in the toolbar as many times as you’d like. You’ll see the bots appear in the Admins Rooms List on the left-hand side of your screen and on screen if you’ve added user slots.
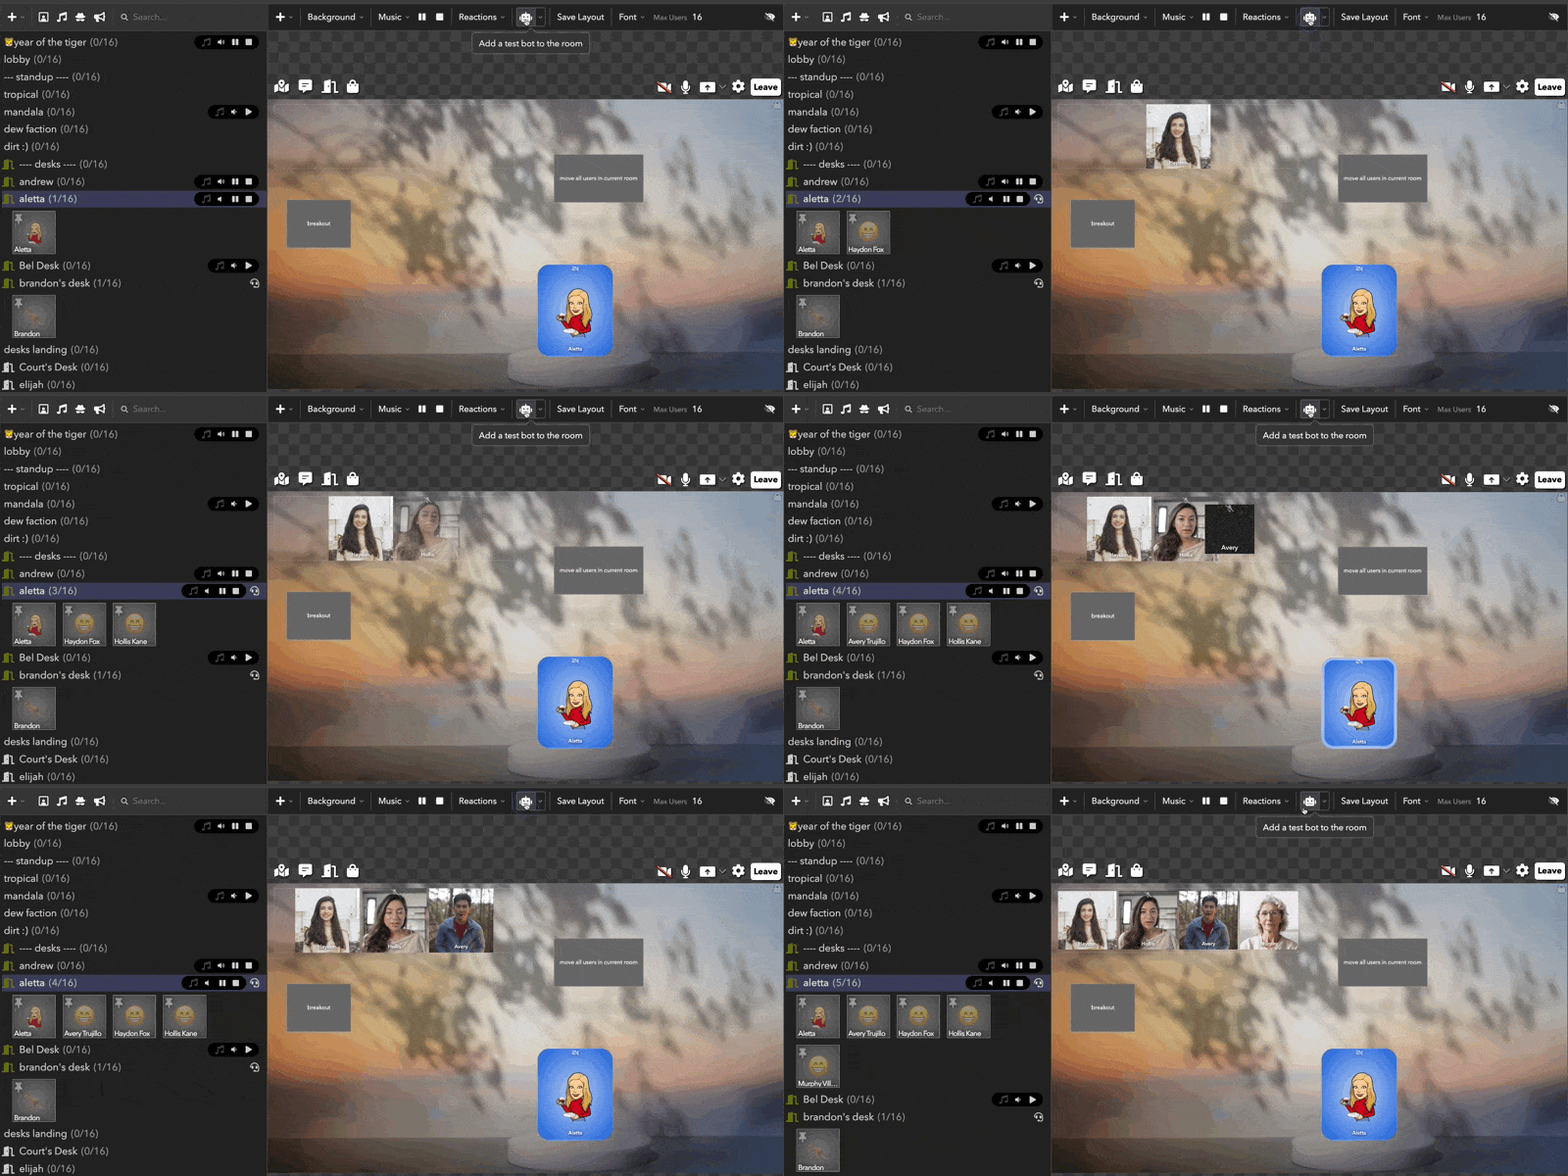
To execute the breakout, switch into Director Mode by hitting the icon in the Toolbar or by hitting the Option key. Then, click on your breakout button.
You should see the test bots in your current room move into the room(s) that you specified in the breakout button.
Bringing your users back
If you’d like to bring users back to your room after the breakout, you have a few different options:
- Right click on the room name in the Admin Rooms List and select Bring All Users to This Room
- Click on Users in the menu and select Bring All Users to This Room
You can also create a breakout button that brings all users back to the room:
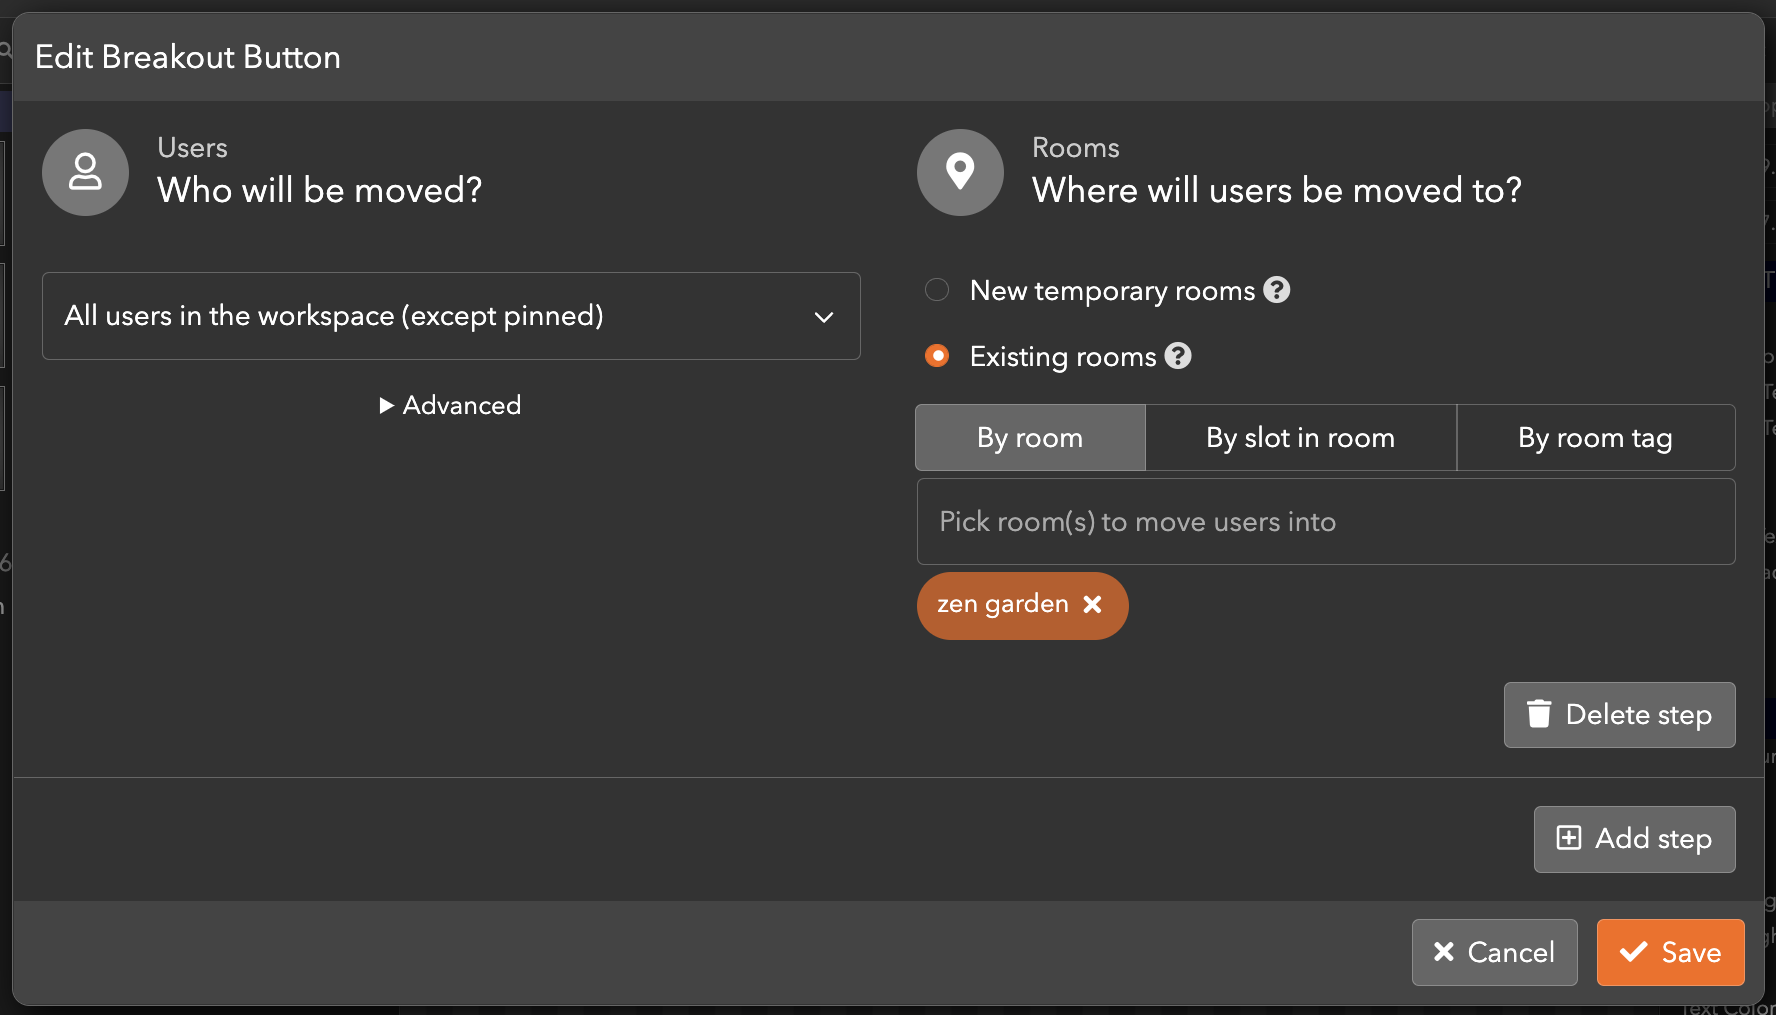
Additional Advanced Properties
Click on your breakout button, and then click on Advanced on the top right of your screen to see additional properties that you can configure in the Advanced Properties panel.

Confirm on Run: Text reading “Are you sure you want to do the breakout?” that appears when you click on your breakout button, before the breakout is executed. By default, you will see the confirm on run text when you select all users in the workspace (except pinned) as a protection mechanism, so you don’t accidentally move everyone in your workspace.
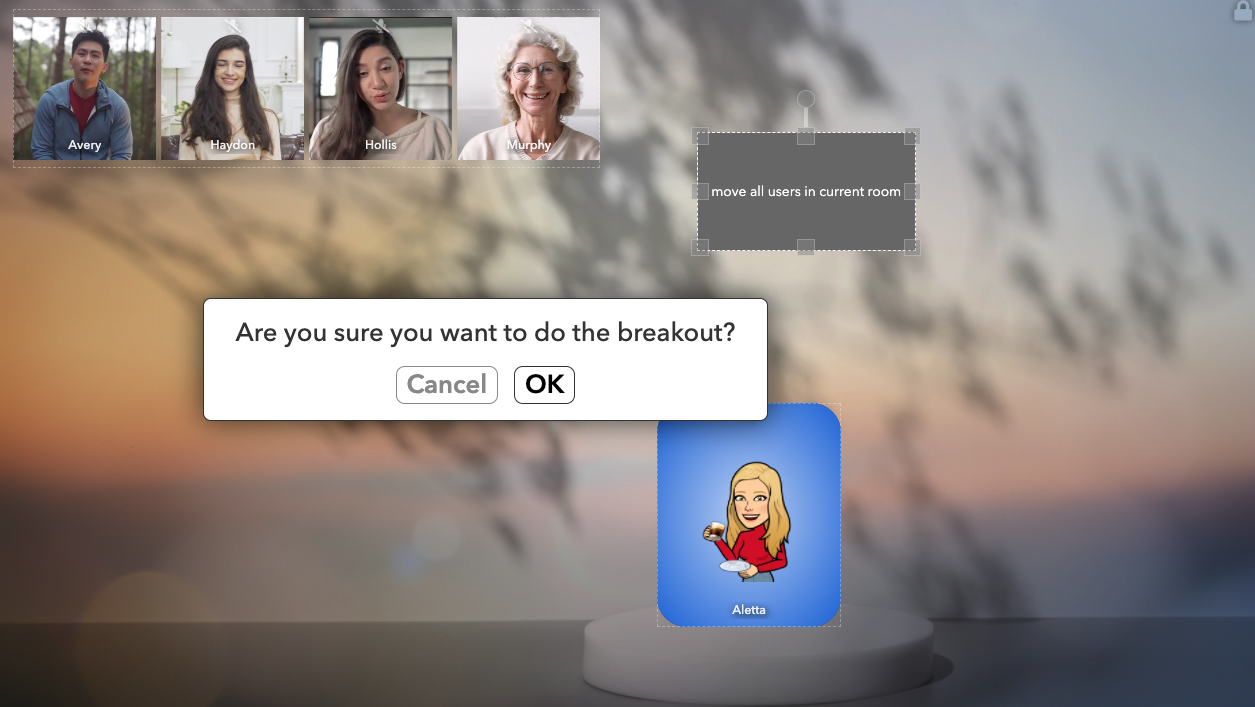
If you don’t want the confirm on run text to show up, even for all users in the workspace (except pinned), select For all users only next to Confirm on Run and select No. If you want it to always show up, select For all users only and select Yes.
Confirm Text: You can customize the Confirm text by simply highlighting the text box reading Are you sure you want to do the breakout? and typing in your text of choice.
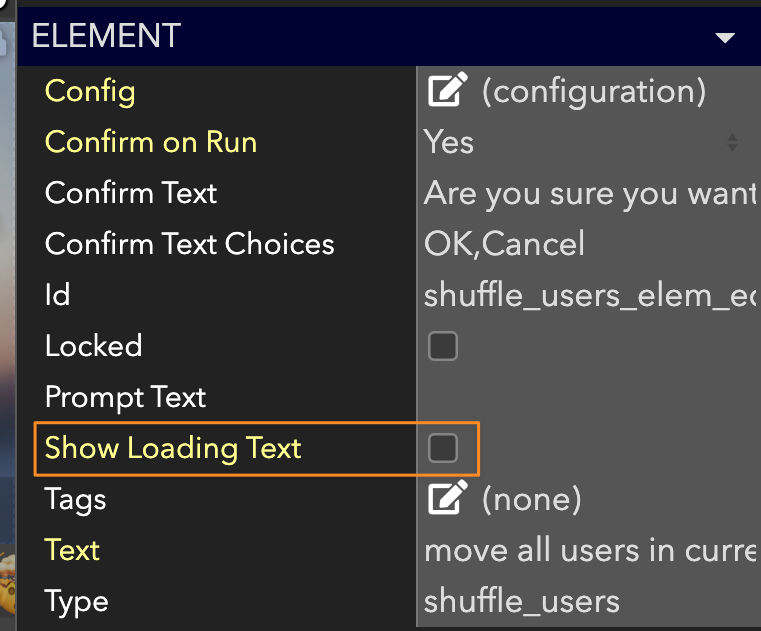
Show Loading Text: When you click on a breakout button, especially when you’re moving a lot of users, it’ll sometimes show “Loading…” text while it loads. You can uncheck the box next to Show Loading Text in the breakout button’s settings if you’d prefer the text not to show up.
Countdown Element
If you’re running a breakout with new, temporary rooms, you can insert a countdown element (in the room that is being copied) that automatically displays the time remaining before the breakout expires.
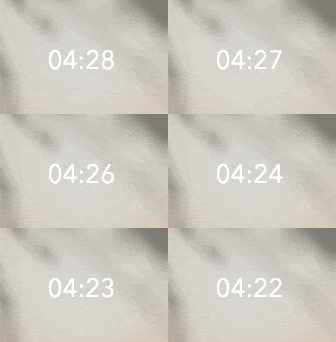
To do so, follow these steps:
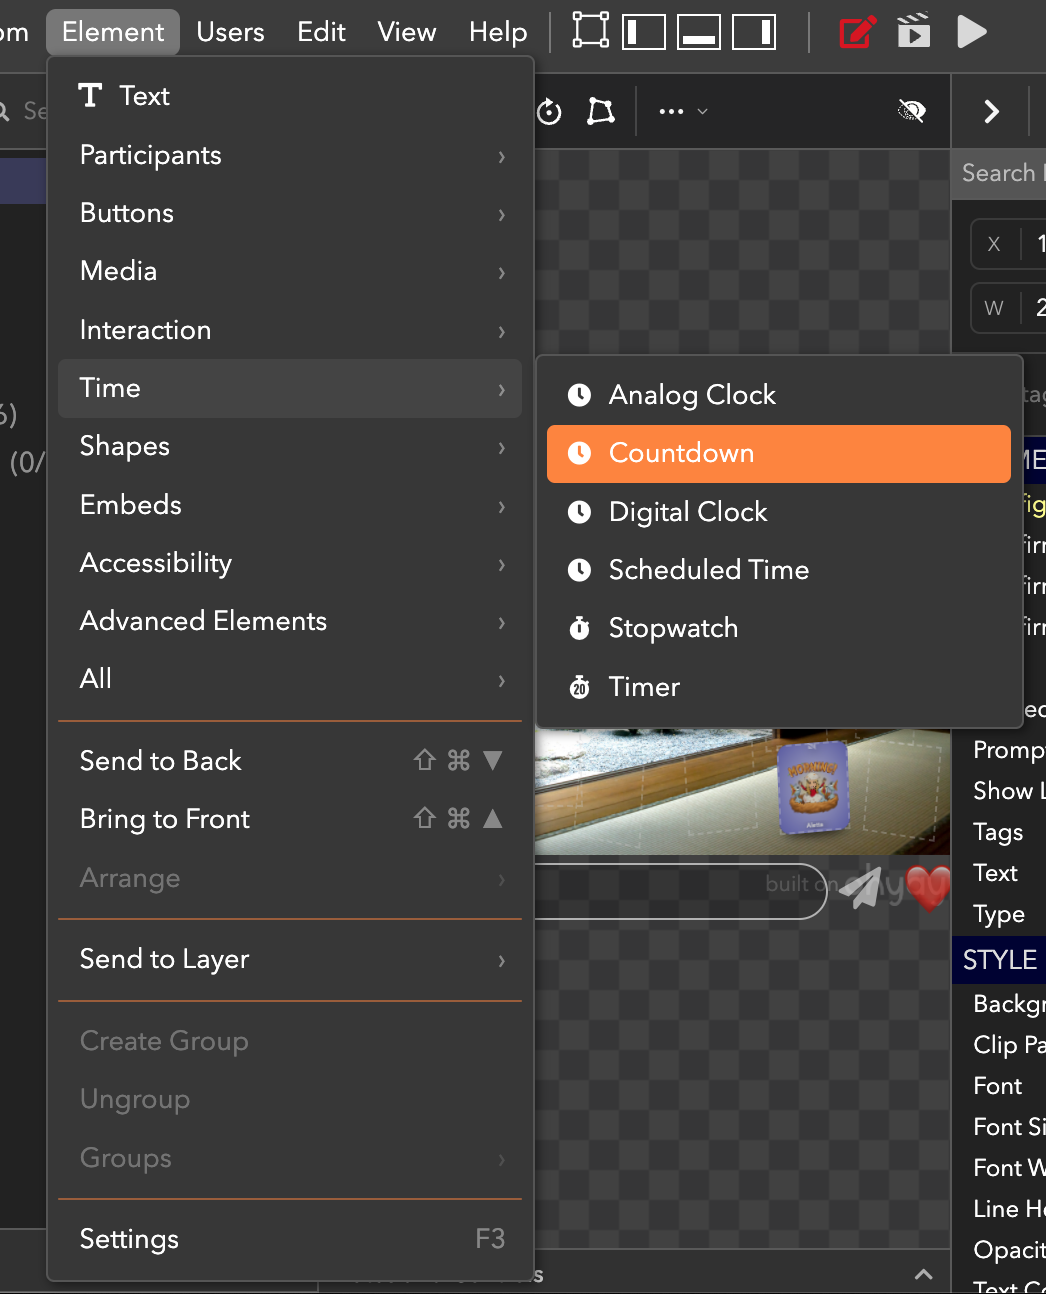
- Insert a Countdown element by clicking the plus + icon in the Toolbar and searching Countdown.
- Click on the countdown element and open its Advanced Properties panel.
- Check the box next to Display Breakout Remaining Time.
- Configure your breakout button to copy the room with the countdown element. Specify the expiration time in minutes.
- When you execute the breakout, the countdown element will automatically start counting down from the minutes that you entered. (This saves you from having to create an action button that invokes the countdown in each new, temporary room).
Common Breakout Configurations
At the beginning of this guide, we named some common use cases for breakout buttons. Below are some common button configurations for those scenarios. Of course, the details (e.g. the selected rooms, the users moved, etc.) will depend on your individual space.
Speed Dating
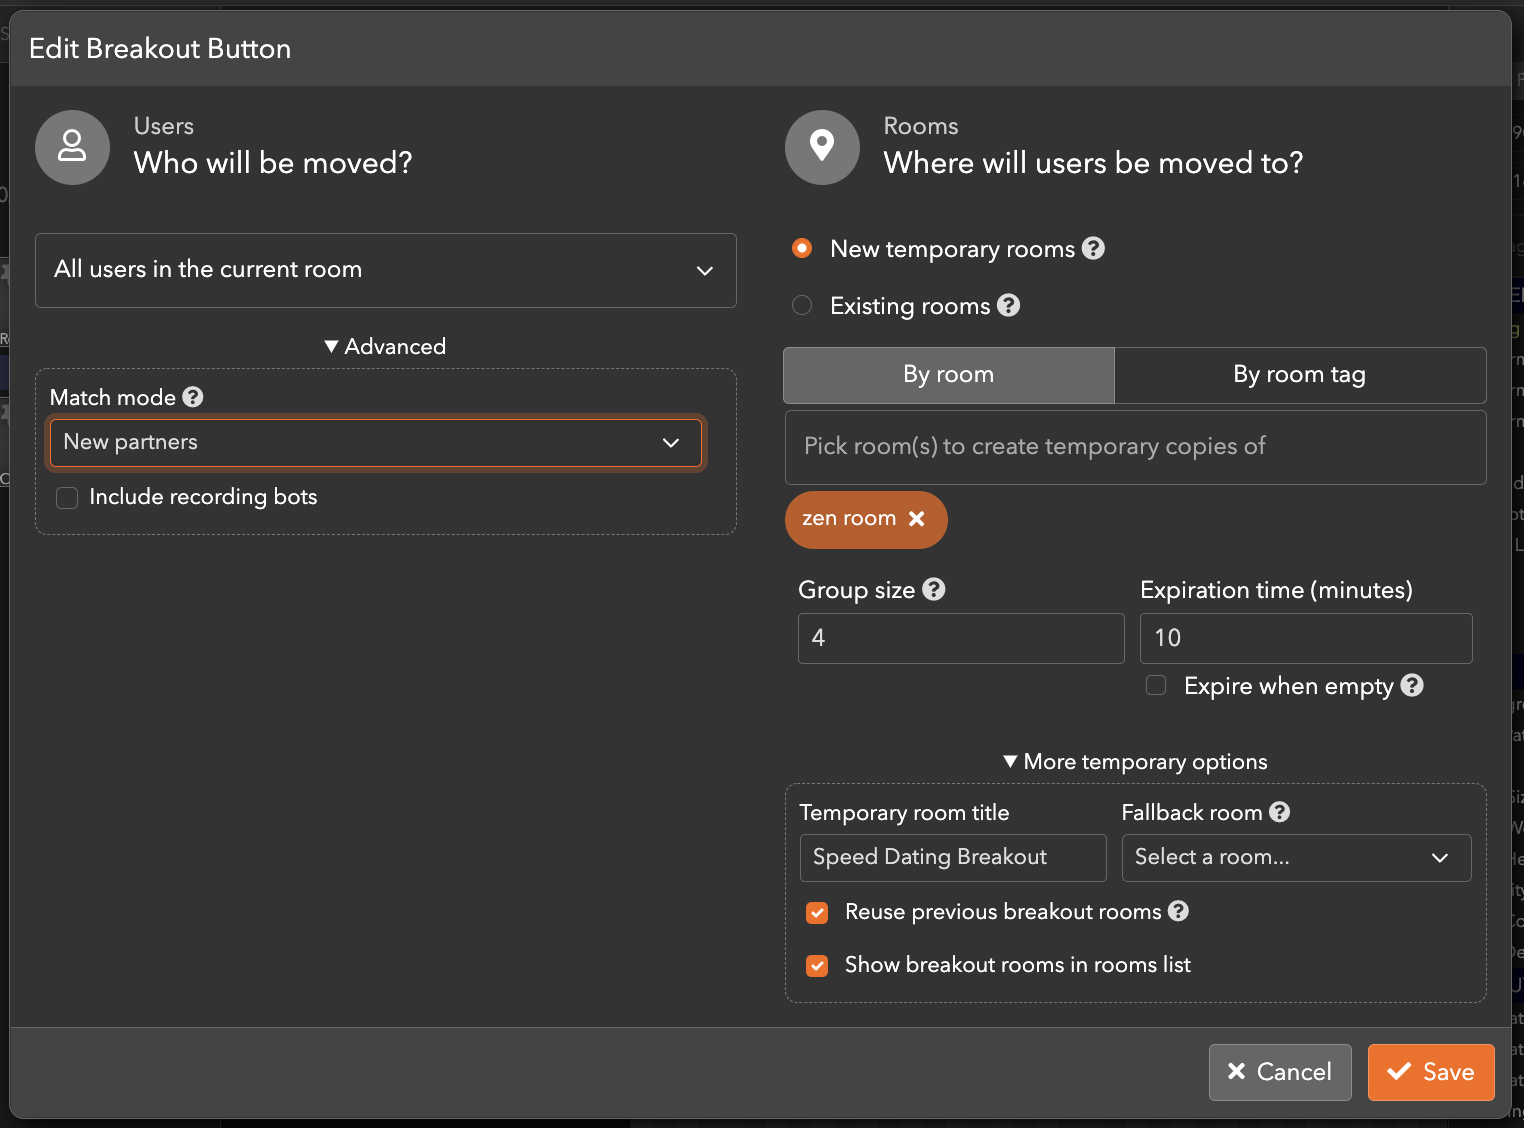
This breakout button moves all users in the current room into new, temporary rooms that are copies of the zen room. It will produce rooms with an average of 4 people and with an expiration time of 10 minutes. The rooms will appear in the Rooms List for all users and previously created breakout rooms will be reused before creating new rooms. Every time the button is hit for another speed dating round, users will likely be matched with a new partner.
Presentations (Moving Speakers)
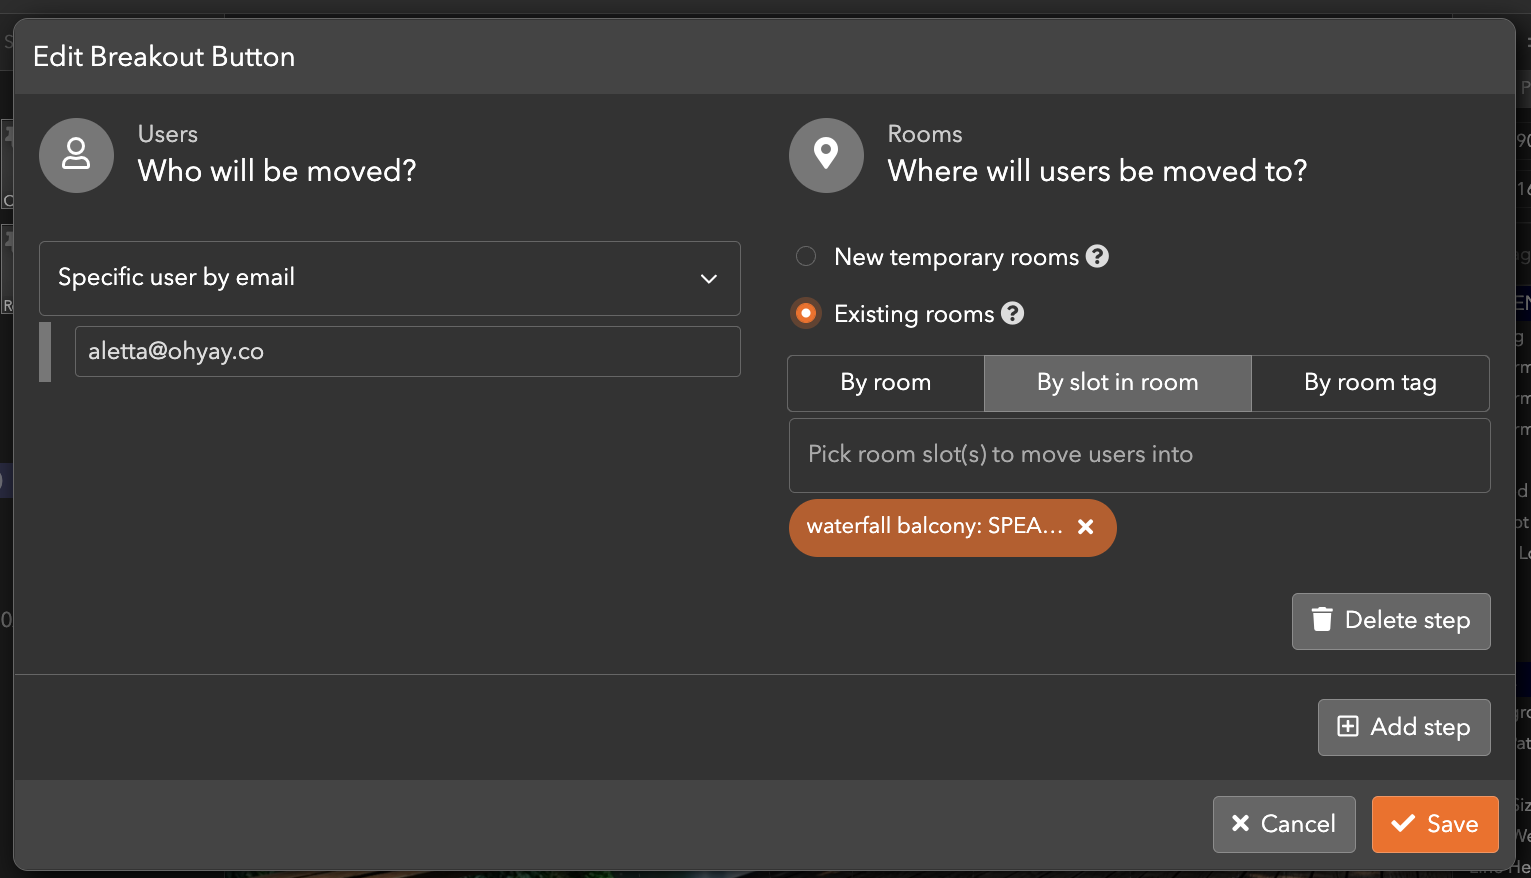
This breakout button moves a speaker (via their email) into a speaker slot (named SPEAKER) in the waterfall balcony room.
Social Rooms
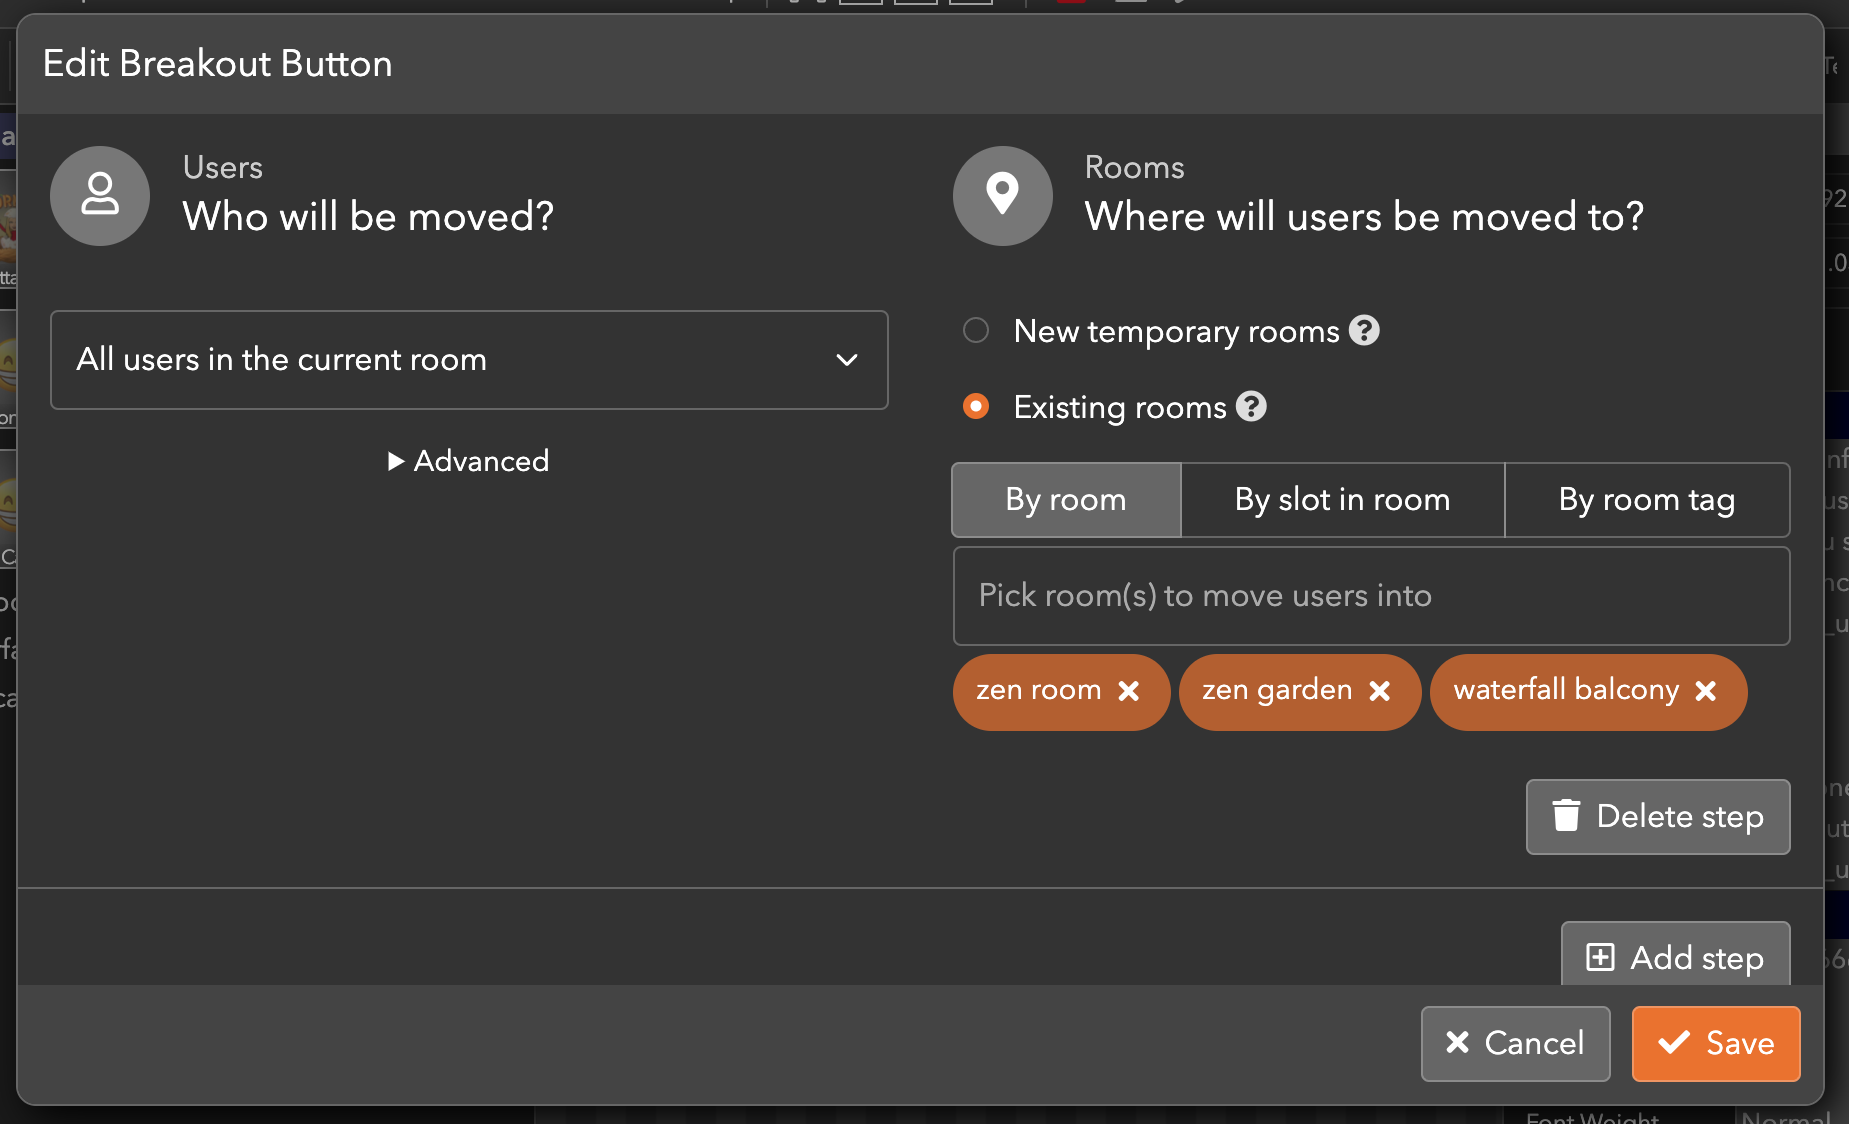
This breakout button moves all users in the current room into existing social rooms in the space (zen room, zen garden, waterfall balcony).
Bring All Here
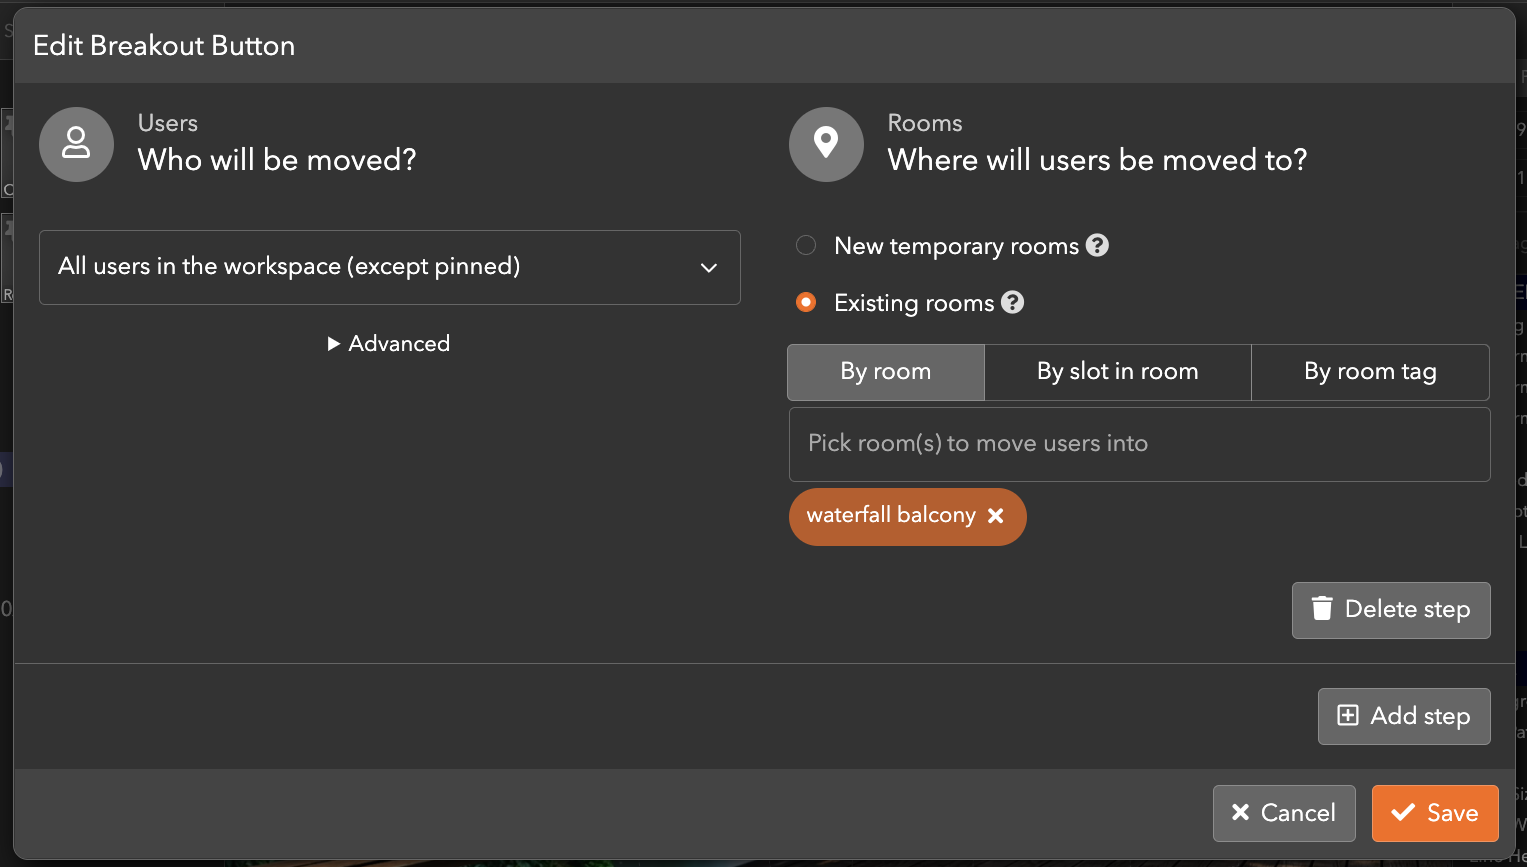
This button brings all users in the workspace (except pinned) to the waterfall balcony room.
Updated almost 4 years ago
Curious what else you can do with Breakout Buttons? Check out some of our demo workspaces, chat with our creators in the discord, or head over to the community forums to ask!
