Tags
Tags can be used for increased control over your workspace, impacting both users and elements.
Overview of Tags
Tags are one of the most powerful tools for creating complex, dynamic workspaces. They give you control over elements, users, even rooms. You can use them in a variety of ways including:
- Making elements visible to specific users
- Moving certain users to rooms on command
- Managing breakout buttons and groups
- Limiting a user slot to a certain group of users
- With Layout Buttons to modify room layouts
- Controlling dropdown elements
and many, many more. We'd be here all day! The point is, they're very very useful.
There are three types of tags: User Tags, Element Tags, and Room Tags. Let's talk about the differences, and why you might use each one.
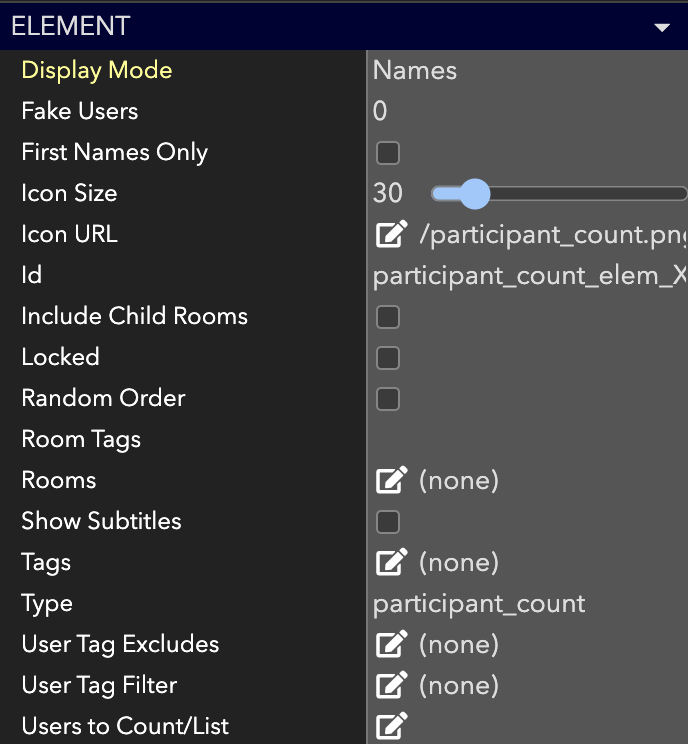
An element Advanced Properties panel showing all three types of tags available for use.
Tagging Best Practices
- Tag early and often: It's easier to tag an element when you create it and then not use the tag. It can be annoying to have to go through and tag after the fact, trust us. Sometimes you might have to, but tag early and be kind to yourself!
- Keep tags short: The shorter and simpler they are for you to remember, the better. One word is really all you need for a tag to function.
- Remember you can assign multiple tags: Don't be afraid to double, triple, quadruple, etc. up! There's no limit to how many tags you can assign a room, element, or user, so they can do whatever you need.
User Tags
Why should I tag users?
Tagging users gives you more control over breakout spaces, access to rooms and user slots, and moving guests around. For example, you can tag the staff of your event with staff and use a button to bring them all to one room without having to individually find them. Or limit a certain user slot to users with the tag host. We'll cover some more sample use cases at the end of this section.
How do I tag users?
To manually tag users
From the Admin Rooms List
The easiest way to add a tag to a single user while they are in the space is via the Admin Rooms list. Right-Click on the user's icon, and select Edit User Tags. You'll be able to quick-add common tags by clicking on the suggseted options, or add a new tag.

From the Advanced Properties panel
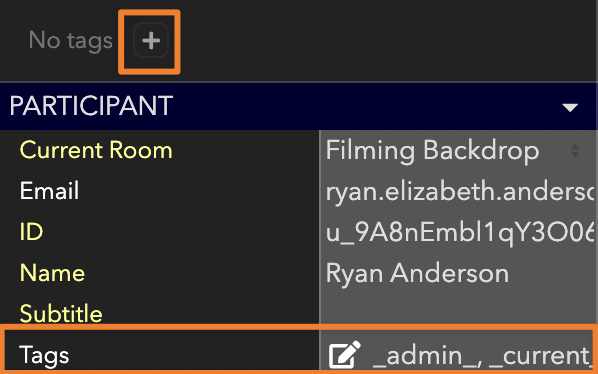
You can also easily add tags to an individual user while they are in the space via the Advanced Properties panel. Right-click on the user in the Admin Rooms list, and choose Select User to open their Advanced Properties panel on the right-hand side. You can then add tags by either clicking the icon at the top, or the
icon next to Tags.
From the User Manager
To upload users with already-assigned tags
You can use the User Manager to upload a CSV file with tags already applied to users. This can be very helpful for large groups, and save you from having to apply all the tags manually. Some examples include self-selecting workshops or identity groups during registration, or pre-sorting your list into small groups.
To upload a file, follow the instructions on the User Manager page. Your CSV file should be formatted as two columns: first is the email address, second is tags. If you have more than one tag, the tags should be comma-separated and the entire column surrounded by “” so that it remains as two columns. If you use Excel, it will do that part for you automatically.
User Manager
You can also use the manager to review who has which tags, add and remove tags, and add and remove Admin access.
Are there other ways to tag users?
Yes! You can configure buttons to assign tags to users as they move through your workspace. This can help you grant access and permissions to users without having to manually apply them during an event.
The configuration below will apply the tag to any user who clicks the button. You can use other configurations to apply them when users take other actions as well.

How can I use tags throughout my workspace?
There are almost endless ways you can use user tags throughout your workspace. Below are some common uses that may inspire you to do other things!
- Limiting User Slots
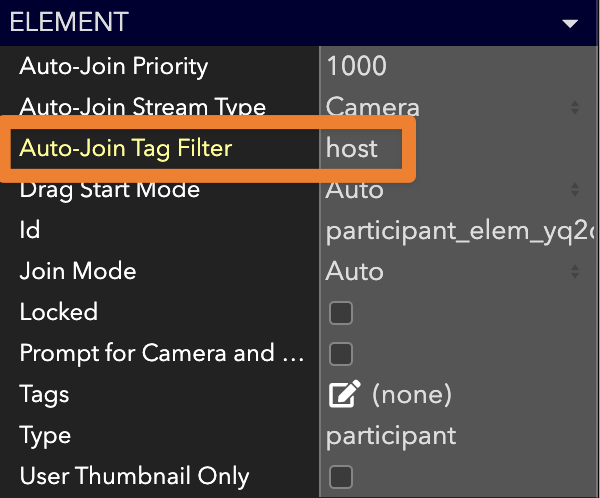
You can use tags to limit which users can enter certain user slots or multi-user slots. Open the Advanced Properties panel of the user or multi-user slot you want to limit, and search Auto-Join Tag Filter under the Element category. Click into the box next to Auto-Join Tag Filter and type in the tags you want to be able to access the slot. You can add multiple tags separated by a comma.
- Breakouts
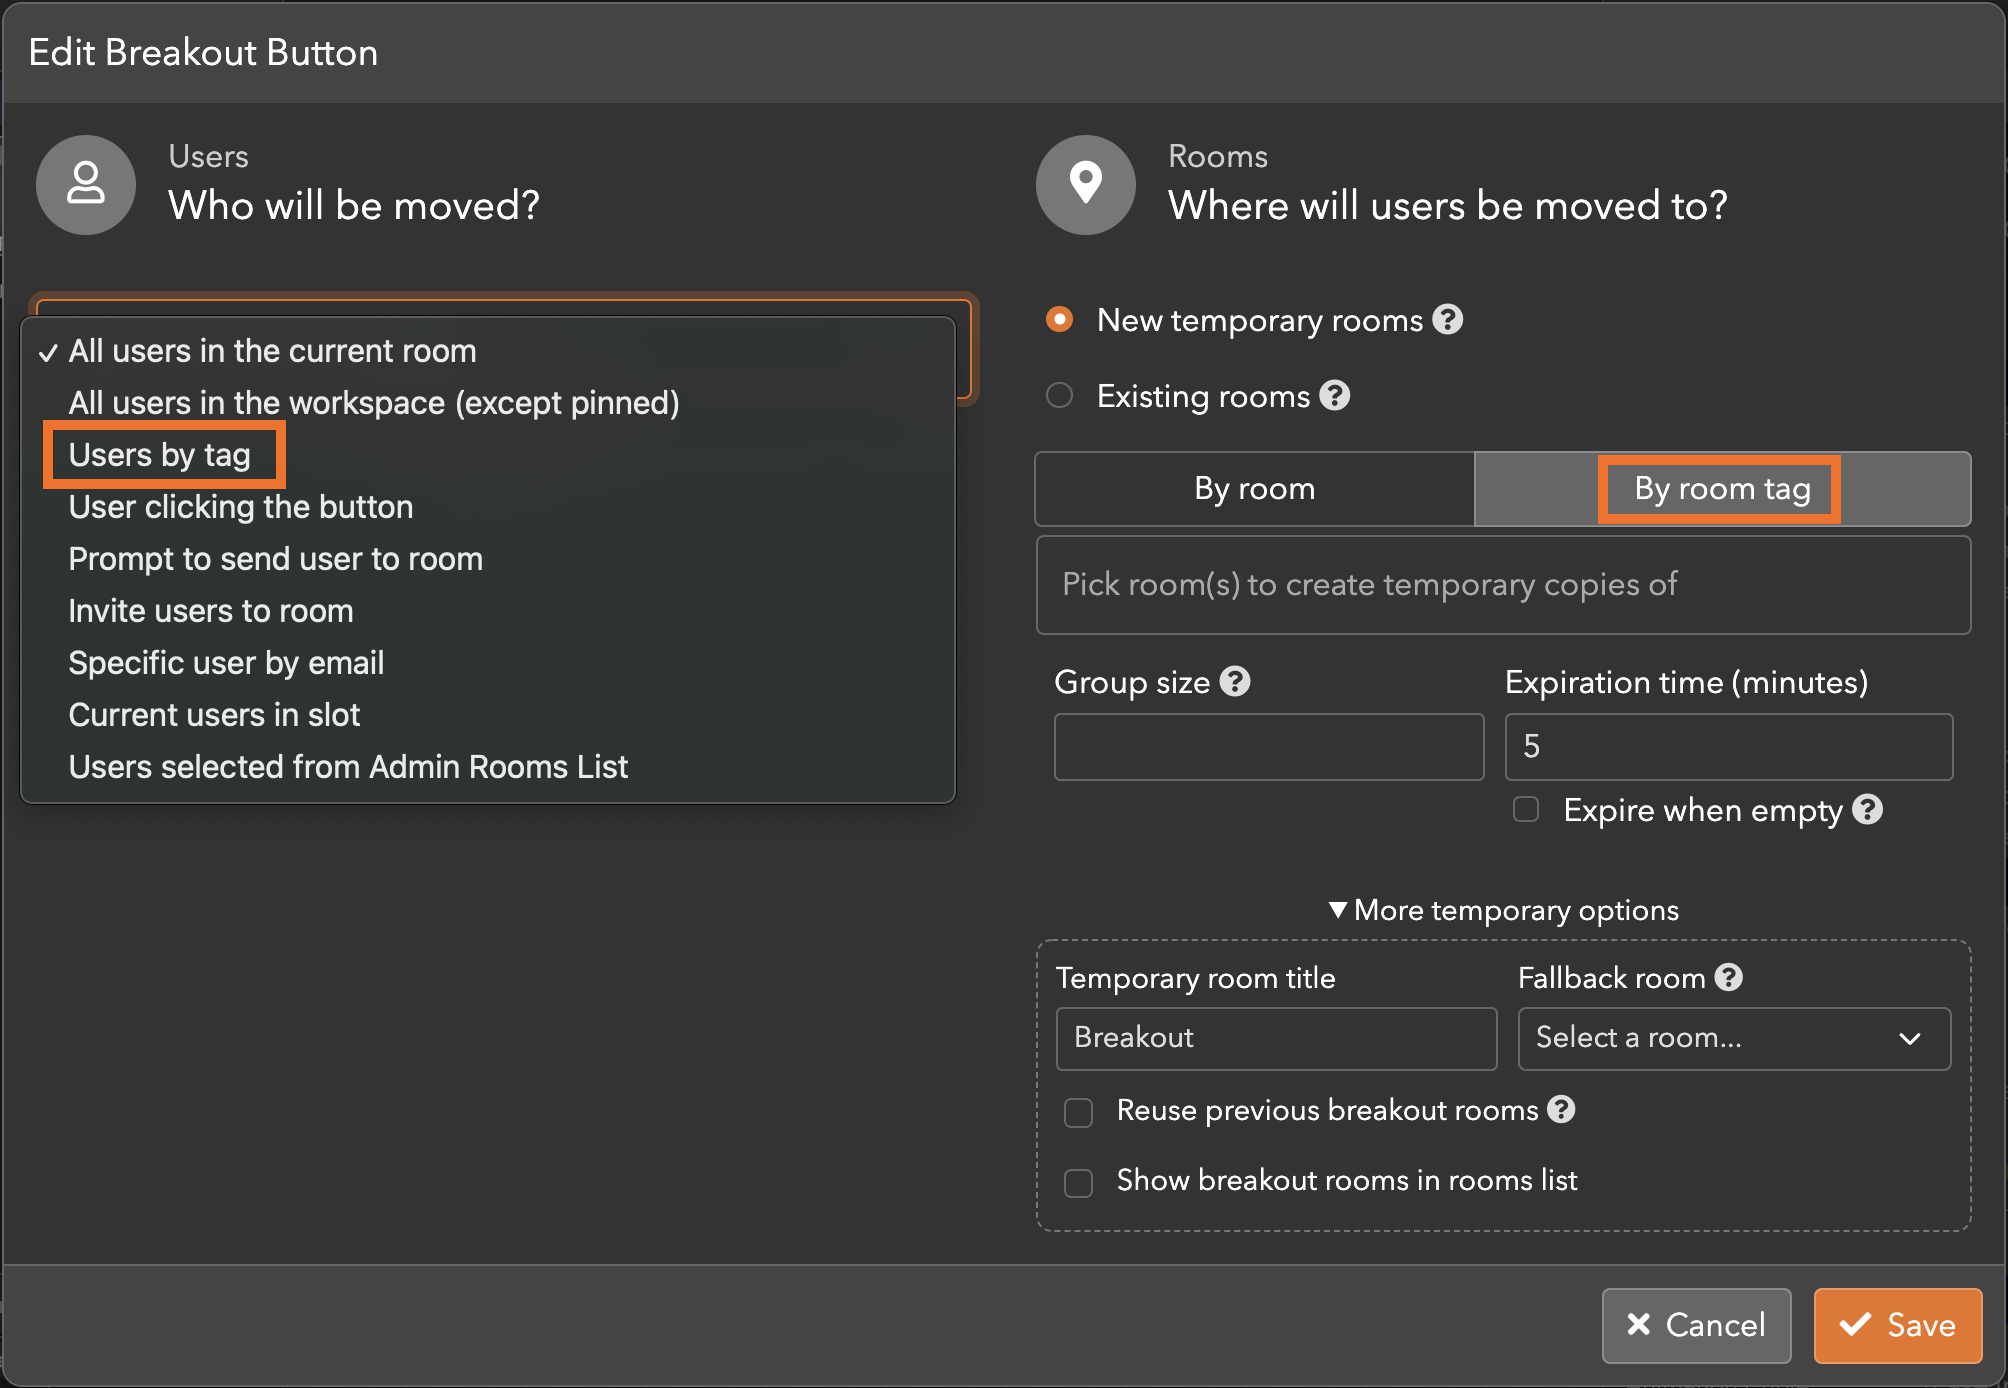
You can use tags while configuring breakout buttons to do, well, a lot of different things.
As you can see from the image of the breakout button configuration dialogue below, you can select Users by Tag to choose to move only certain users. You can also use room tags to move users to certain rooms without selecting each room manually.
- Hiding Elements
You can use tags to hide elements from users. The most basic version of this is done using the Visible for Condition property on the element itself. Select the element you want to hide, open the Advanced Properties panel, and search Visible for Condition, found under the Conditions category. Click the icon next to the property to open the condition builder, and use the sample configuration below to make the element visible only for users with the tag Host.
This is often used to show a countdown timer to a host, or give them access only to certain buttons.

- Moving Users
You can use action buttons with tags to move users around your workspace using an action configuration like the one below. The configuration below will move any user with the tag Tagged to the room Filming Backdrop.

Play around with action configurations to see what else you can do using users and tags.
Element Tags
Why should I tag elements?
Tagging elements gives you the ability to control elements across the entire workspace or room with one line in an action configuration, as opposed to one line for each element. This can help you create systems of elements (speaker slots vs host slots, for example!) within your space. There are countless ways to use tagged elements- we'll detail some below.
When should I tag elements?
While you can add tags at any time, we really recommend you tag elements when you create them! It's going to be much easier on you later in your design process as you add action buttons, layouts, and other elements that will interact with or modify the workspace.
Where do I tag elements?
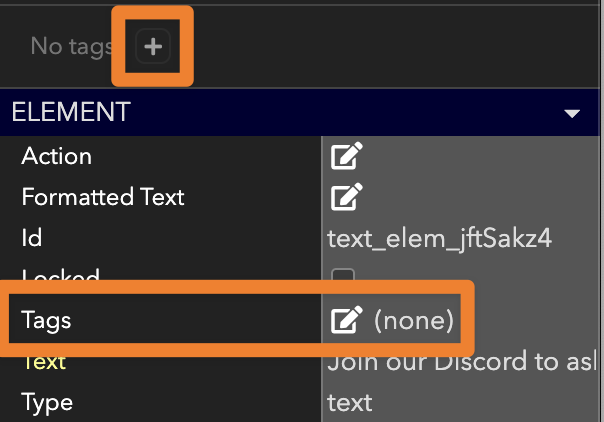
There are two ways to assign a tag to an element. You can do so at the top of the Advanced Properties panel, directly under the resolution panel by clicking on the icon next to the No Tags text.
You'll see a cursor appear. Type in the tag you want to assign, and use the enter key to save it. You can quickly assign multiple tags to an element in this way.
You can also use the Advanced Properties panel to open up a dialogue box to manage the room's tags. Click the icon next to Tags under the Element category to open up the dialogue.
Type in the tag you want to apply, and click Add. To remove a tag using this dialogue, click the X next to the tag in the list.
How do I use element tags throughout my workspace?
There are almost endless ways you can use element tags throughout your workspace. Below are some common uses that may inspire you to do other things!
- Configuring Actions
Similar to user tags, you can use tags to configure actions for specific elements as well. You can configure the action to modify the tagged elements in a certain room or *All Rooms, as seen in the action builder below.

- Modify Layouts
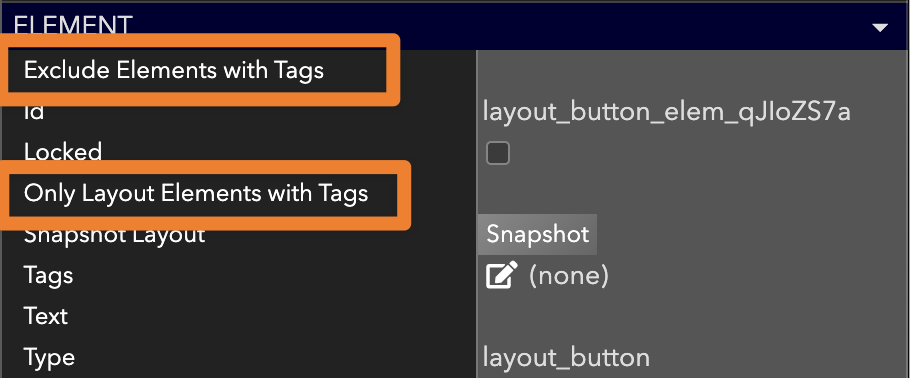
Have you tried using Layout Button's yet? If so, you can use tags with elements to easily control which elements the layout buttons effect or ignore. Use Exclude Elements with Tags to indicate which element tag the layout button should ignore, or Only Layout Elements with Tags to indicate which elements the layout button should effect when triggered.
Element tags open up a lot of options while running events and can make your life a lot easier. Let us know what you've used them for in the community forum or discord!
Room Tags
Why should I tag rooms?
Tagging rooms can help you organize your workspace and simplify the steps you need to take to accomplish certain pieces of your build. For example, you may want a room preview to show one of your social spaces, chosen by a dropdown that users can access while making their choice. If your social spaces have been tagged social you can limit the rooms shown in that dropdown to only those rooms.
How to Tag Rooms
There are two ways to assign a tag to a room. You can do so at the top of the Advanced Properties panel, directly under the resolution panel by clicking on the icon next to the No Tags text.

You'll see a cursor appear. Type in the tag you want to assign, and use the enter key to save it. You can quickly assign multiple tags to a room in this way.

You can also use the Advanced Properties panel to open up a dialogue box to manage the room's tags. Click the icon next to Tags under the Room category to open up the dialogue.

Type in the tag you want to apply, and click Add. To remove a tag using this dialogue, click the X next to the tag in the list.

When should I tag rooms?
For rooms, when you tag is up to you. We recommend tagging early still, but you may build a room and tag it social and later decide it actually falls under breakout, for example. It's a little easier to re-tag rooms than elements across a workspace.
Especially if you know you'll be using room tags elsewhere in the space (such as in one of the use cases below), make sure you tag the room early.
How do I use Room Tags in a workspace?
There are almost endless ways you can use element tags throughout your workspace. Below are some common uses that may inspire you to do other things!
- Dropdown Menus
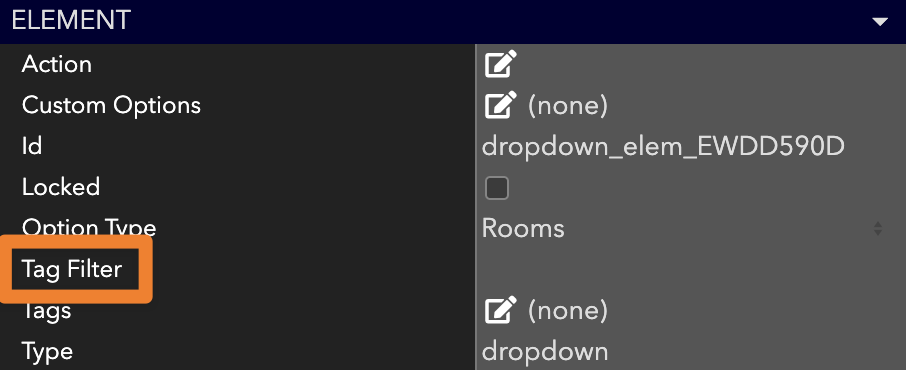
Using the Tag Filter setting under the Element category, you can restrict the options the dropdown shows. Click into the text box next to the property to input the tag you want to use. While the image below shows the Room option, this works for other dropdown options as well.
- User Counts/Lists
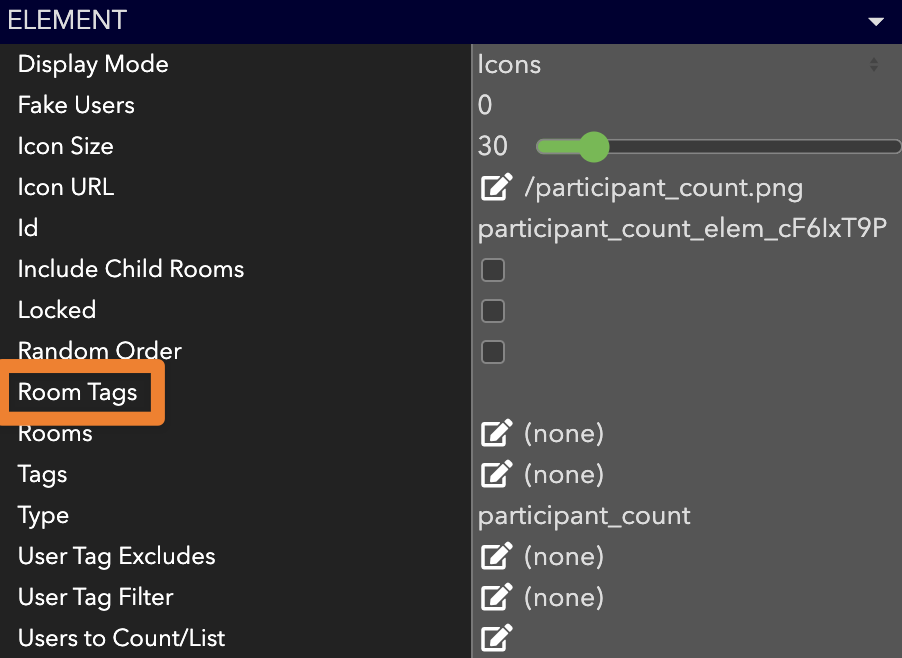
User Count/List's gives you the ability to count or show users in specific spaces, and you can use user and room tags to have more granular control over what users and rooms are counted. Use the Room Tags property to control which rooms are counted without tagging them individually.
- Control settings across multiple rooms
Whether you are trying to hide rooms from the room list, control music playing, change the background, or lock or unlock doors, you can use rooms tags and the action builder to control multiple rooms at once.
Using the action builder, select Tagged Rooms. You can then use the action builder as you normally would for any other Action Button to affect multiple rooms at once.

Updated almost 4 years ago
Whew, that was a lot! Curious what else you can do with tags, or just need someone to help you process all of that? Check out some of our demo workspaces, chat with our creators in the discord, or head over to the community forums to ask!
